目录
- 安装 master
- 安装 slave
- 设置 master 与 slave 的通信方式
- 添加 slave 配置
- 在 salve 上安装 jre
- 安装并配置 Jenkins salve
Jenkins 是一个可扩展的持续集成引擎。主要用于持续、自动地构建、测试软件项目。本文介绍在 windows 平台上安装 Jenkins master 和 slave。
安装 master
请从 Jenkins 的官网下载安装包,直接运行,一路 “next” 就可以了。安装包执行完成后会启动你机器上默认的浏览器进行初始化配置和基本插件的安装。
第一步是进行安全性验证:
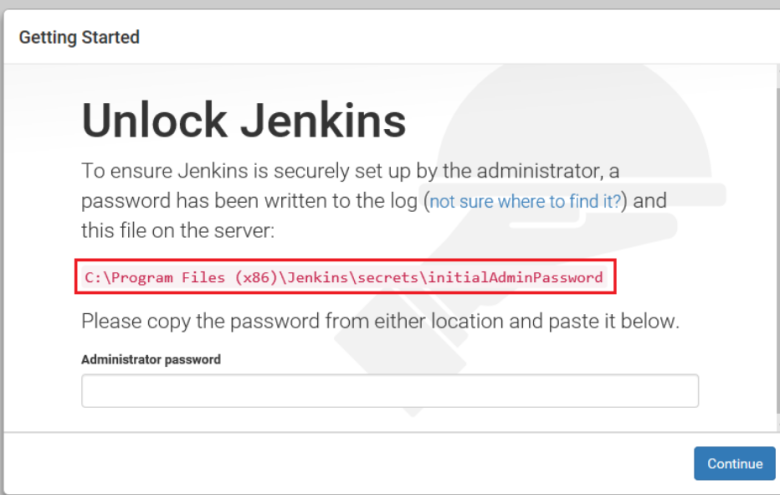
需要把安装目录下一个文件中的密码输入到 UI 中,按照 UI 中的说明填入密码,然后继续。
第二步是选择插件进行安装:
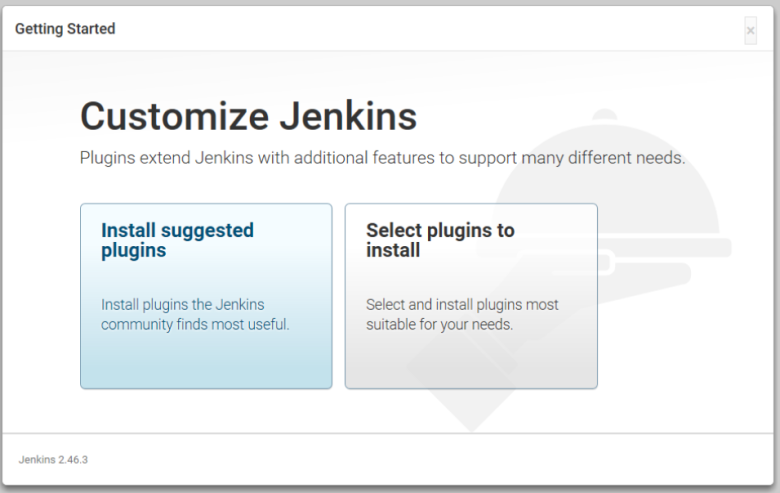
最好安装 Jenkins 建议安装的插件,点击第一个大大的按钮继续。接下来是安装这些插件,这个过程完全是在线安装,一般情况下会比较慢。
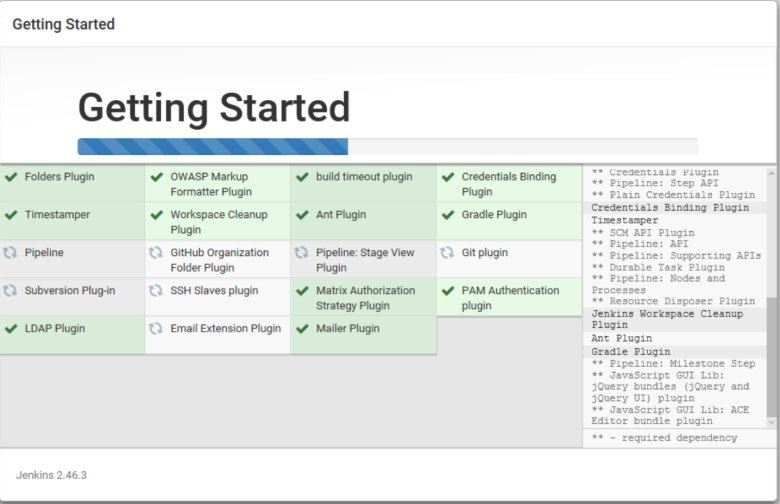
插件安装完成后进入第三步:
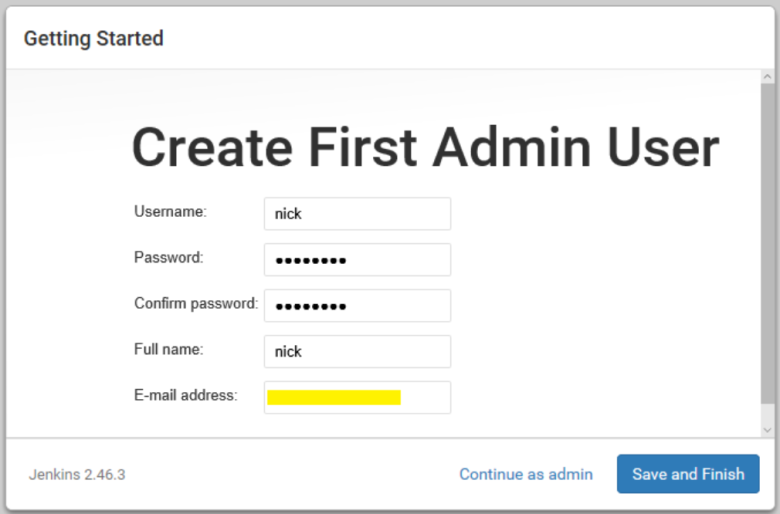
设置管理员账号,点击 “Save and Finish”。下个界面会提示 Jenkins 已经完成安装,点击 “Start using Jenkins” 进入 Jenkins 的主界面:
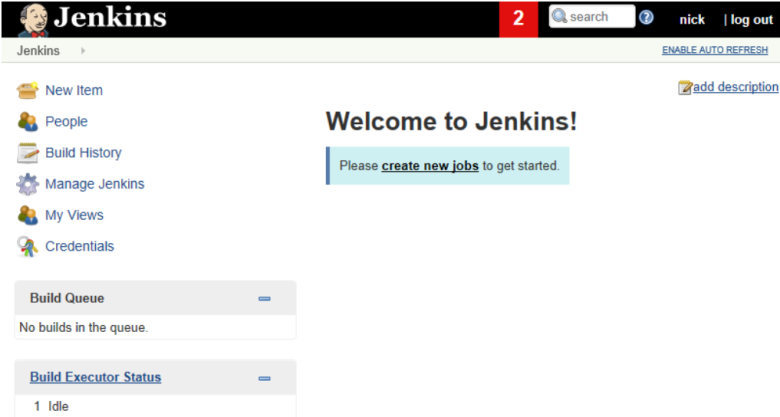
OK,master 已经安装完成了!
安装 slave
设置 master 与 slave 的通信方式
进入 Jenkins 的全局安全配置界面(Jenkins->Manage Jenkins->Configure Global Security):

选择 “Enable security”,TCP 的端口号选择随机就可以了。
添加 slave 配置
在 Jenkins 上添加 slave 节点的配置(Jenkins->Manage Jenkins->Manage Nodes):

点击 “New Node”:
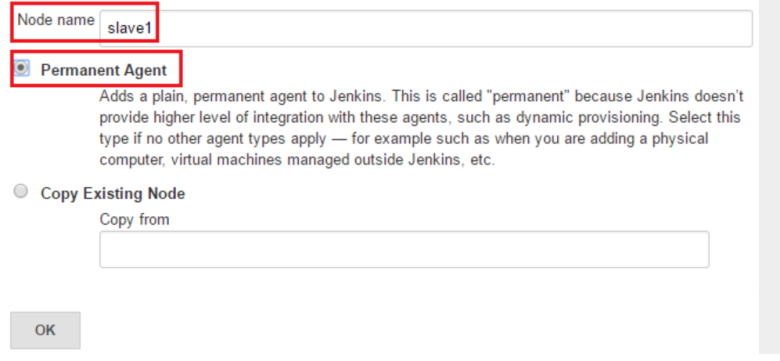
输入 slave 节点的名称,并选择 “Permanent Agent” 类型,点击 OK 后进入详细信息的设置界面:
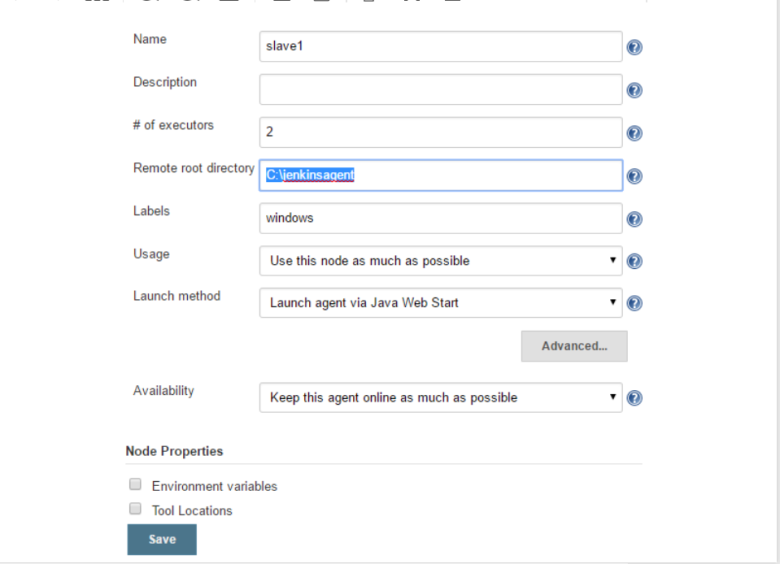
简单解释一下上面的配置:
Name:该节点的名字。
Description:说明这个节点的用途。
# of executors:允许在这个节点上并发执行任务的数量,一般设置为 cpu 支持的线程数。
Remote root directory:节点上 Jenkins 的根目录。
Labels:分配给这个节点的标签。
Usage:节点的使用策略。
Launch method:启动 agent 的方式,对于 windows 平台,最好选择 “Launch agent via Java Web Start”。
Availability:Jenkins 控制 slave 是否在线的策略。
保存上面的配置,接下来去 salve 上完成安装和配置。
在 salve 上安装 jre
到 Oracle 官网下载最新的 jre 安装包并在 salve 上安装。
安装并配置 Jenkins salve
下面的操作默认都是在 salve 上进行。
首先在 C 盘根目录下创建目录 jenkinsagent。
接着在浏览器中登录前面创建的 Jenkins,并打开刚才创建的节点:
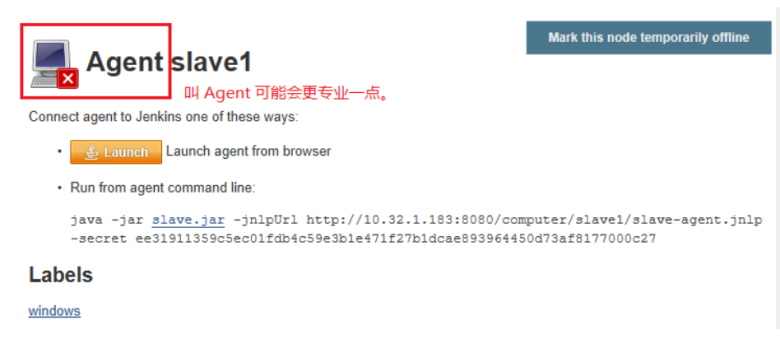
点击上图中的 “Launch” 按钮,在浏览器的提示下把一个叫 slave-agent.jnlp 的文件保存到本地。
然后以管理员的权限启动命令行, 执行 slave-agent.jnlp 文件,最终会启动一个小程序:

上图中的 “Connected” 说明 slave 和 master 已经建立了连接。但是我们希望把 slave-agent 程序安装成 Windows Service,这样以后 slave 机器重新启动后就能自动连接 master。在上面的 File 菜单中点击 “Install as a service”,完成安装后上面的小程序会自动关闭,一个 Windows Service 被创建:

好了,刷新一下 salve 的页面:

至此,一个 master 与一个 slave 组成的 Jenkins 系统已经搭建起来了。
链接:https://www.cnblogs.com/sparkdev/p/7102622.html
(版权归原作者所有,侵删)

需要完整资料的看这里
扫码回复666 根据提示 添加小助理领取

本文链接:https://www.yunweipai.com/46131.html