这篇文章我们讲解的是如何自定义Source。
1. Source的简单介绍
Source是负责接收数据到Flume Agent的组件。Source组件可以处理各种类型、各种格式的日志数据,包括avro、thrift、exec、jms、spooling directory、netcat、sequence generator、syslog、http、legacy。官方提供的source类型已经很多,但是有时候并不能满足实际开发当中的需求,此时我们就需要根据实际需求自定义某些source。
官方也提供了自定义source的接口:
https://flume.apache.org/FlumeDeveloperGuide.html#source
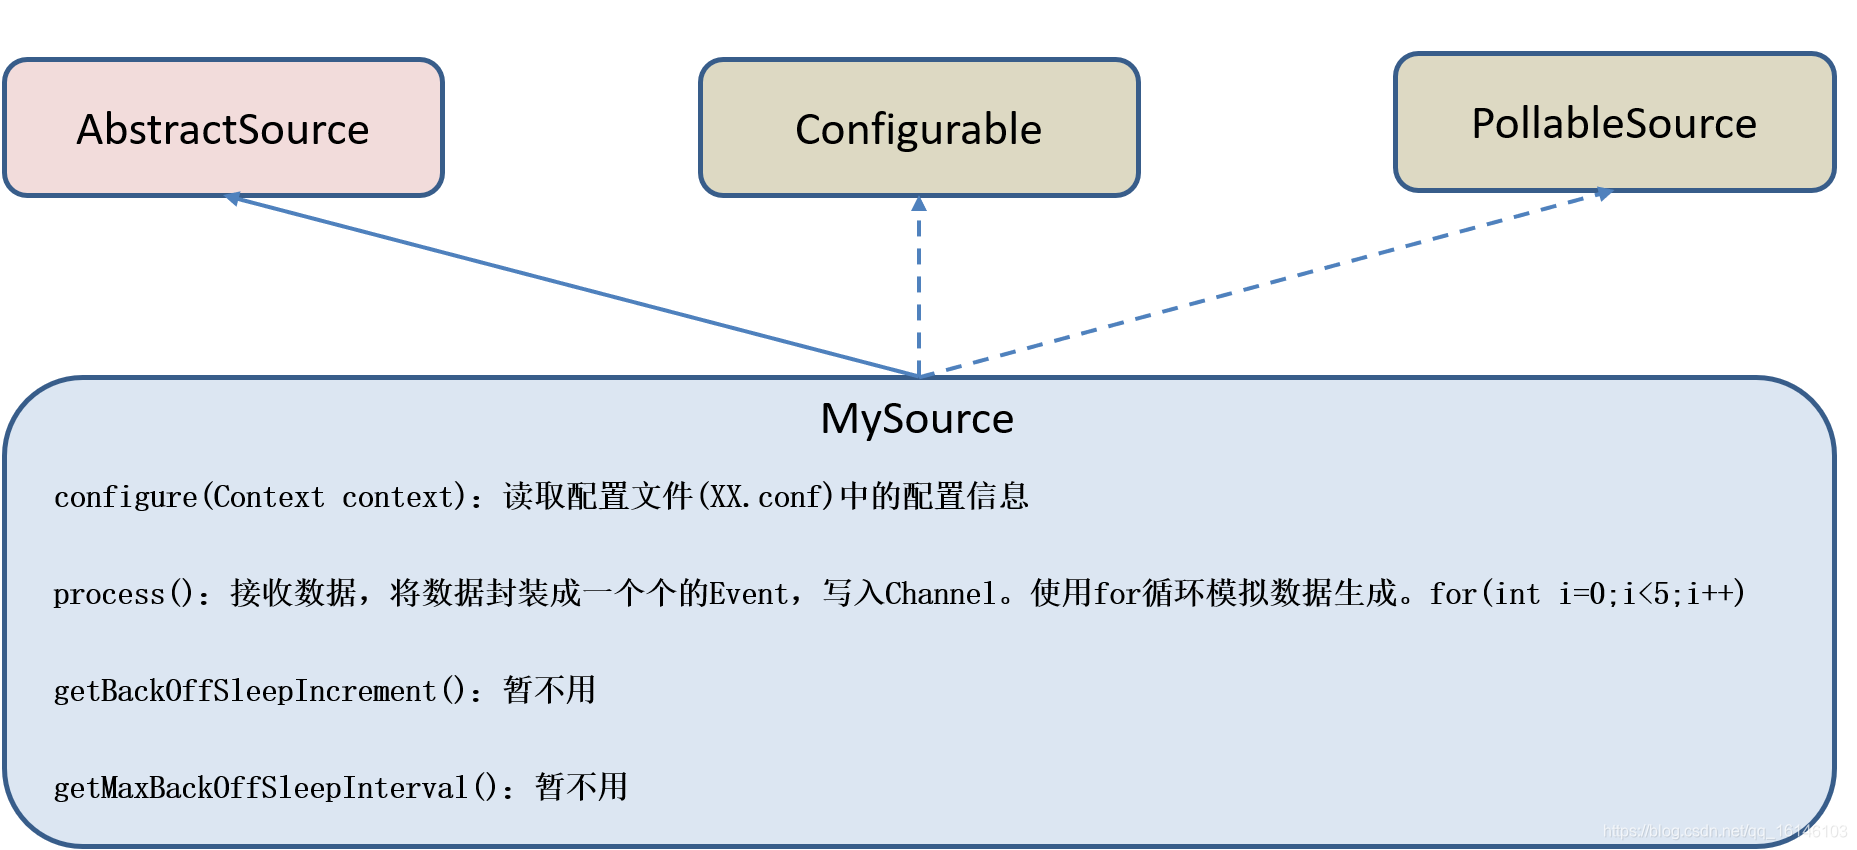
根据官方说明自定义MySource需要继承AbstractSource类并实现Configurable和PollableSource接口。
实现相应方法:
getBackOffSleepIncrement()//暂不用
getMaxBackOffSleepInterval()//暂不用
configure(Context context)//初始化context(读取配置文件内容)
- 1
- 2
- 3
process()//获取数据封装成event并写入channel,这个方法将被循环调用。
使用场景:读取MySQL数据或者其他文件系统。
- 1
- 2
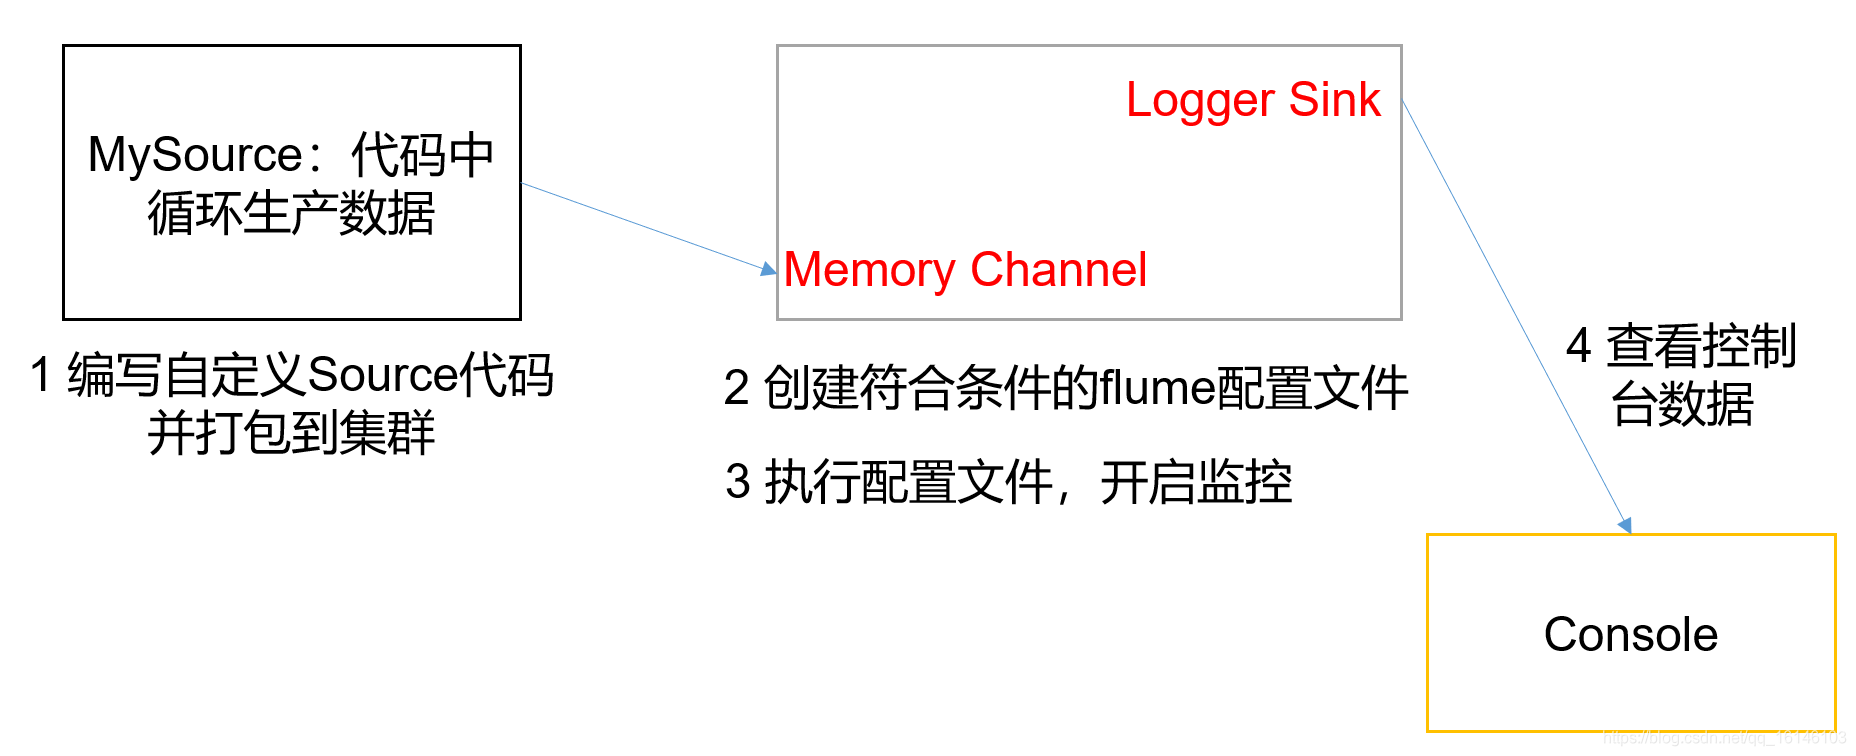
2. 需求/分析
使用flume接收数据,并给每条数据添加前缀,输出到控制台。前缀可从flume配置文件中配置。
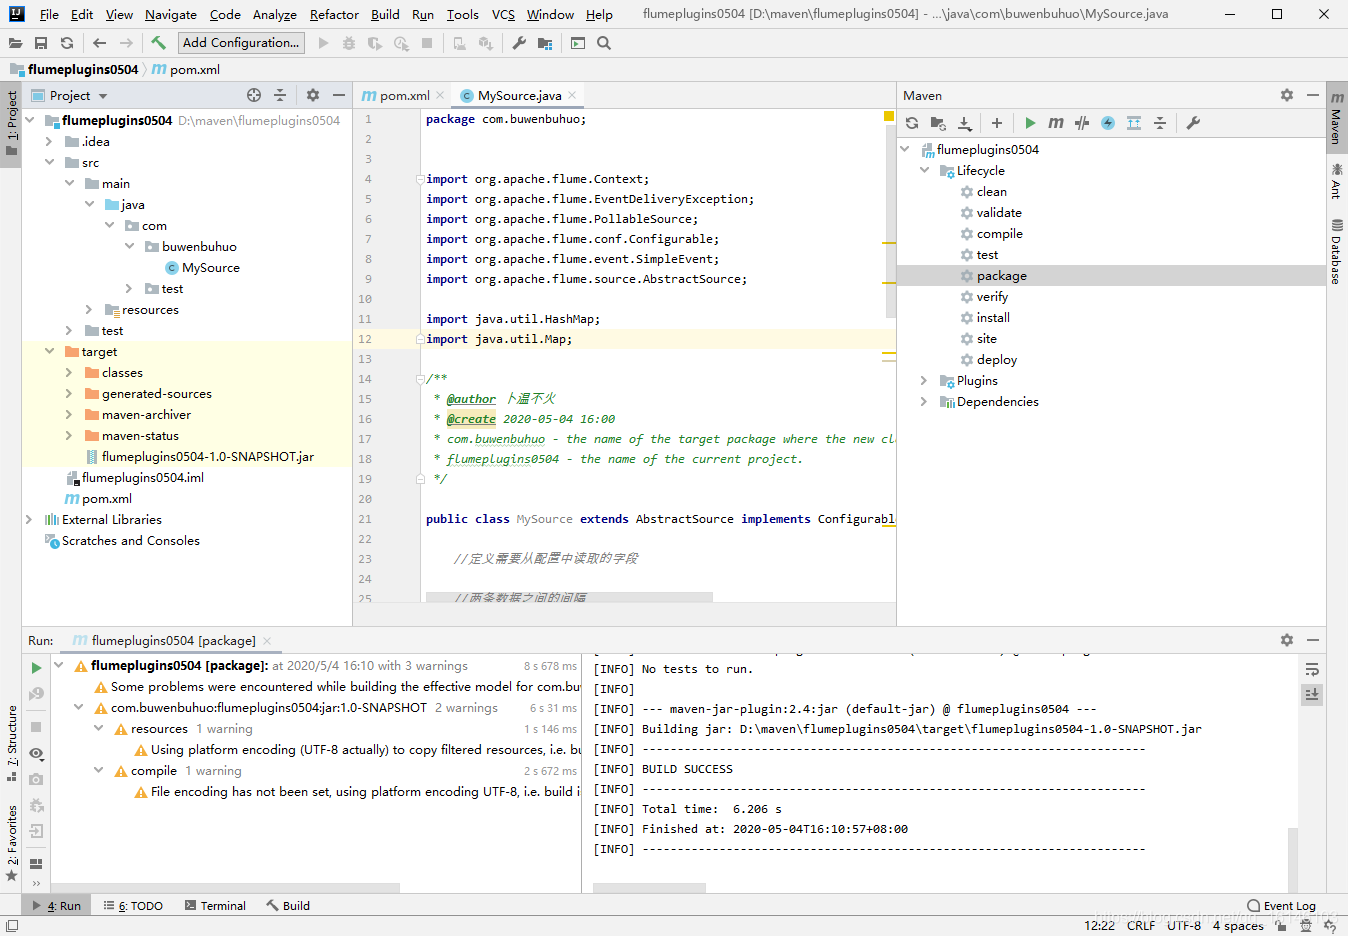
3. 编码
3.1 导入pom依赖
<build> <plugins> <plugin> <groupId>org.apache.maven.plugins</groupId> <artifactId>maven-compiler-plugin</artifactId> <configuration> <source>8</source> <target>8</target> </configuration> </plugin> </plugins> </build> <dependencies> <dependency> <groupId>org.apache.flume</groupId> <artifactId>flume-ng-core</artifactId> <version>1.7.0</version> </dependency> </dependencies>
- 1
- 2
- 3
- 4
- 5
- 6
- 7
- 8
- 9
- 10
- 11
- 12
- 13
- 14
- 15
- 16
- 17
- 18
- 19
- 20
- 21
- 22
3.2 编写代码
package com.buwenbuhuo;


import org.apache.flume.Context;
import org.apache.flume.EventDeliveryException;
import org.apache.flume.PollableSource;
import org.apache.flume.conf.Configurable;
import org.apache.flume.event.SimpleEvent;
import org.apache.flume.source.AbstractSource;

import java.util.HashMap;
import java.util.Map;

/**
 * @author 卜温不火
 * @create 2020-05-04 16:00
 * com.buwenbuhuo - the name of the target package where the new class or interface will be created.
 * flumeplugins0504 - the name of the current project.
 */

public class MySource extends AbstractSource implements Configurable, PollableSource { //定义需要从配置中读取的字段 //两条数据之间的间隔 private long delay; private String field; public Status process() throws EventDeliveryException { try { Map<String, String> header = new HashMap<>(); SimpleEvent event = new SimpleEvent(); //拿到数据 for (int i = 0; i < 5; i++) { event.setHeaders(header); event.setBody((field + i).getBytes()); getChannelProcessor().processEvent(event); Thread.sleep(delay); } } catch (Exception e) { return Status.BACKOFF; } return Status.READY; } public long getBackOffSleepIncrement() { return 0; } public long getMaxBackOffSleepInterval() { return 0; } public void configure(Context context) { delay = context.getLong("delay", 2000l); field = context.getString("field", "buwenbuhuo"); }
}
- 1
- 2
- 3
- 4
- 5
- 6
- 7
- 8
- 9
- 10
- 11
- 12
- 13
- 14
- 15
- 16
- 17
- 18
- 19
- 20
- 21
- 22
- 23
- 24
- 25
- 26
- 27
- 28
- 29
- 30
- 31
- 32
- 33
- 34
- 35
- 36
- 37
- 38
- 39
- 40
- 41
- 42
- 43
- 44
- 45
- 46
- 47
- 48
- 49
- 50
- 51
- 52
- 53
- 54
- 55
- 56
- 57
- 58
- 59
4. 测试
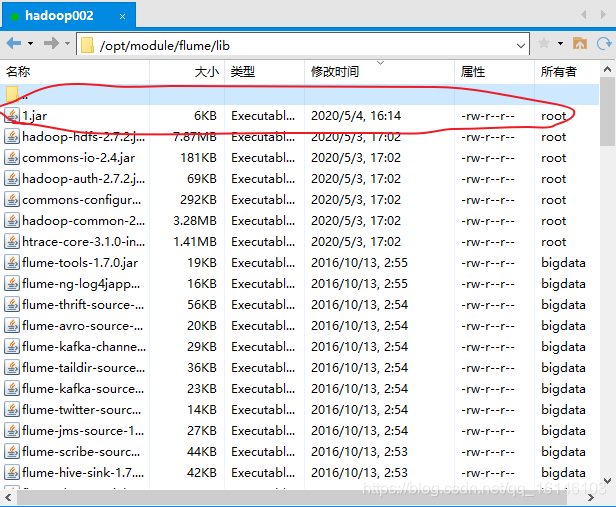
- 1 打包上传
将写好的代码打包,并放到flume的lib目录(/opt/module/flume/lib)下。
- 2. 配置文件
[bigdata@hadoop002 job]$ cp flume-netcat-logger.conf flume-mysource-logger.conf
[bigdata@hadoop002 job]$ vim flume-mysource-logger.conf # Name the components on this agent
a1.sources = r1
a1.sinks = k1
a1.channels = c1

# Describe/configure the source
a1.sources.r1.type = com.buwenbuhuo.MySource
a1.sources.r1.delay = 2000
a1.sources.r1.field = buwenbuhuo

# Describe the sink
a1.sinks.k1.type = logger

# Use a channel which buffers events in memory
a1.channels.c1.type = memory
a1.channels.c1.capacity = 1000
a1.channels.c1.transactionCapacity = 100

# Bind the source and sink to the channel
a1.sources.r1.channels = c1
a1.sinks.k1.channel = c1
- 1
- 2
- 3
- 4
- 5
- 6
- 7
- 8
- 9
- 10
- 11
- 12
- 13
- 14
- 15
- 16
- 17
- 18
- 19
- 20
- 21
- 22
- 23
- 24
- 25
- 26
- 3. 开启任务
[bigdata@hadoop002 flume]$ [bigdata@hadoop002 flume]$ bin/flume-ng agent -c conf/ -f job/flume-mysource-logger.conf -n a1 -Dflume.root.logger=INFO,console
- 1
- 2
- 4. 结果展示
展示的结果如预期一样,两秒一次

本次的分享就到这里了,

看 完 就 赞 , 养 成 习 惯 ! ! ! \color{#FF0000}{看完就赞,养成习惯!!!} 看完就赞,养成习惯!!!^ _ ^ ❤️ ❤️ ❤️
码字不易,大家的支持就是我坚持下去的动力。点赞后不要忘了关注我哦!
文章来源: buwenbuhuo.blog.csdn.net,作者:不温卜火,版权归原作者所有,如需转载,请联系作者。
原文链接:buwenbuhuo.blog.csdn.net/article/details/105916648