翻译:houjingyi233
预估稿费:200RMB
投稿方式:发送邮件至linwei#360.cn,或登陆网页版在线投稿
传送门
前言
在我的有关frida的第二篇博客发布不久之后,@muellerberndt决定发布另一个OWASP Android crackme,我很想知道是否可以再次用frida解决。如果你想跟着我做一遍,你需要下面的工具。
Android SDK和模拟器(我使用的是Android 7.1 x64镜像)
radare2(或您选择的其他一些反汇编工具)
如果您需要知道如何安装Frida,请查看Frida文档。对于Frida的使用,您还可以检查本教程的第I部分。我假设你在继续之前拥有上面的工具,并且基本熟悉Frida。另外,确保Frida可以连接到您的设备/模拟器(例如使用frida-ps -U)。我将向您展示各种方法来克服具体的问题,如果您只是寻找一个快速的解决方案,请在本教程末尾查看Frida脚本。注意:如果使用frida遇到了
Error: access violation accessing 0xebad8082或者类似的错误,从模拟器中擦除用户数据,重新启动并重新安装该apk可能有助于解决问题。做好可能需要多次尝试的准备。该应用程序可能会崩溃,模拟器可能会重新启动,一切可能会搞砸,但是最终我们会成功的。
第一次尝试
和UnCrackable1 一样,当在仿真器中运行它时,它会检测到它是在root设备上运行的。
我们可以尝试像前面一样hook OnClickListener。但首先我们来看看我们是否可以连接frida开始tampering。
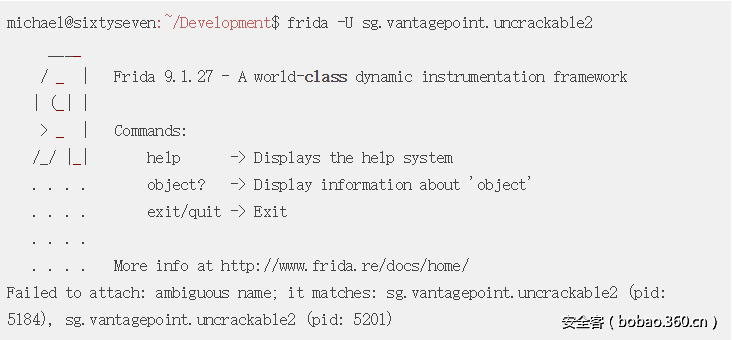
有两个名称相同的进程,我们可以通过frida-ps -U验证一下。
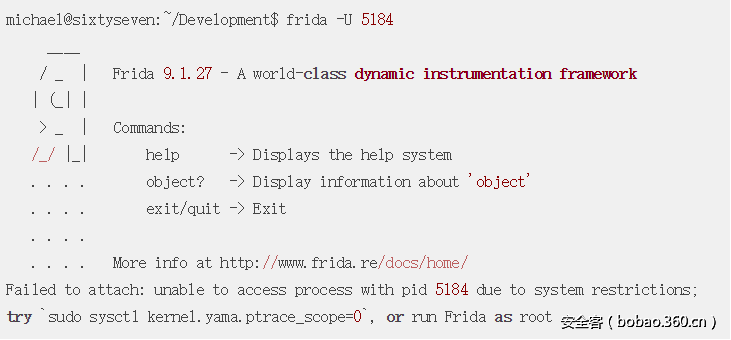
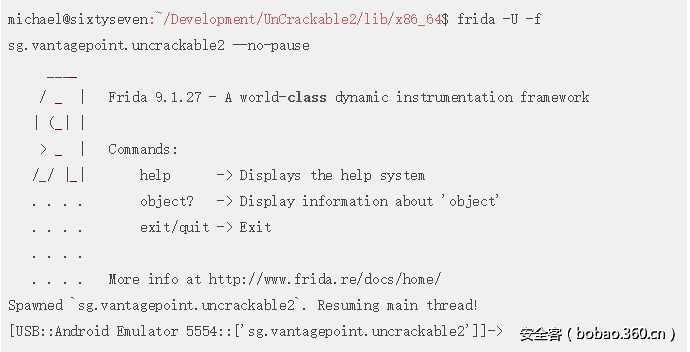
我们来试试将frida注入父进程。
这里发生了什么?我们来看看应用程序吧。解压缩apk并反编译classes.dex。
package sg.vantagepoint.uncrackable2;

import android.app.AlertDialog;
import android.content.Context;
import android.content.DialogInterface;
import android.os.AsyncTask;
import android.os.Bundle;
import android.support.v7.app.c;
import android.text.Editable;
import android.view.View;
import android.widget.EditText;
import sg.vantagepoint.a.a;
import sg.vantagepoint.a.b;
import sg.vantagepoint.uncrackable2.CodeCheck;
import sg.vantagepoint.uncrackable2.MainActivity;

public class MainActivity
extends c {
    private CodeCheck m;

    static {
        System.loadLibrary("foo"); //[1]
    }

    private void a(String string) {
        AlertDialog Dialog = new AlertDialog.Builder((Context)this).create();
        Dialog.setTitle((CharSequence)string);
        Dialog.setMessage((CharSequence)"This in unacceptable. The app is now going to exit.");
        Dialog.setButton(-3, (CharSequence)"OK", (DialogInterface.OnClickListener)new /* Unavailable Anonymous Inner Class!! */);
        Dialog.setCancelable(false);
        Dialog.show();
    }

    static /* synthetic */ void a(MainActivity mainActivity, String string) {
        mainActivity.a(string);
    }

    private native void init(); //[2]

    protected void onCreate(Bundle bundle) {
        this.init(); //[3]
        if (b.a() || b.b() || b.c()) {
            this.a("Root detected!");
        }
        if (a.a((Context)this.getApplicationContext())) {
            this.a("App is debuggable!");
        }
        new /* Unavailable Anonymous Inner Class!! */.execute((Object[])new Void[]{null, null, null});
        this.m = new CodeCheck();
        super.onCreate(bundle);
        this.setContentView(2130968603);
    }

    public void verify(View view) {
        String string = ((EditText)this.findViewById(2131427422)).getText().toString();
        AlertDialog Dialog = new AlertDialog.Builder((Context)this).create();
        if (this.m.a(string)) {
            Dialog.setTitle((CharSequence)"Success!");
            Dialog.setMessage((CharSequence)"This is the correct secret.");
        } else {
            Dialog.setTitle((CharSequence)"Nope...");
            Dialog.setMessage((CharSequence)"That's not it. Try again.");
        }
        Dialog.setButton(-3, (CharSequence)"OK", (DialogInterface.OnClickListener)new /* Unavailable Anonymous Inner Class!! */);
        Dialog.show();
    }
}
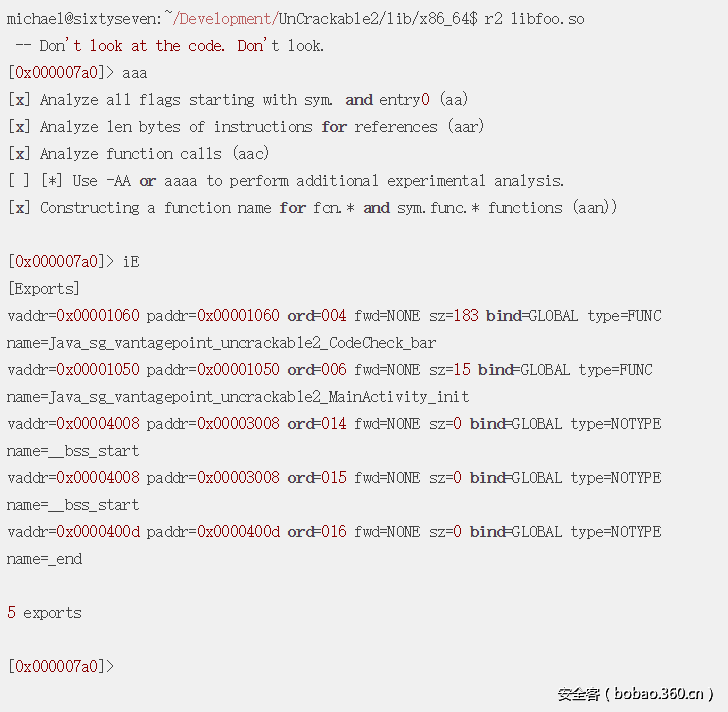
我们注意到程序加载了foo库([1])。在onCreate方法的第一行程序调用了this.init()([3]),它被声明成一个native方法([2]),所以它可能是foo的一部分。现在我们来看看foo库。使用radare2打开它并分析,列出它的导出函数。
该库导出两个有趣的功能:Java_sg_vantagepoint_uncrackable2_MainActivity_init和Java_sg_vantagepoint_uncrackable2_CodeCheck_bar。我们来看看Java_sg_vantagepoint_uncrackable2_MainActivity_init。
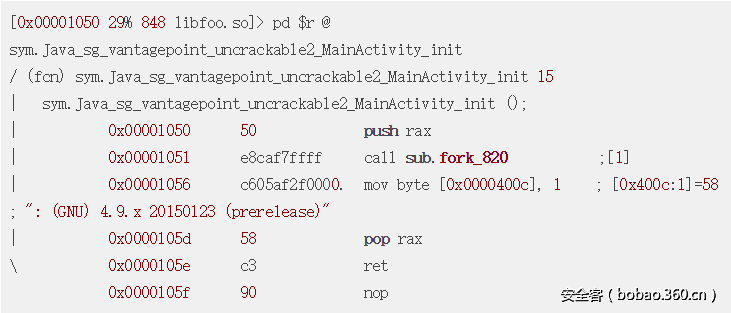
这是一个很短的函数。
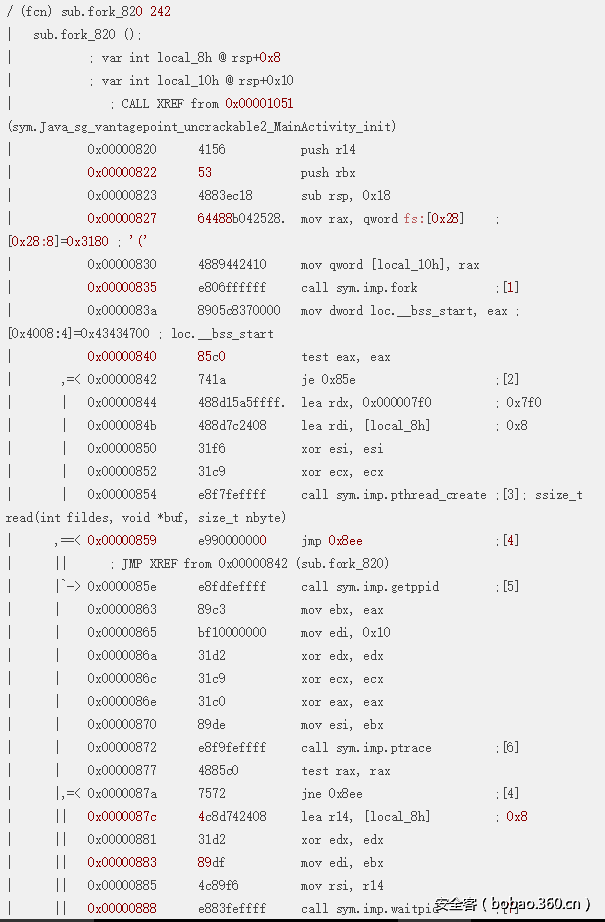
它调用了sub.fork_820,这里面有更多的内容。
这个函数中调用了fork、pthread_create、getppid、ptrace和waitpid等函数。这是一个基本的反调试技术,附加调试进程被阻止,因为已经有其他进程作为调试器连接。
对抗反调试方案一:frida
我们可以让frida为我们生成一个进程而不是将它注入到运行中的进程中。
frida注入到Zygote中,生成我们的进程并且等待输入,这个过程可能比较漫长。
对抗反调试方案二:patch
我们可以通过apktool实现patch。
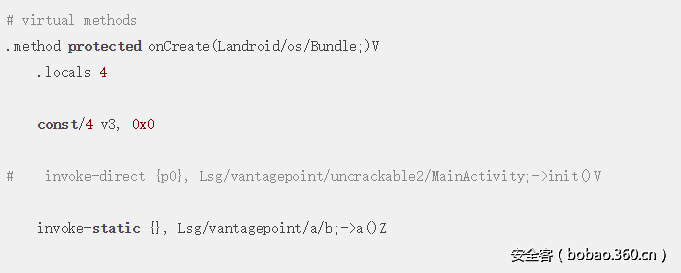
(我通过-r选项跳过了资源提取,因为在回编译apk的时候它可能会导致问题,反正我们这里不需要资源文件。) 看一下smali/sg/vantagepoint/uncrackable2/MainActivity.smali中的smali代码。你可以在第82行找到init的调用并注释掉它。
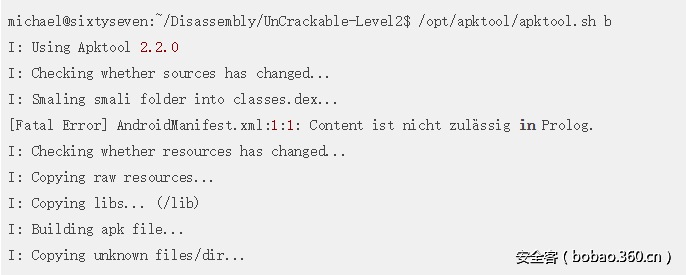
回编译apk(忽略错误)。
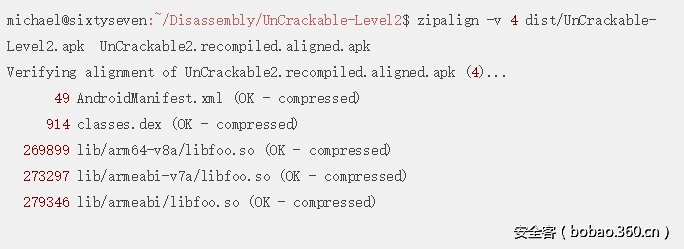
对齐。
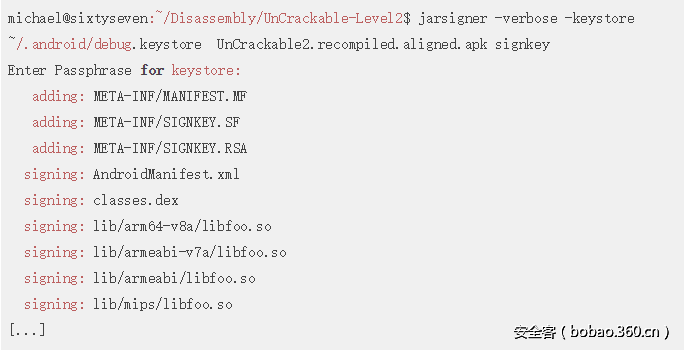
签名(注意:您需要有一个密钥和密钥库)。
你可以在OWASP Mobile Security Testing Guide中找到更详细的描述。卸载原来的apk并安装我们patch过的apk。
重新启动应用程序。运行frida-ps,现在只有一个进程了。
frida进行连接也没什么问题。
这比在frida中增加-r选项更为繁琐,但也更普遍。如前所述,当我们使用patch过的版本(我会告诉你如何解决这个问题,所以不要把它删了)不能轻易地提取需要的字符串。现在我们继续使用原来的apk。确保安装的是原始的apk。
继续尝试
在我们摆脱反调试之后来看看如何继续进行下去。一旦按了OK按钮,应用程序就会在模拟器中运行时进行root检测并退出。我们可以patch掉这个行为,也可以用frida来解决这个问题。由于OnClickListener实现调用,我们可以hook System.exit函数使其不产生作用。
setImmediate(function() {
    console.log("[*] Starting script");
    Java.perform(function() {
        exitClass = Java.use("java.lang.System");
        exitClass.exit.implementation = function() {
            console.log("[*] System.exit called");
        }
        console.log("[*] Hooking calls to System.exit");
    });
});
再次关闭任何正在运行的UnCrackable2实例,并再次在frida的帮助下启动它。
等到app启动,frida在控制台中显示Hooking calls…然后按OK。你应该得到这样的信息。
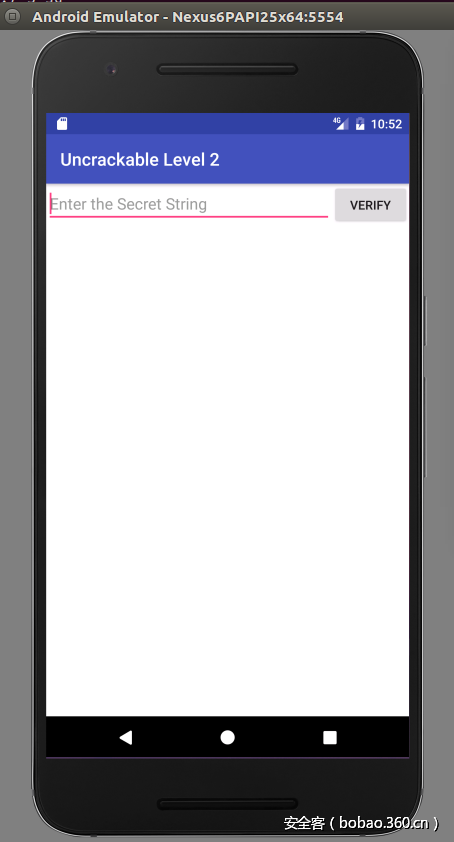
该应用程序不再退出,我们可以输入一个字符串。
但是我们应该在这里输入什么呢?看看MainActivity。
this.m = new CodeCheck();

[...]

//in method: public void verify
if (this.m.a(string)) {
            Dialog.setTitle((CharSequence)"Success!");
            Dialog.setMessage((CharSequence)"This is the correct secret.");
}
这是CodeCheck类。
package sg.vantagepoint.uncrackable2;

public class CodeCheck {
    private native boolean bar(byte[] var1);

    public boolean a(String string) {
        return this.bar(string.getBytes()); //Call to a native function
    }
}
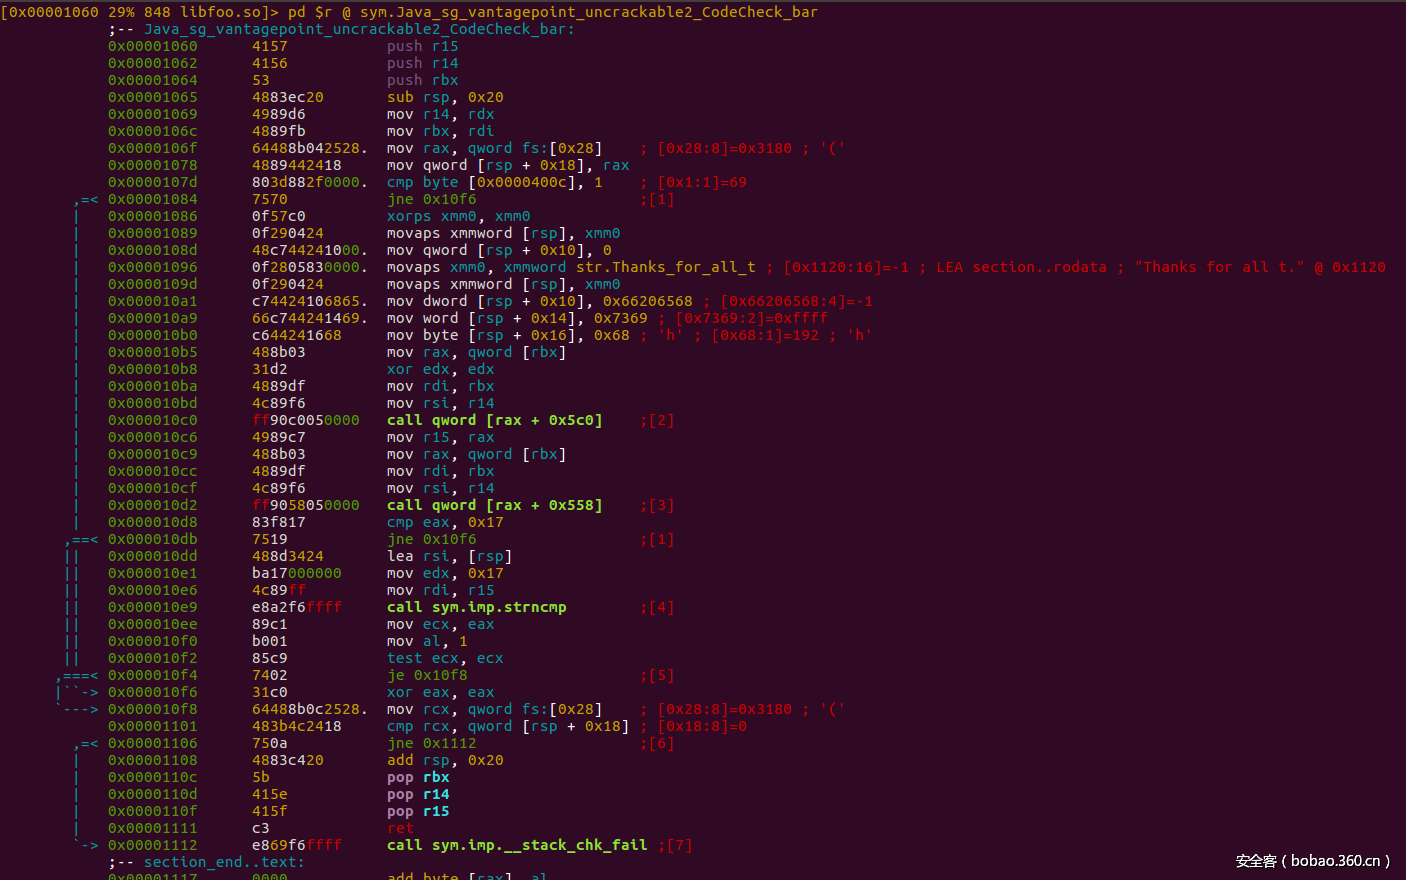
我们注意到输入的字符串被传递给了一个native方法bar。同样,我们在libfoo.so中找到了这个函数。使用radare2寻找这个函数的地址并反汇编它。
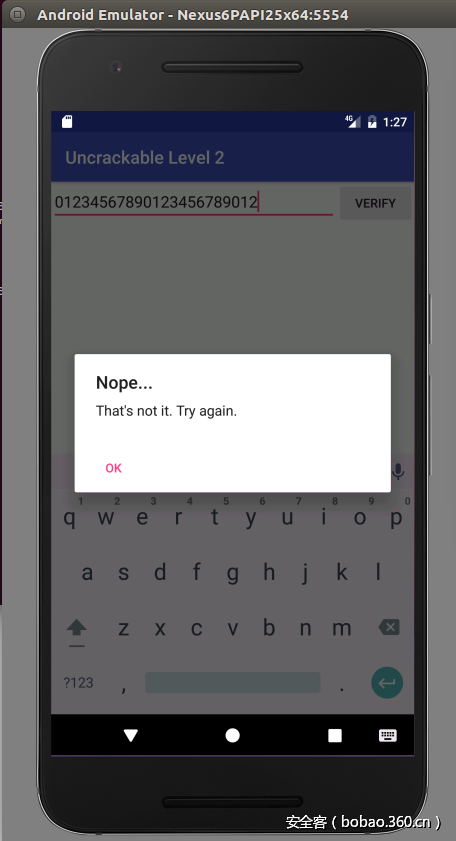
反汇编代码中有一些字符串比较操作,有一个有趣的明文字符串Thanks for all t。输入这个字符串,但是它不起作用。看看地址0x000010d8处的反汇编代码。
这里有一个eax和0x17的比较,如果不相同的话strncmp函数不会被调用。我们同时注意到0x17是strncmp的一个参数。
464位的linux中函数的前6个参数通过寄存器传递,前3个寄存器分别是RDI、 RSI和RDX。所以strncmp函数将比较0x17=23个字符。可以推断,输入的字符串的长度应该是23。让我们尝试hook strncmp,并打印出它的参数。如果你这样做,你会发现strncmp被调用了很多次,我们需要进一步限制输出。
var strncmp = undefined;
imports = Module.enumerateImportsSync("libfoo.so");

for(i = 0; i < imports.length; i++) {
if(imports[i].name == "strncmp") {
        strncmp = imports[i].address;
        break;
    }

}

Interceptor.attach(strncmp, {
            onEnter: function (args) {
               if(args[2].toInt32() == 23 && Memory.readUtf8String(args[0],23) == "01234567890123456789012") {
                    console.log("[*] Secret string at " + args[1] + ": " + Memory.readUtf8String(args[1],23));
               }
            }
});
1.该脚本调用Module.enumerateImportsSync以从libfoo.so中获取有关导入信息的对象数组。我们遍历这个数组,直到找到strncmp并检索其地址。然后我们将interceptor附加到它。
2.Java中的字符串不会以null结束。当strncmp使用frida的Memory.readUtf8String方法访问字符串指针的内存位置并且不提供长度时,frida会期待一个结束符,或者输出一些垃圾内存。它不知道字符串在哪里结束。如果我们指定要读取的字符数量作为第二个参数就解决了这个问题。
3.如果我们没有限制strncmp参数的条件将得到很多输出。限制条件为第三个参数size_t为23。
我怎么如何知道args[0]是我们的输入,args[1]是我们寻找的字符串呢?我不知道,我只是测试,将大量的输出dump到屏幕以找到我的输入。如果你不想跳过这部分,可以删除上面脚本中的if语句,并使用frida的hexdump输出。
buf = Memory.readByteArray(args[0],32);
console.log(hexdump(buf, {
     offset: 0,
     length: 32,
     header: true,
     ansi: true
}));

buf = Memory.readByteArray(args[1],32);
console.log(hexdump(buf, {
    offset: 0,
    length: 32,
    header: true,
   ansi: true
}));
以下是完整版的脚本,可以更好地输出参数。
setImmediate(function() {
    Java.perform(function() {
        console.log("[*] Hooking calls to System.exit");
        exitClass = Java.use("java.lang.System");
        exitClass.exit.implementation = function() {
            console.log("[*] System.exit called");
        }

        var strncmp = undefined;
        imports = Module.enumerateImportsSync("libfoo.so");

        for(i = 0; i < imports.length; i++) {
        if(imports[i].name == "strncmp") {
                strncmp = imports[i].address;
                break;
            }

        }

        Interceptor.attach(strncmp, {
            onEnter: function (args) {
               if(args[2].toInt32() == 23 && Memory.readUtf8String(args[0],23) == "01234567890123456789012") {
                    console.log("[*] Secret string at " + args[1] + ": " + Memory.readUtf8String(args[1],23));
                }
             },
        });
        console.log("[*] Intercepting strncmp");
    });
});
现在启动frida加载这个脚本。
输入字符串并且按下VERIFY。
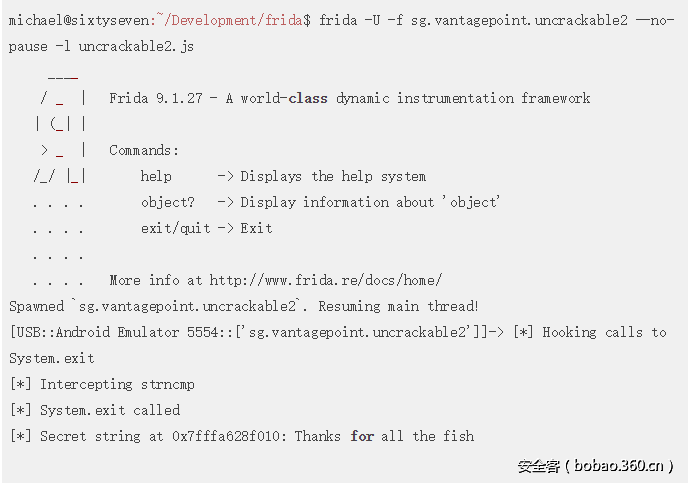
在控制台会看到下面的结果。
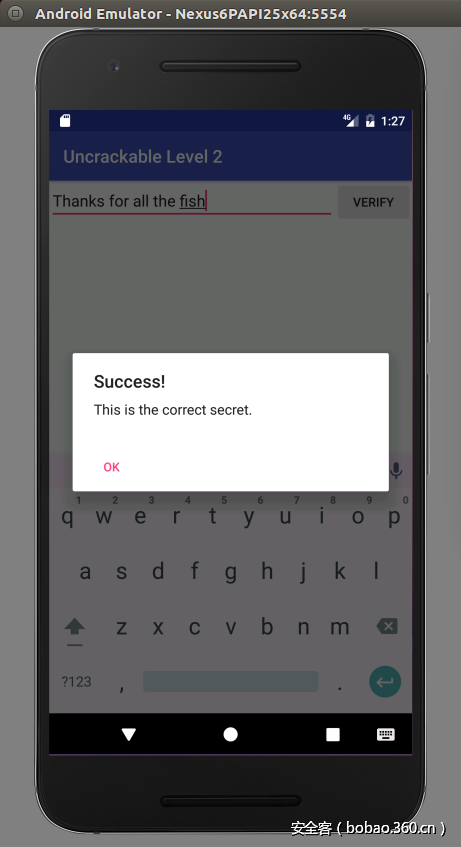
我们找到了正确的字符串Thanks for all the fish。
使用patch过的apk
当我们使用patch过的apk时可能不会得到需要的字符串。libfoo库中的init函数包含一些初始化逻辑,阻止应用程序根据我们的输入检查或解码字符串。如果我们再看看init函数的反汇编代码会看到有趣的一行。
相同的变量会在libfoo库的bar函数中检查,如果没有设置,那么代码会跳过strncmp。
它可能是一个boolean类型的变量,当init函数运行时被设置。如果我们想要让patch过的apk调用strncmp函数就需要设置这个变量或者至少阻止它跳过 strncmp的调用。我们可以再patch一次,但是既然这是frida教程,我们可以使用它动态改变内存。下面是可供patch过的apk使用的完整的脚本。
setImmediate(function() {
    Java.perform(function() {
        console.log("[*] Hooking calls to System.exit");
        exitClass = Java.use("java.lang.System");
        exitClass.exit.implementation = function() {
            console.log("[*] System.exit called");
        }

        var strncmp = undefined;
        imports = Module.enumerateImportsSync("libfoo.so");

        for(i = 0; i < imports.length; i++) {
            if(imports[i].name == "strncmp") {
                strncmp = imports[i].address;
                break;
            }

        }

        //Get base address of library
        var libfoo = Module.findBaseAddress("libfoo.so");

        //Calculate address of variable
        var initialized = libfoo.add(ptr("0x400C"));

        //Write 1 to the variable
        Memory.writeInt(initialized,1);

        Interceptor.attach(strncmp, {
            onEnter: function (args) {
               if(args[2].toInt32() == 23 && Memory.readUtf8String(args[0],23) == "01234567890123456789012") {
                    console.log("[*] Secret string at " + args[1] + ": " + Memory.readUtf8String(args[1],23));
                }
             },
        });
        console.log("[*] Intercepting strncmp");
    });
});

