0x0 前言
查阅了网上的Shiro权限绕过的文章,感觉讲得比较乱也比较杂,利用和成因点都没有很明朗的时间线,利用方式更是各种各样,导致没办法很好地学习到多次Bypass patch的精髓,故笔者对此学习和研究了一番,希望与大家一起分享我的过程。
0x1 环境搭建
为了方便调试shiro包,这里采用IDEA搭建基础Shiro环境
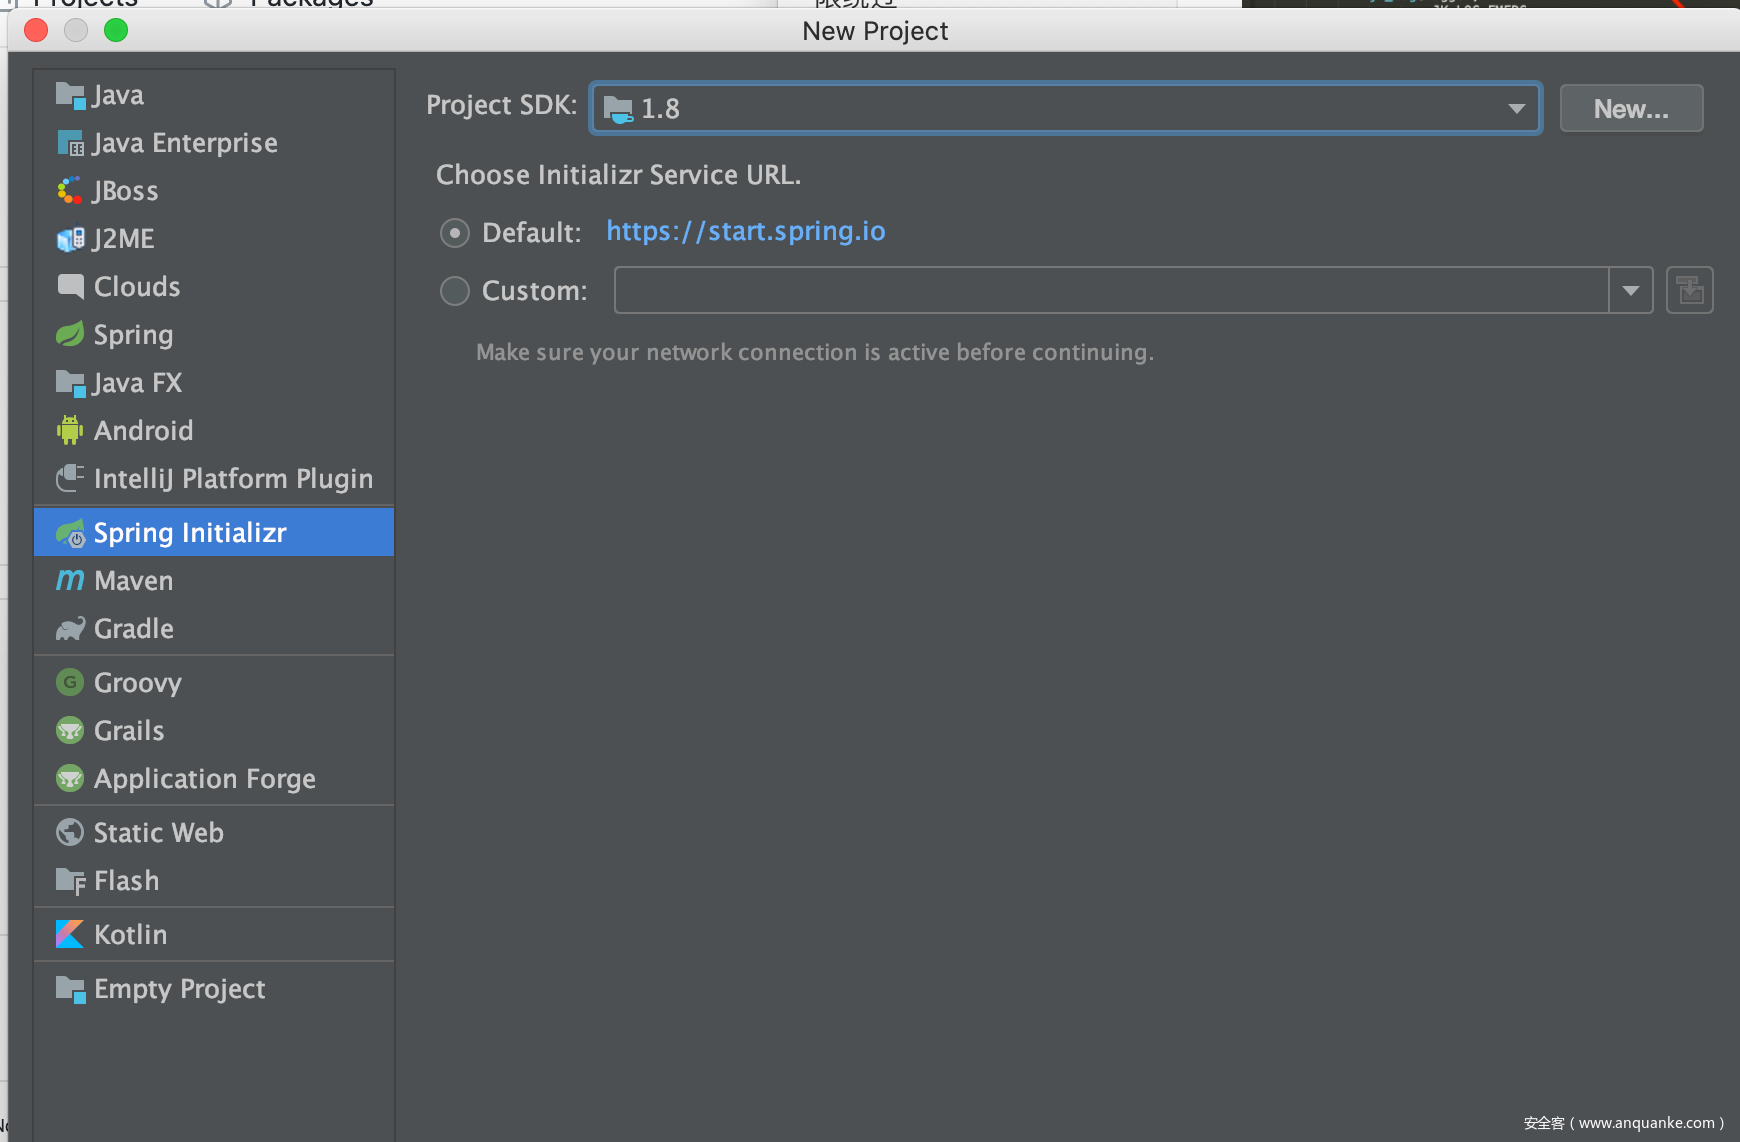
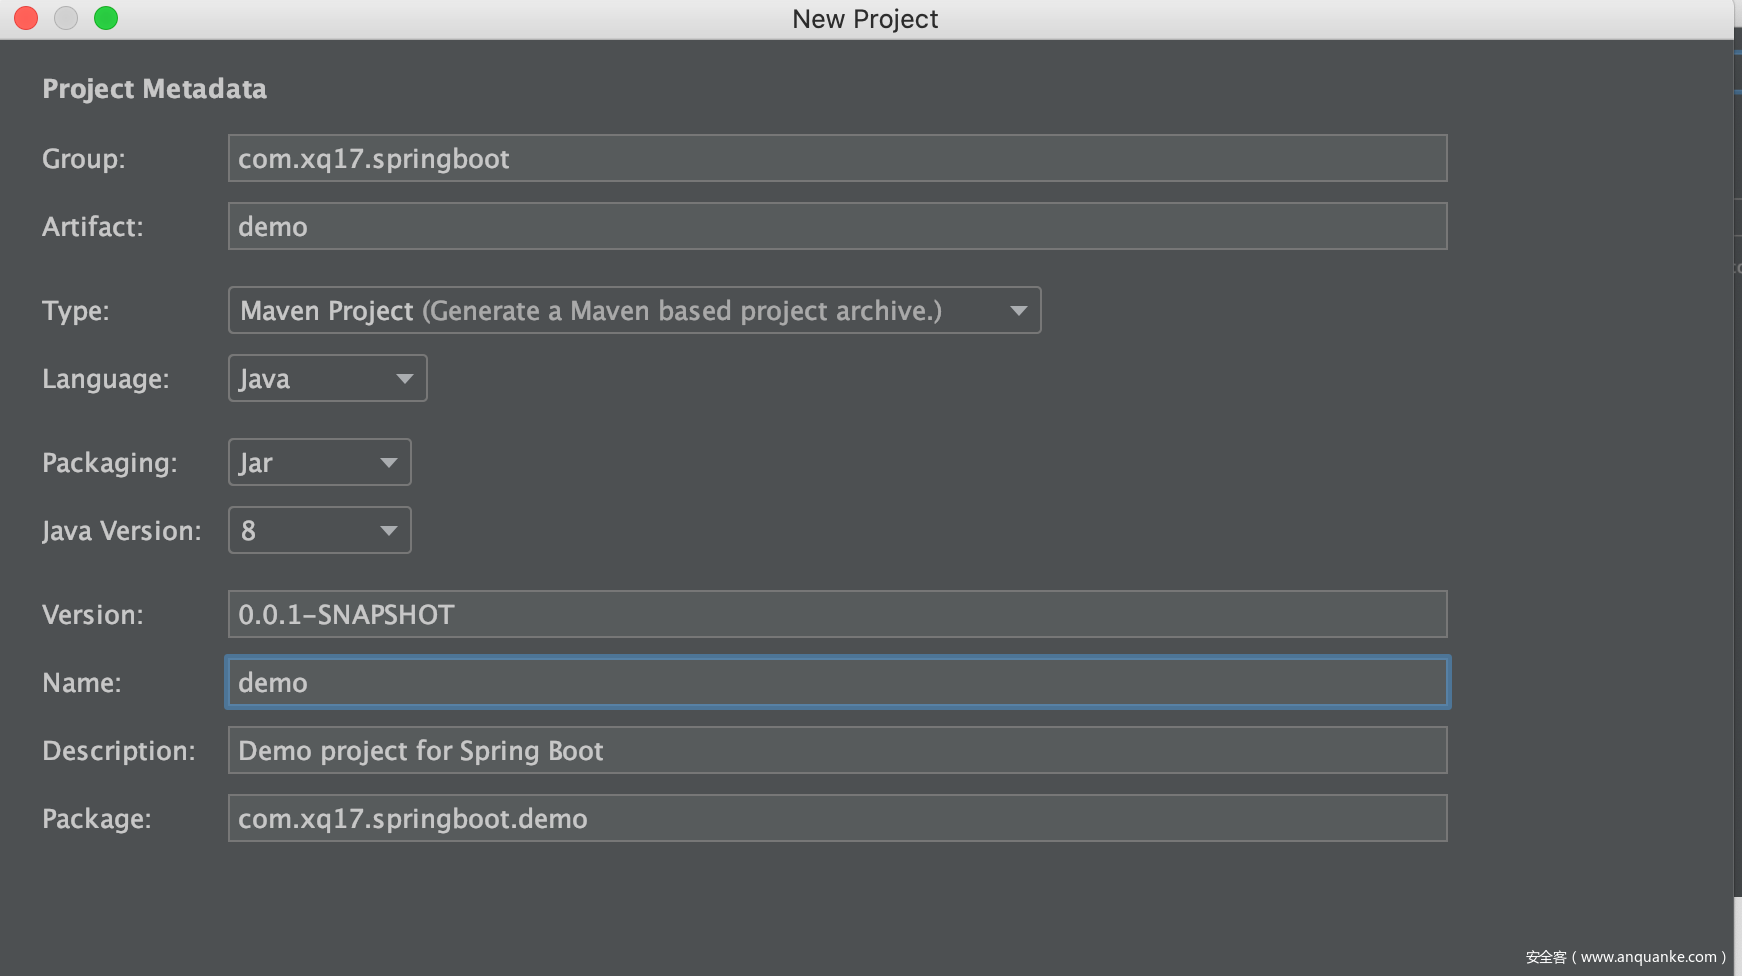
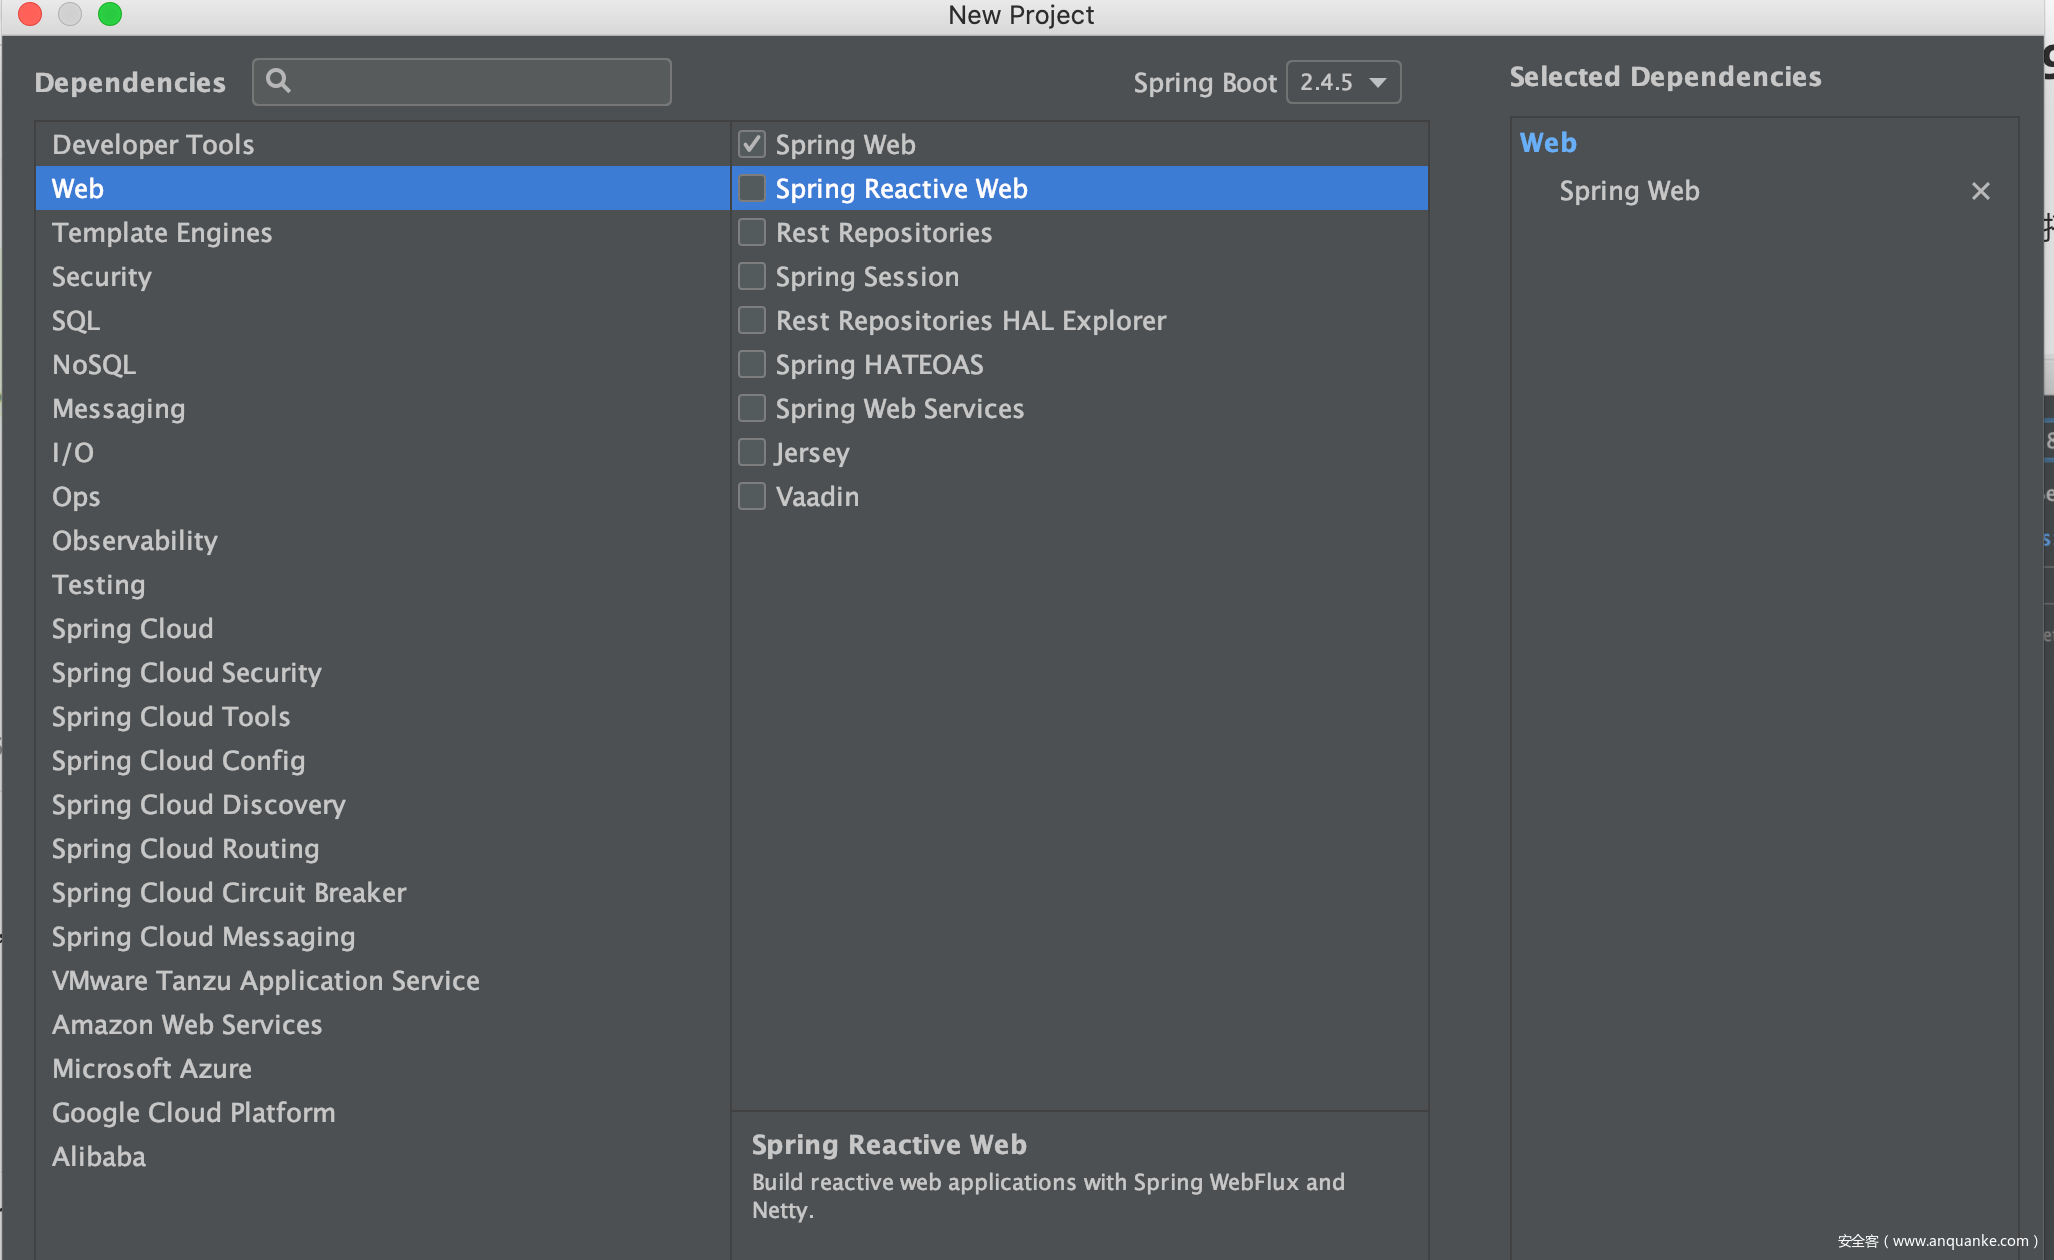
先创建一个spring-boot的基础环境,
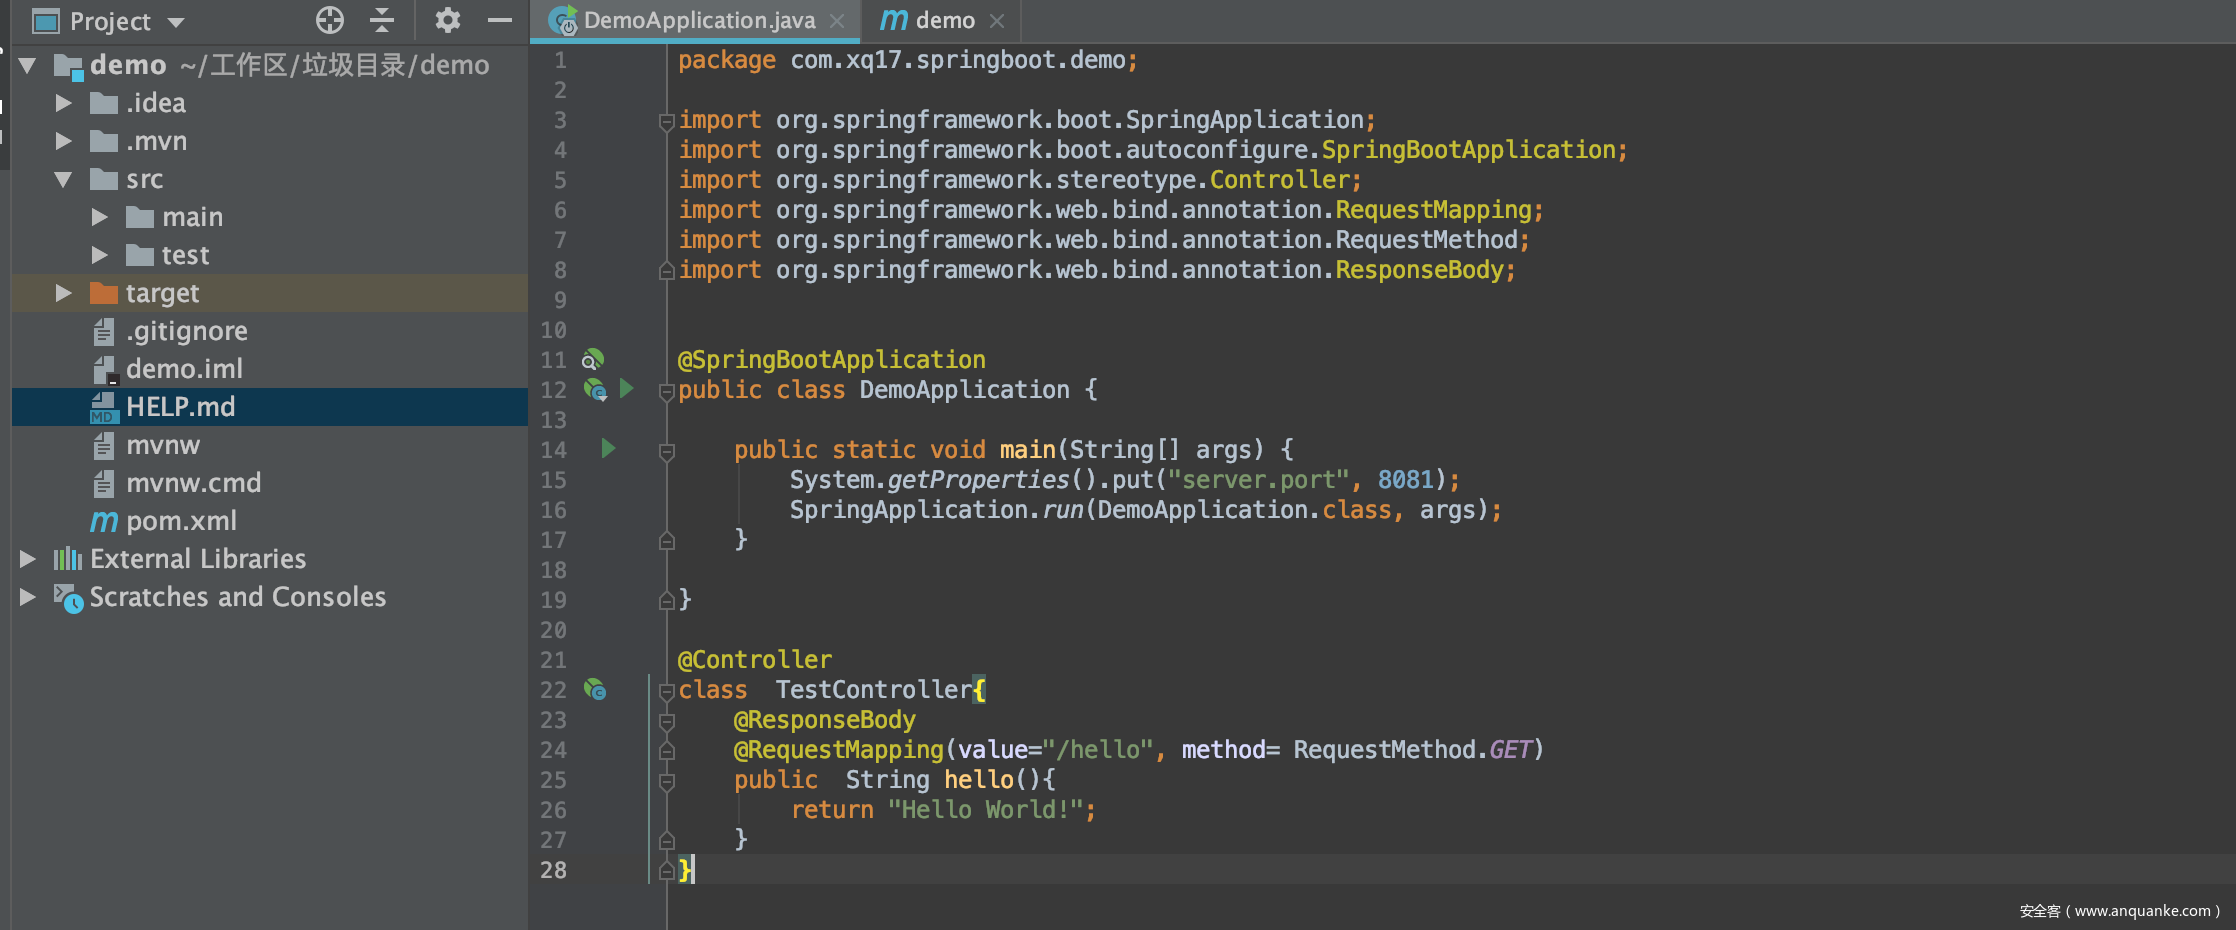
成功创建了一个Demo项目
接下来,由于是基于maven构造的依赖,所以我们在pom.xml添加我们想要的shiro版本,这个洞影响的是1.4.2版本以下的话,所以只要选择个shiro的版本比这个低就行了。
package com.xq17.springboot.demo;

import org.apache.shiro.authc.AuthenticationException;
import org.apache.shiro.authc.AuthenticationInfo;
import org.apache.shiro.authc.AuthenticationToken;
import org.apache.shiro.authc.SimpleAuthenticationInfo;
import org.apache.shiro.authz.AuthorizationInfo;
import org.apache.shiro.realm.AuthorizingRealm;
import org.apache.shiro.spring.web.ShiroFilterFactoryBean;
import org.apache.shiro.subject.PrincipalCollection;
import org.apache.shiro.web.mgt.DefaultWebSecurityManager;
import org.springframework.boot.SpringApplication;
import org.springframework.boot.autoconfigure.SpringBootApplication;
import org.springframework.context.annotation.Bean;
import org.springframework.context.annotation.Configuration;
import org.springframework.stereotype.Controller;
import org.springframework.web.bind.annotation.PathVariable;
import org.springframework.web.bind.annotation.RequestMapping;
import org.springframework.web.bind.annotation.RequestMethod;
import org.springframework.web.bind.annotation.ResponseBody;

import java.util.HashMap;
import java.util.Map;


@SpringBootApplication
public class DemoApplication {

    public static void main(String[] args) {
        SpringApplication.run(DemoApplication.class, args);
    }

}

@Controller
class  TestController{
    @ResponseBody
    @RequestMapping(value="/hello", method= RequestMethod.GET)
    public  String hello(){
        return "Hello World!";
    }

    @ResponseBody
    @RequestMapping(value="/hello/more", method= RequestMethod.GET)
    public  String moreHello(){
        return "Hello moreHello!";
    }

    @ResponseBody
    @RequestMapping(value="/hello" +
            "" +
            "/{index}", method= RequestMethod.GET)
    public  String hello1(@PathVariable Integer index){
        return "Hello World"+ index.toString() + "!";
    }

    @ResponseBody
    @RequestMapping(value="/static/say", method = RequestMethod.GET)
    public String say(){
        return "hello, i am say";
    }

    @ResponseBody
    @RequestMapping(value="/admin/cmd", method = RequestMethod.GET)
    public String cmd(){
        return "execute command endpoint!";
    }

    @ResponseBody
    @RequestMapping(value="/admin", method = RequestMethod.GET)
    public String admin(){
        return "secret key: admin888!";
    }


    @ResponseBody
    @RequestMapping(value="/login", method = RequestMethod.GET)
    public String login(){
        return "please login to admin panel";
    }

}

class MyRealm extends AuthorizingRealm {
    /**
     * s权限
     * @param principals
     * @return
     */
    @Override
    protected AuthorizationInfo doGetAuthorizationInfo(PrincipalCollection principals) {
        return null;
    }

    /***
     *  认证
     * @param token
     * @return
     * @throws AuthenticationException
     */
    @Override
    protected AuthenticationInfo doGetAuthenticationInfo(AuthenticationToken token) throws AuthenticationException {
        String username = (String) token.getPrincipal();
        if("xq17".equals(username)){
            return new SimpleAuthenticationInfo(username, "123", getName());
        }
        return null;
    }
}

@Configuration
class ShiroConfig {
    @Bean
    MyRealm myRealm(){
        return new MyRealm();
    }

    @Bean
    public DefaultWebSecurityManager manager(){
        DefaultWebSecurityManager manager = new DefaultWebSecurityManager();
        manager.setRealm(myRealm());
        return manager;
    }

    @Bean
    public ShiroFilterFactoryBean filterFactoryBean(){
        ShiroFilterFactoryBean factoryBean = new ShiroFilterFactoryBean();
        factoryBean.setSecurityManager(manager());
        factoryBean.setUnauthorizedUrl("/login");
        factoryBean.setLoginUrl("/login");
        Map<String, String> map = new HashMap<>();
        map.put("/login", "anon");
        map.put("/static/**", "anon");
        map.put("/hello/*", "authc");
        //map.put("/admin", "authc");
        //map.put("/admin/**", "authc");
        //map.put("/admin/**", "authc");
        //map.put("/**", "authc");
        factoryBean.setFilterChainDefinitionMap(map);
        return factoryBean;

    }

}
这里需要了解一些关于Shiro逻辑规则的前置知识:
1. anon -- org.apache.shiro.web.filter.authc.AnonymousFilter
2. authc -- org.apache.shiro.web.filter.authc.FormAuthenticationFilter
3. authcBasic -- org.apache.shiro.web.filter.authc.BasicHttpAuthenticationFilter
4. perms -- org.apache.shiro.web.filter.authz.PermissionsAuthorizationFilter
5. port -- org.apache.shiro.web.filter.authz.PortFilter
6. rest -- org.apache.shiro.web.filter.authz.HttpMethodPermissionFilter
7. roles -- org.apache.shiro.web.filter.authz.RolesAuthorizationFilter
8. ssl -- org.apache.shiro.web.filter.authz.SslFilter
9. user -- org.apache.shiro.web.filter.authc.UserFilter
10 logout -- org.apache.shiro.web.filter.authc.LogoutFilter
anon:例子/admins/**=anon #没有参数,表示可以匿名使用。 authc:例如/admins/user/**=authc #表示需要认证(登录)才能使用,没有参数 roles:例子/admins/user/**=roles[admin], #参数可以写多个,多个时必须加上引号,并且参数之间用逗号分割,当有多个参数时,例如admins/user/**=roles["admin,guest"], 每个参数通过才算通过,相当于hasAllRoles()方法。 perms:例子/admins/user/**=perms[user:add:*], #参数可以写多个,多个时必须加上引号,并且参数之间用逗号分割,例如/admins/user/**=perms["user:add:*,user:modify:*"],当有多个参数时必须每个参数都通过才通过,想当于isPermitedAll()方法。 rest:例子/admins/user/**=rest[user], #根据请求的方法,相当于/admins/user/**=perms[user:method] ,其中method为 post,get,delete等。 port:例子/admins/user/**=port[8081], #当请求的url的端口不是8081是跳转到schemal://serverName:8081?queryString,其中schmal是协议http或https等,serverName是你访问的host,8081是url配置里port的端口,queryString是你访问的url里的?后面的参数。 authcBasic:例如/admins/user/**=authcBasic #没有参数表示httpBasic认证 ssl:例子/admins/user/**=ssl #没有参数,表示安全的url请求,协议为https user:例如/admins/user/**=user #没有参数表示必须存在用户,当登入操作时不做检查然后这里我们需要重点关注就是
anon 不需要验证,可以直接访问
authc 需要验证,也就是我们需要bypass的地方
Shiro的URL路径表达式为Ant格式:
/hello 只匹配url http://demo.com/hello
/h?      只匹配url  http://demo.com/h+任意一个字符
/hello/*  匹配url下 http://demo.com/hello/xxxx的任意内容,不匹配多个路径
/hello/** 匹配url下 http://demo.com/hello/xxxx/aaaa的任意内容,匹配多个路径
0x2 CVE 时间线
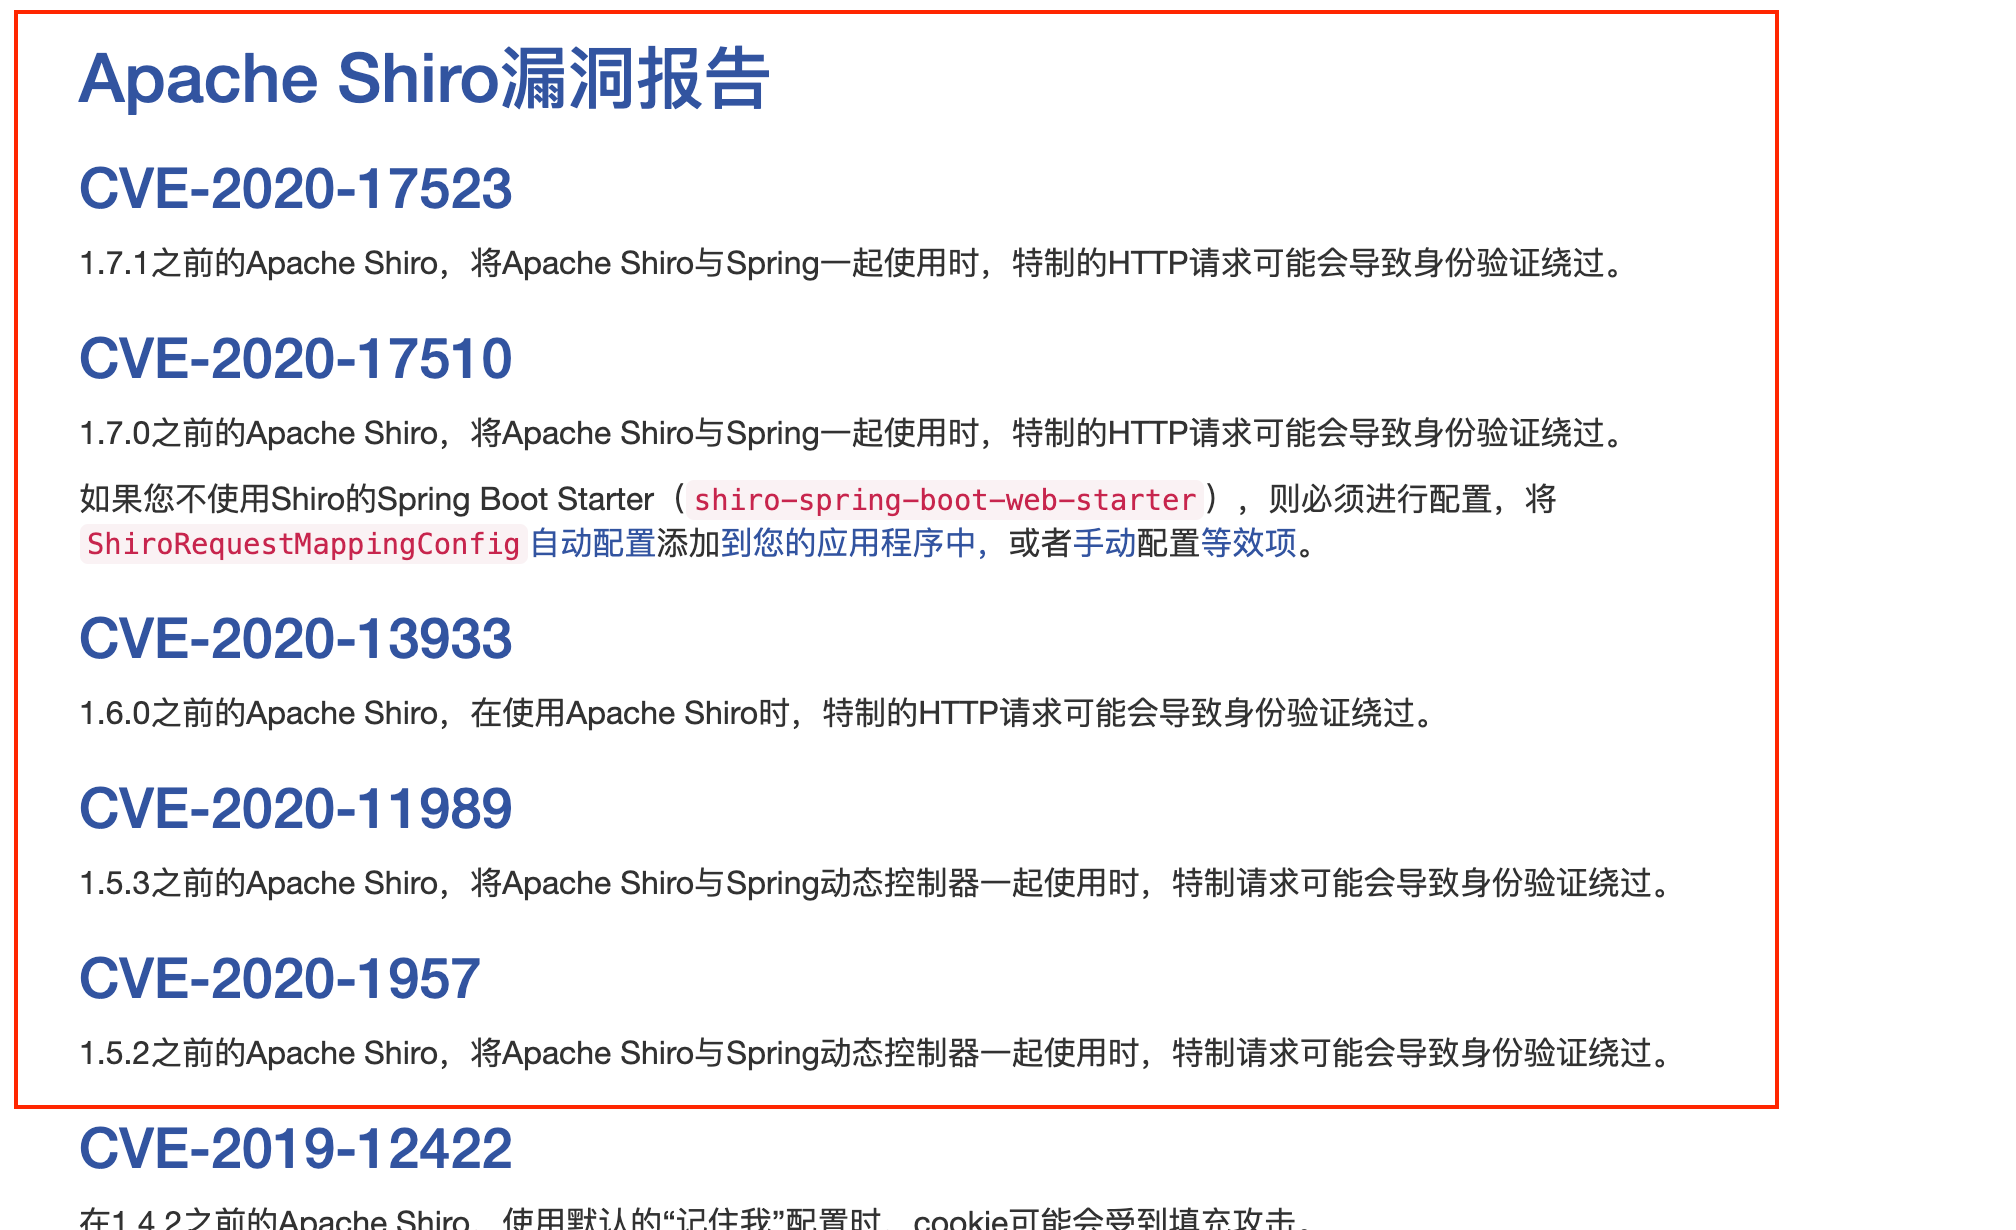
这个可以从官方安全报告可以得到比较官方的时间线:https://shiro.apache.org/security-reports.hCVE-2020-17510tml
下面让我们逐步分析,这些CVE的形成原因,最后再对成因做一个总结。
0x3 CVE-2020-1957
0x3.1 漏洞简介
影响版本: shiro<1.5.2
类型: 权限绕过
其他信息:
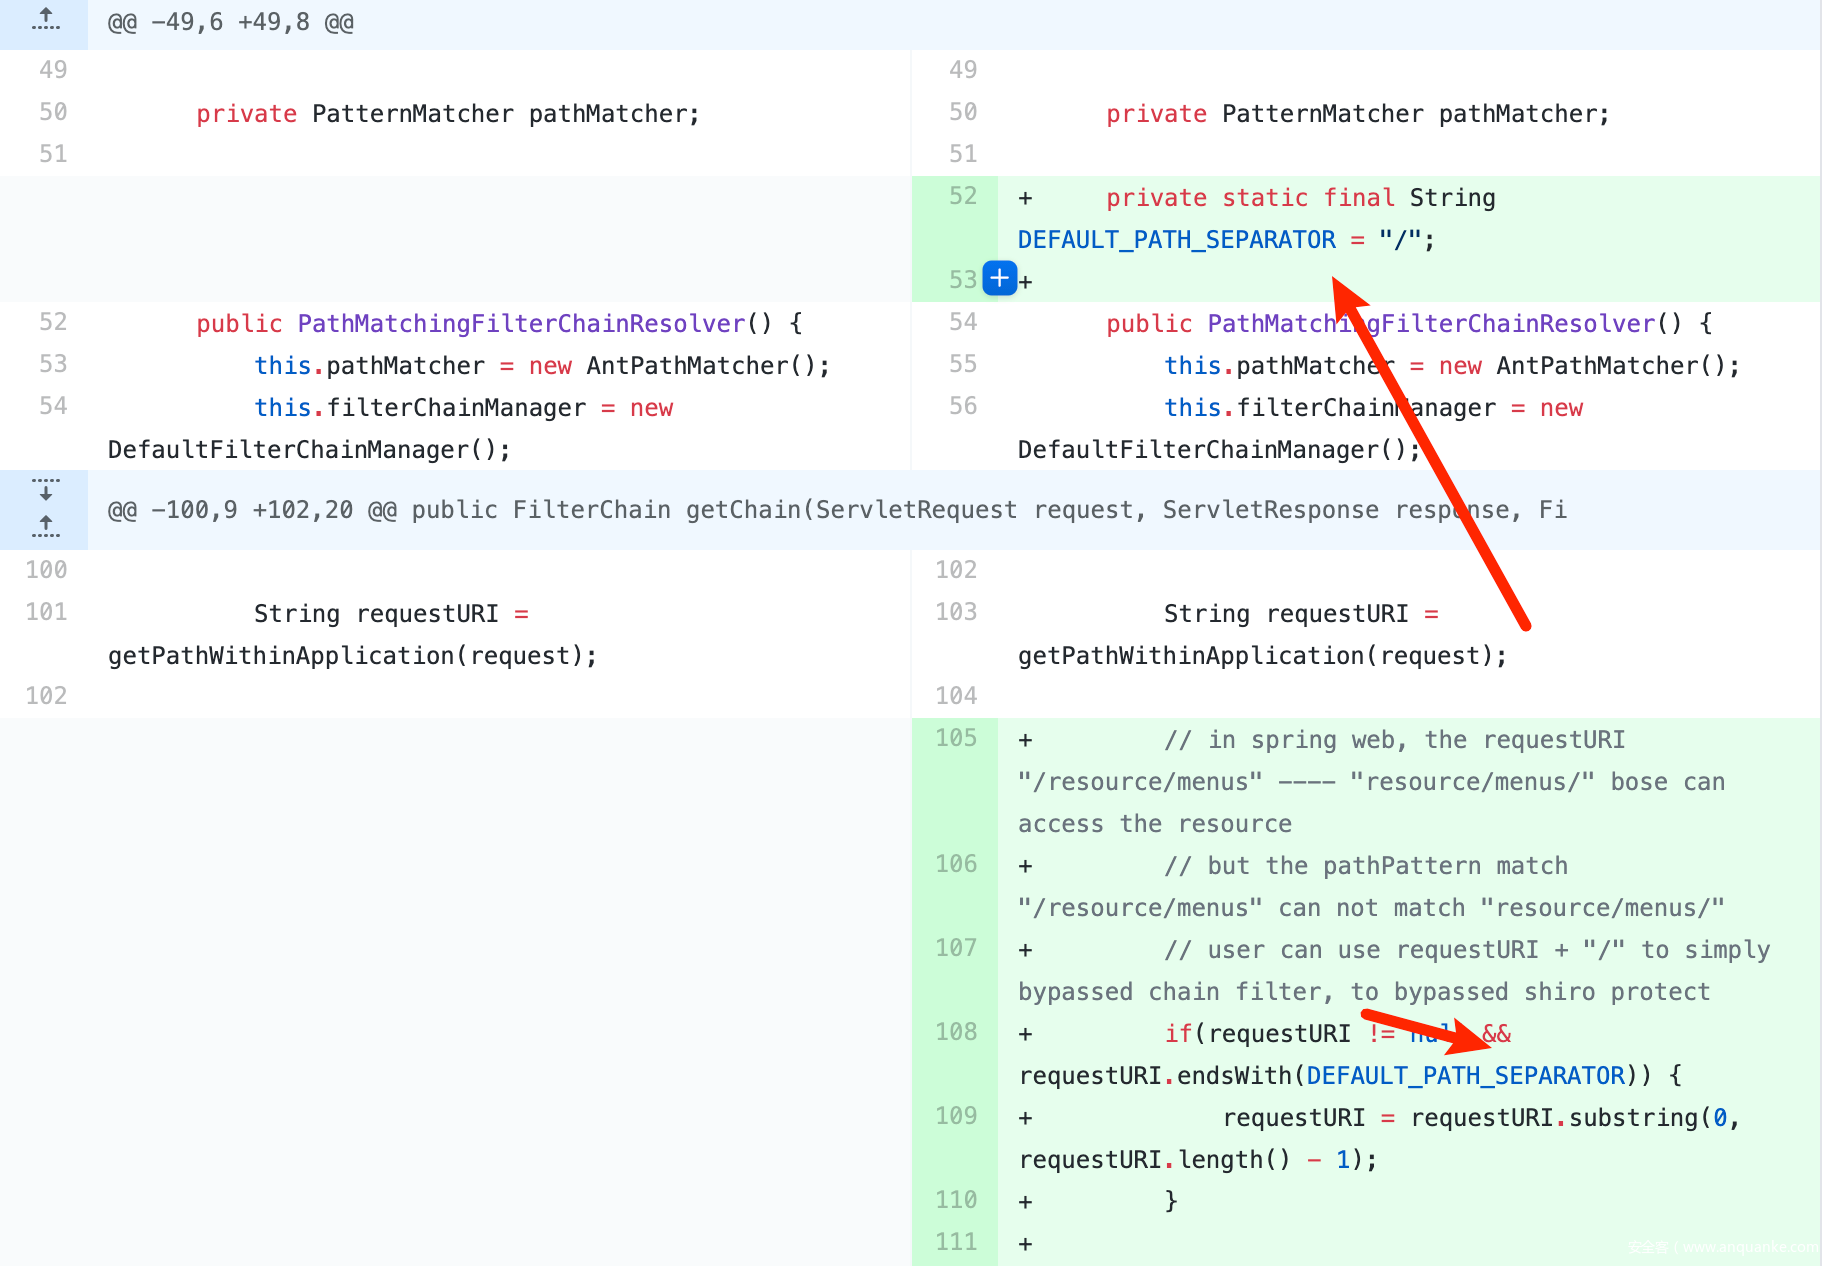
这个洞可以追溯下SHIRO-682,1957 在此1.5.0版本修复的基础上实现了绕过。
关于Shiro-682的绕过方式很简单,就是对于形如如下的规则时
map.put("/admin", "authc");可以通过请求
/admin/去实现免验证,即bypass.原理是: Spring Web中
/admin/支持访问到/admin,这个洞shiro在1.5.0版本修了,修补手法也很简单
只是做了下Path的路径检测,然后去掉了结尾
/
0x3.2 漏洞配置
修改下shiro的检验配置:
config配置(这个很重要,必须)
map.put("/hello/*", "authc");
Controller接口
    @ResponseBody
    @RequestMapping(value="/hello" +
            "" +
            "/{index}", method= RequestMethod.GET)
    public  String hello1(@PathVariable Integer index){
        return "Hello World"+ index.toString() + "!";
    }
然后我们在maven中修改下Shiro的版本为1.5.1,然后还有个坑点就是要复现这个的话spring-boot的版本记得改为:1.5.22.RELEASE,要不然是没办法复现成功的. 至于为什么这里简单说说吧,就是
lookupPath来源的问题,旧版本能够解析为/admin,而新版本直接解析为/static/../admin,然后基于lookupPath去寻找对应的RequestMapping方法自然是找不到的,要么就避免引入..
限于文章篇幅,关于理解下面两个版本的结果,可以先看看Tomcat URL解析差异性导致的安全问题的一些相关内容,这里就不去解释了。
旧版本是:
/web/servlet/handler/AbstractHandlerMethodMapping.class:175
String lookupPath = this.getUrlPathHelper().getLookupPathForRequest(request);
调用的是:
String rest = this.getPathWithinServletMapping(request);
调用的是:
String servletPath = this.getServletPath(request);
最终是tomcat的处理路径:
org.apache.catalina.connector.RequestFacade#getServletPath
这个时候就会做一些..;的处理,所以可以导致绕过。
而新版本是:
org.springframework.web.servlet.handler.AbstractHandlerMapping#initLookupPath
this.getUrlPathHelper().resolveAndCacheLookupPath(request);
调用的是:
String lookupPath = this.getLookupPathForRequest(request);
调用的是:
String pathWithinApp = this.getPathWithinApplication(request);
调用的是:
String requestUri = this.getRequestUri(request);
tomcat的调用:
org.apache.catalina.connector.Request#getRequestURI
然后最终进行了url清洗,会保留..来匹配:
this.decodeAndCleanUriString(request, uri);
然后下面是针对不同的漏洞使用不同的Shiro版本maven文件。
        <dependency>
            <groupId>org.apache.shiro</groupId>
            <artifactId>shiro-web</artifactId>
            <version>1.5.1</version>
        </dependency>
        <dependency>
            <groupId>org.apache.shiro</groupId>
            <artifactId>shiro-spring</artifactId>
            <version>1.5.1</version>
        </dependency>
0x3.3 漏洞演示
直接访问是被拒绝的。
绕过:
spring新版本(不能引入):
POC:
/fsdf;/../hello/1111
那么如果map这样设置,这个洞依然是可以的,至于为什么,下面漏洞分析会说明。
map.put("/hello/**", "authc"); 这样设置的话,之前靠/hello/112/ 末尾+/的话就没用了
map.put("/hellO", "authc");
0x3.4 漏洞分析
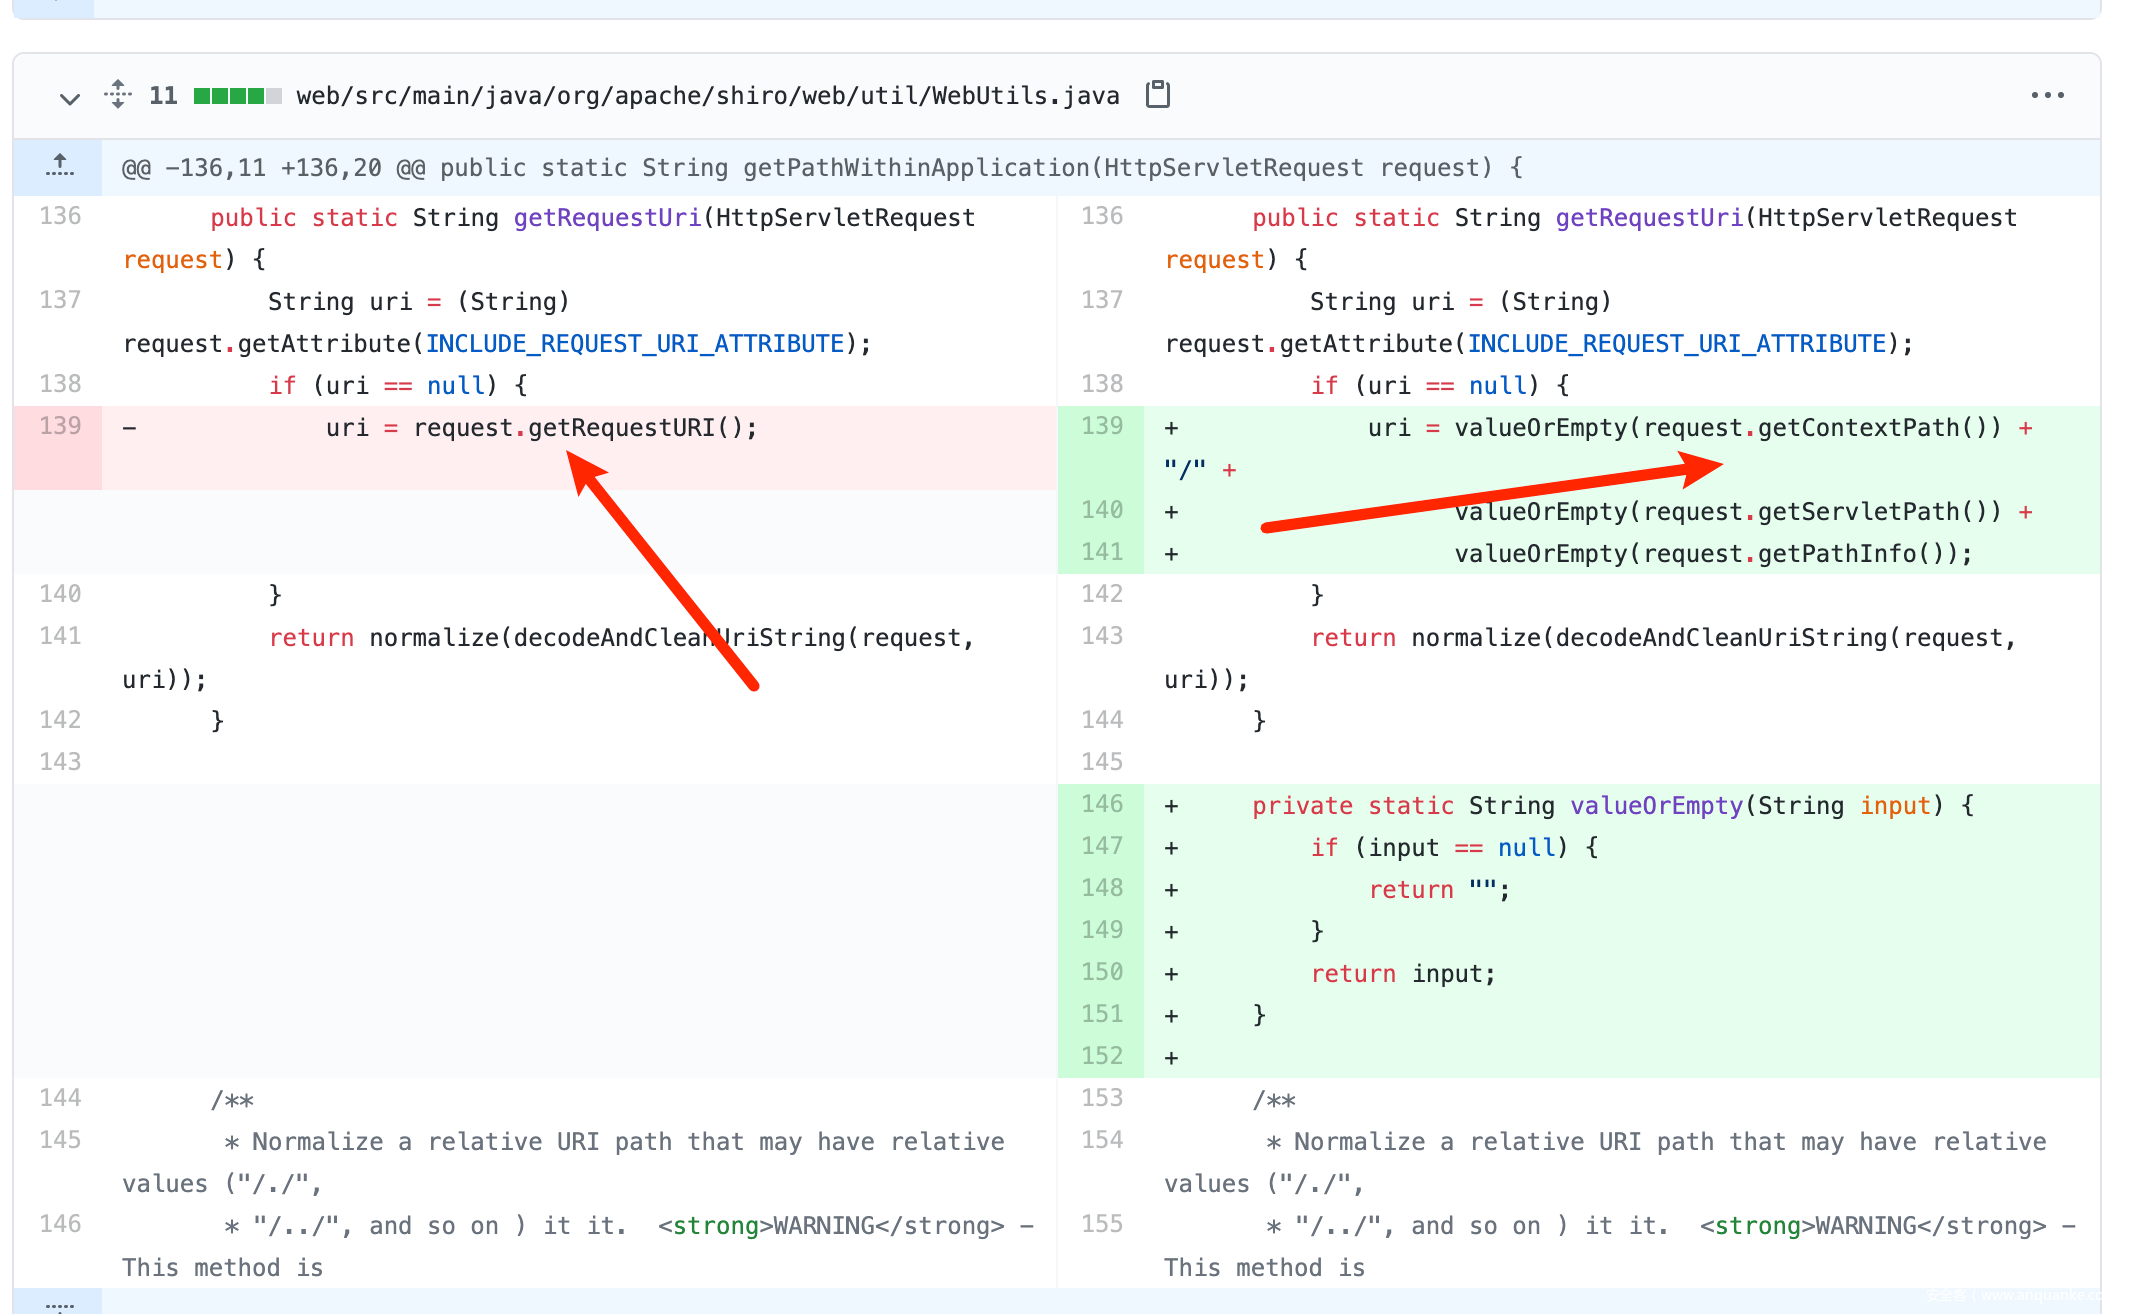
通过diff 1.5.2 与 1.5.0的代码,可以确定在这里出现了问题
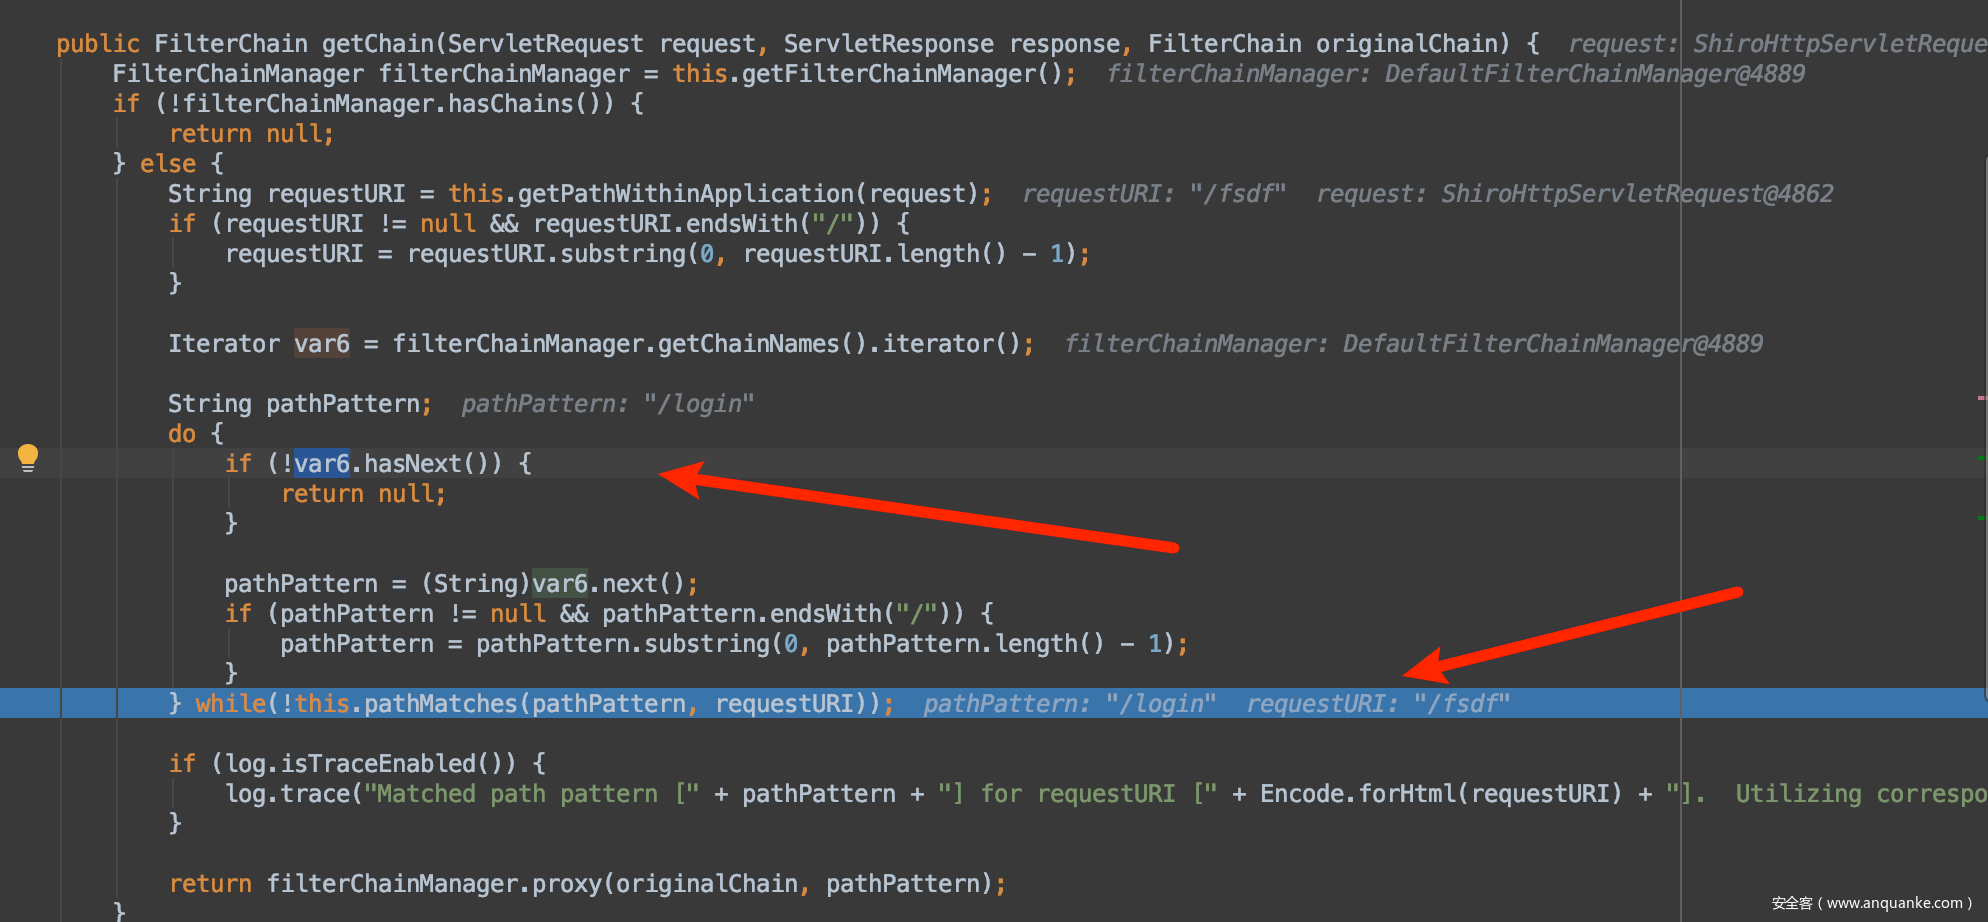
我们debug直接跟到这里:
然后在这里的话,首先会做urldecode解码然后会删除掉uri中;后面的内容,然后normalize规范化路径。
然后返回的是这个路径:
然后Shiro开始做匹配,从this.getFilterChainManager()获取定义的URL规则和权限规则来判断URL的走向。
这里没有定义fsdf,所以自然没有找到,直接返回了Null
然后开始走默认的default的URL规则,经过Spring-boot解析,tomcat解析之后到达了真正的函数点。
这里简化点,通俗来说就是, 一个URL
/fsdf;/../hello/1111
首先要走Shiro的过滤器处理,解析得到/fsdf发现没有匹配的拦截器,那么就默认放行,如果有那么就进行权限认证,shiro绕过之后,然后来到了Spring-boot解析,然后Spring-boot在查找方法的时候会调用tomcat的getServletPath,那么就会返回/hello/1111去RequestMapping去找相对应我们定义的方法,那么可以绕过了。
其实关于这个payload我们还可以这样:
 /fsdf/..;/a;aaa;a/..;/hello/1
 /fsdf/..;/a;aaa;a/..;/hello/1
原因是:
在流向的过程中,tomcat会对特殊字符;处理去掉((;XXXX)/)括号里面的内容得到`/fsdf/../a/../hello/1 ,传递给getServletPath,最终得到/hello/1作为lookupPath,去RequestMapping对应的函数来调用。
0x3.5 漏洞修复
这里我们修改maven,shiro升级到1.5.2
        <!-- shiro与spring整合依赖 -->
        <dependency>
            <groupId>org.apache.shiro</groupId>
            <artifactId>shiro-web</artifactId>
            <version>1.5.2</version>
        </dependency>
        <dependency>
            <groupId>org.apache.shiro</groupId>
            <artifactId>shiro-spring</artifactId>
            <version>1.5.2</version>
        </dependency>
修复代码,细究下:
可以看到原先是由
request.getRequestURI():根路径到地址结尾,原封不动,不走任何处理。
现在变为了:
项目根路径(Spring MVC下如果是根目录默认是为空的)+相对路径+getPathInfo(Spring MVC下默认是为空的)
其实就是统一了request.getServletPath()来处理路径再进行比较,这里是Shiro主动去兼容Spring和tomcat。
0x4 CVE-2020-11989
0x4.1 漏洞简介
影响版本: shiro<1.5.3
类型: 权限绕过
其他信息:
https://xlab.tencent.com/cn/2020/06/30/xlab-20-002/
其实这两篇文章成因很显然是不同的,但是修补方式是可以避免这两种绕过方式的,让我们来分析下吧。
0x4.2 漏洞配置
这个漏洞的话,限制比CVE2020-1957多点,比如对于/**这种匹配的话是不存在漏洞还有就是针对某类型的函数,第二种利用则是需要context-path不为空,这个利用就和CVE-2020-1957差不多。
第一种:
这个还不会受到Spring MVC版本的影响。
map.put("/hello/*", "authc");
同时我们还需要改一下我们的方法:
    @ResponseBody
    @RequestMapping(value="/hello" +
            "" +
            "/{index}", method= RequestMethod.GET)
    public  String hello1(@PathVariable String index){
        return "Hello World"+ index.toString() + "!";
    }
需要获取的参数为String的,因为后面就是基于这个String类型来针对这种函数的特殊情况来绕过的。
第一种绕过方式对于这种是无效的,必须是动态获取到传入的内容,然后把传入的内容当做参数才行,像下面这个没有动态参数的话,那么根本就没办法匹配到more:
    @ResponseBody
    @RequestMapping(value="/hello/more", method= RequestMethod.GET)
    public  String moreHello(){
        return "Hello moreHello!";
    }
第二种:
server.context-path=/shiro
这种情况就和CVE2020-1957的绕过原理很像,就是基于;这个解析差异来实现绕过,但是官方缺乏考虑边缘情况,导致了绕过
这里新版本Spring是不行,因为在getPathWithinServletMapping实现不同,pathWithinApp
变成了contextPath
2.0之后的新版本配置Context-path:
server.servlet.context-path=/shiro
0x4.3 漏洞演示
第一种:
/hello/luanxie%25%32%661
%25%32%66其实就是%2f的编码
第二种:
/;/shiro/hello/hi
0x4.4 漏洞分析
先说第一种,还是路径解析差异导致,但是属于多一层URL解码,emm
还是在原来那个地方下一个断点
这一行和上面分析差不多,然后这里注意下:
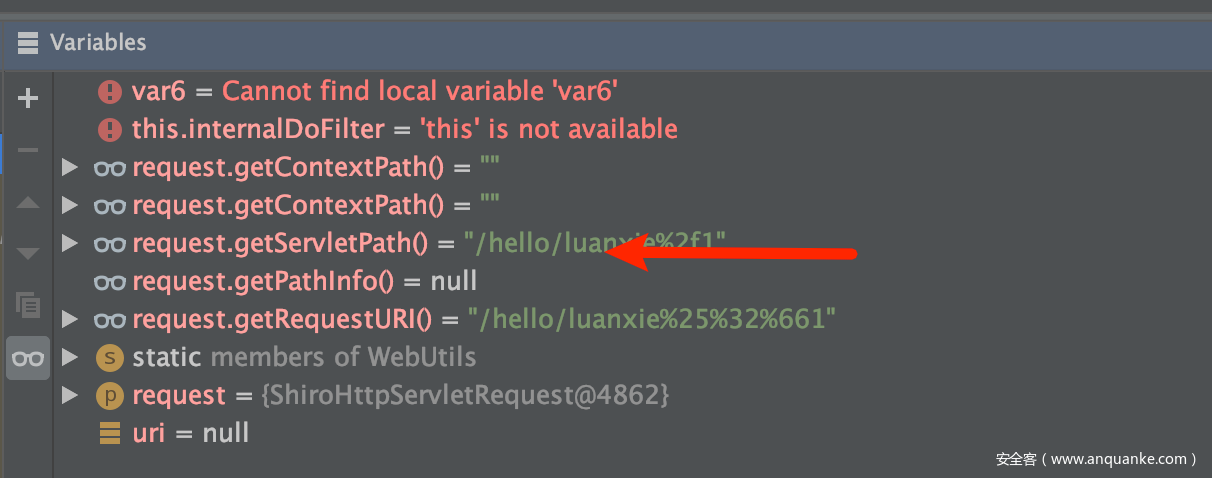
这里传入URL的时候,request.getServletPath()会做一层URL解码处理(Tomcat URL解析差异性导致的安全问题),
然后我们继续跟进去:normalize(decodeAndCleanUriString(request, uri));
可以看到这里又做了一层decode处理,下一个断点,跟进去这个是什么处理的。
没什么好说的,检测一下编码,然后URLDecoder解码,把本来我想着有没有那种纯数字编码的,这样利用范围就会大一些,比较极端的情况啦,确实没有,解码之后传入normalize做一些规范化处理,这个函数做了什么规范化处理呢,其实也可以看看。
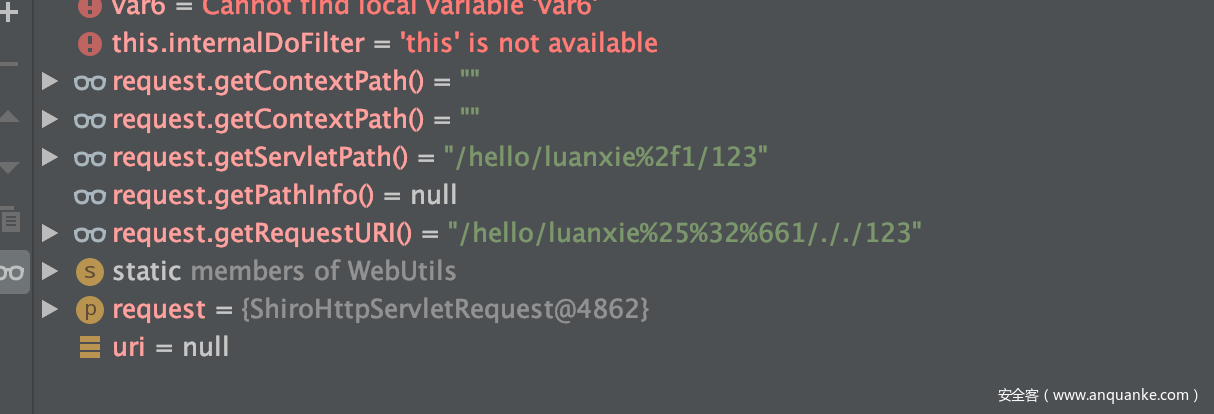
感觉emm,会有点多余啦,这里写了个循环去删除/./和/../,这个其实都会被处理掉的
这里就先姑且当做双重保险,normalize函数的作用跟我们这次漏洞没啥关系。
最终传入Shiro进行和/hello/*匹配的是
原始hello/luanxie%25%32%661->经过Shiro的getRequestUri->组装URL`request.getServletPath(这里解码一次) ->decodeAndCleanUriString(这里解码一次)->normalize->最终变成了-/hello/luanxie/1,然后进入了Shiro的匹配了,所以如果/hello/**这样的配置是可以匹配到多路径的,但是单*号的话,是没办法处理这个路径的,直接放行,然后request继续走呀走呀,走到Spring那里直接取request.getServletPath也就是/hello/luanxie%2f1,作为lookpath,去寻找RequestMapping有没有合适的定义的方法,结果发现
    @ResponseBody
    @RequestMapping(value="/hello" +
            "" +
            "/{index}", method= RequestMethod.GET)
    public  String hello1(@PathVariable String index){
        return "Hello World"+ index.toString() + "!";
    }
这个参数hello/luanxie%2f1正好就是/hello/String的模式呀,那么就直接调用了这个函数hello1,实现了绕过。
下面说说第二种绕过方式,说实话,这种绕过方式其实应用场景更广
这个问题主要tomcat的getContextPath的实现上
org.apache.catalina.connector.Request#getContextPath
可以看到这个函数执行操作是POS会一直++直到匹配到`/shiro,
然后返回的时候直接返回0-Pos位置的字符串,怎么说呢,这个设计可能是为了兼容../的类似情况,然后导致最终解析的URL引入了;
然后后面的话,就回到我们之前2020-1957的分析的,只不过这次
;的引入不再是由request.getRequestURI()引入,这次引入是补丁中的getContextPath这个拼接的时候引入的,然后Shiro对于;处理也说了,直接删掉;后面的内容,所以最终返回的是fsdf去匹配Shiro我们定义的正则。
所以这样去绕过也可以的。
0x4.5 漏洞修复
直接比对下代码:https://github.com/apache/shiro/compare/shiro-root-1.5.2…shiro-root-1.5.3
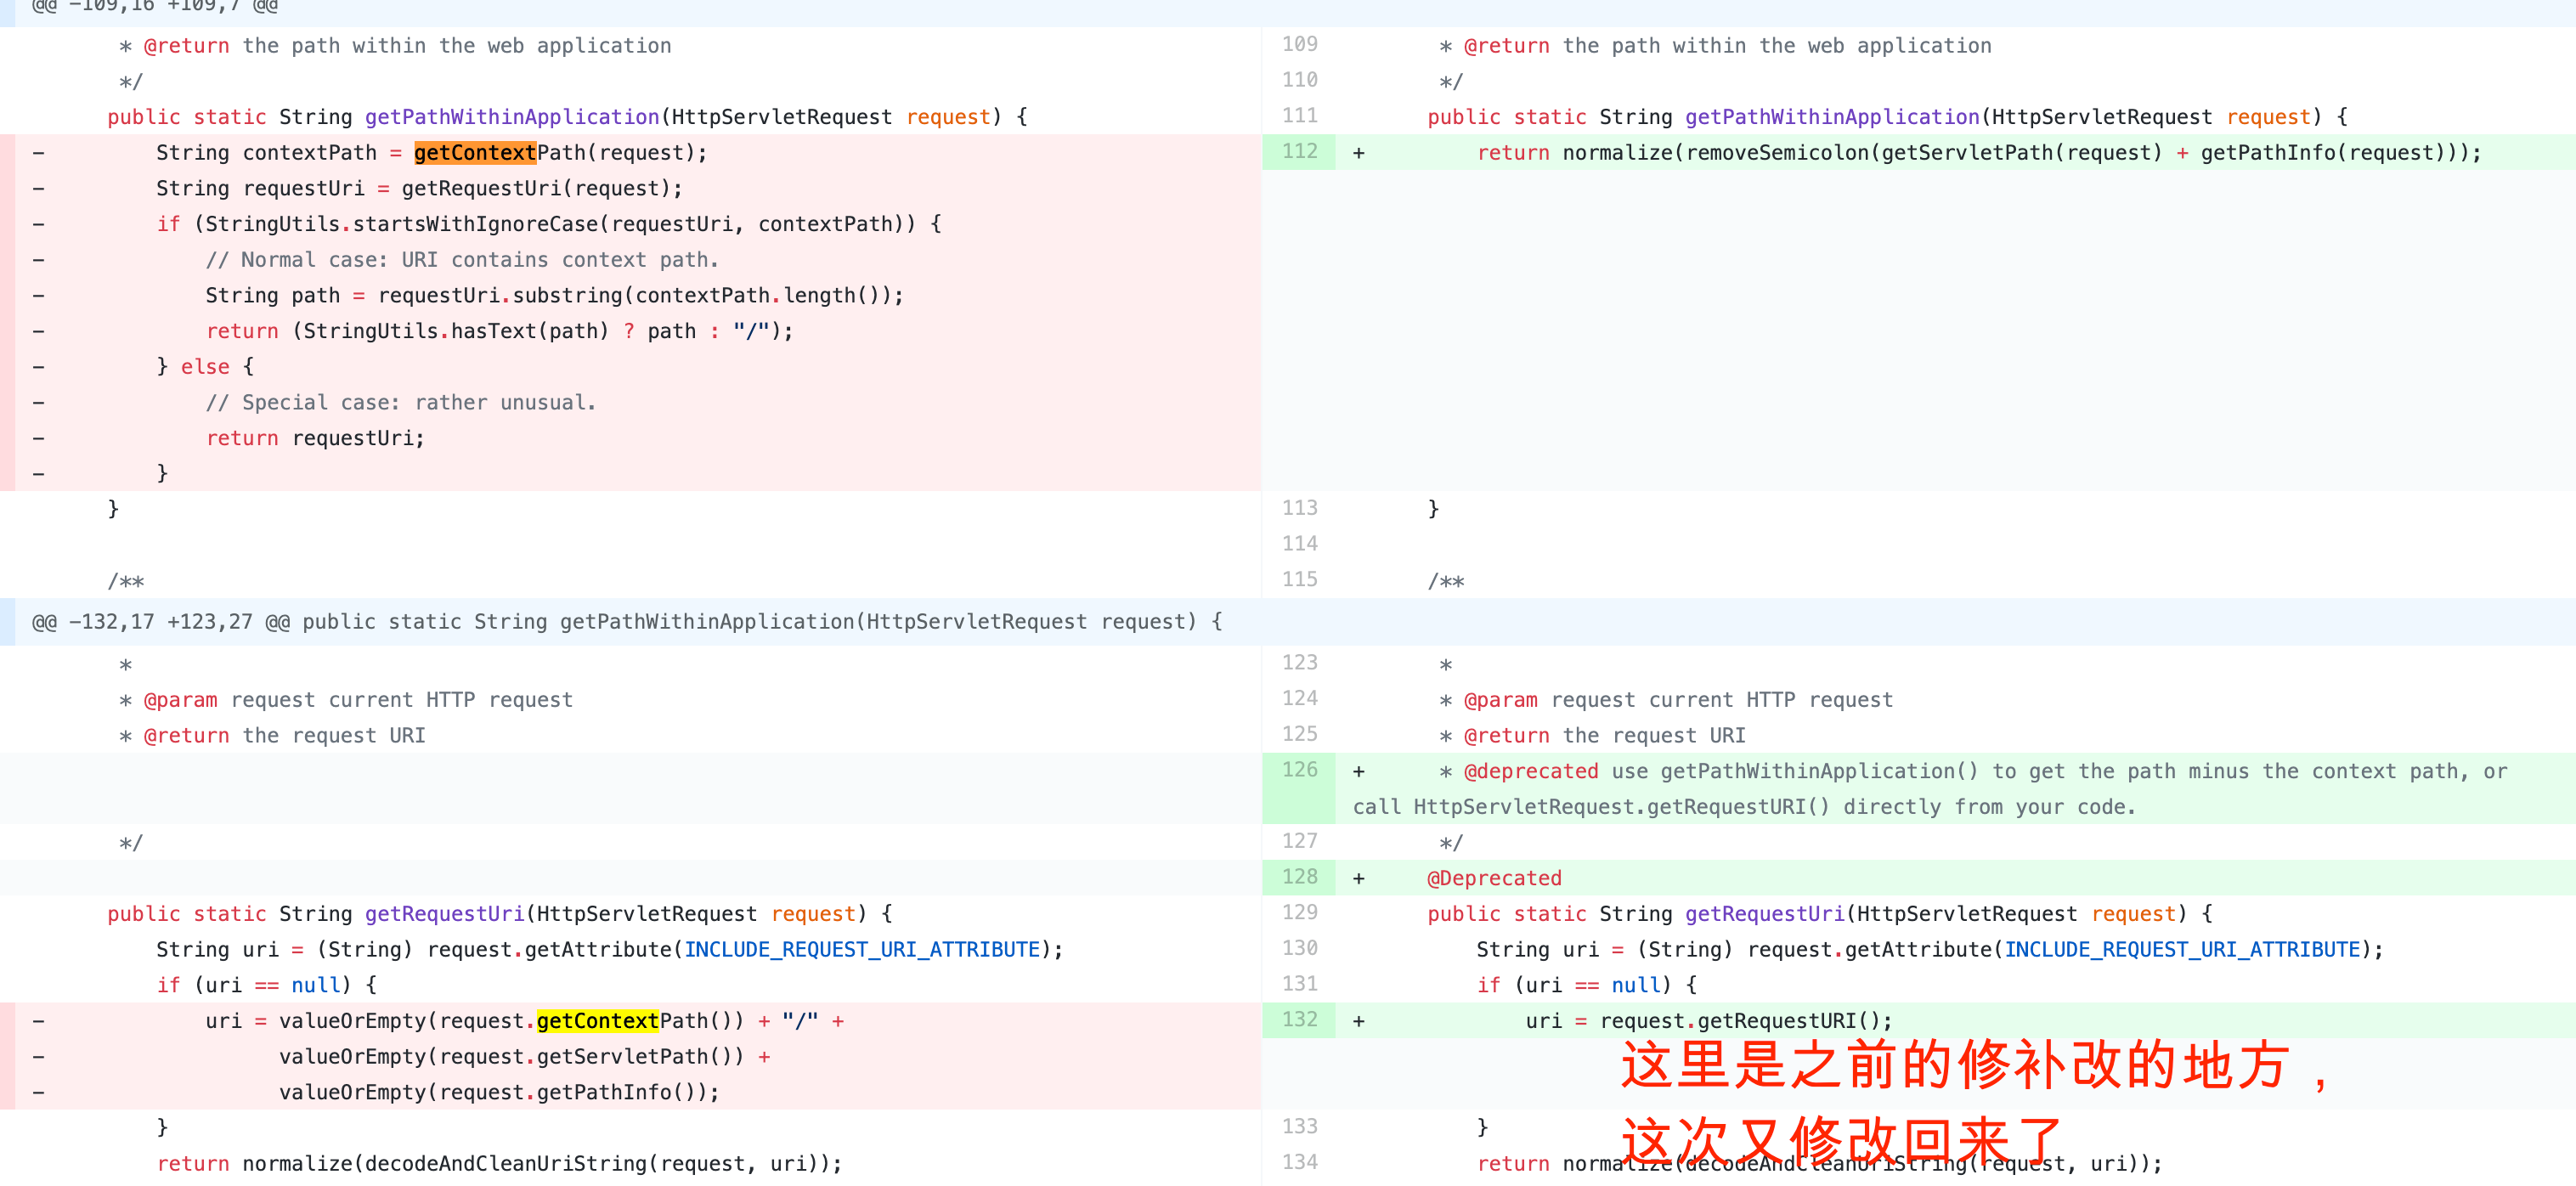
这次的修补地方,主要是改了getPathWithinApplication(这个函数返回的uri是用于后面Shiro进行URL过滤匹配的)。
return normalize(removeSemicolon(getServletPath(request) + getPathInfo(request)));
这样没有了多一重的URL解码,解决了问题1,然后删掉了ContextPath,解决了问题2。
其实可以思考下,getPathInfo如果也可以引入;那么一样是会存在漏洞的,笔者对于挖Shiro的这种有限制的0day并不感兴趣,有兴趣的读者可以去挖。
参考链接
(小安提示,明日待续)

