作者: A2u13@星盟
漏洞扫描模块
总体架构
框架目录
.
├── kunpeng.py
├── kunpeng_c.dll
├── kunpeng_c.dylib
├── kunpeng_c.so
├── vuldb
│   ├── Confluence_CVE20158399.json
│   ├── Docker_Remote_API_20161220120458.json
│   ├── ElasticSearch_unauth.json
│   ├── MS10-070.py
│   ├── MS15-034.py
│   ├── MS17_010.py
│   ├── activemq_upload.py
│   ├── axis_config_read.py
│   ├── axis_info.json
│   ├── crack_axis.py
│   ├── crack_cisco_web.py
│   ├── crack_ftp.py
│   ├── crack_glassfish.py
│   ├── crack_grafana.py
│   ├── crack_jboss.py
│   ├── crack_jenkins.py
│   ├── crack_mongo.py
│   ├── crack_mssql.py
│   ├── crack_mysql.py
│   ├── crack_postgres.py
│   ├── crack_redis.py
│   ├── crack_resin.py
│   ├── crack_supervisor_web.py
│   ├── crack_weblogic.py
│   ├── fastcgi_rce.py
│   ├── git_index_disclosure.json
│   ├── glassfish_filread.json
│   ├── hadoop_yarn_resourcemanager_unauth_rce.json
│   ├── heartbleed_poc.py
│   ├── hikvision_crackpass.py
│   ├── iis_shortfile.py
│   ├── iis_webdav.py
│   ├── iis_webdav_rce.py
│   ├── java_rmi_rce.py
│   ├── jboss_head.py
│   ├── jboss_info.json
│   ├── jboss_rce_un.py
│   ├── jenkins_CVE_2015_8103.py
│   ├── jenkins_CVE_2017_1000353.py
│   ├── jetty_refer.py
│   ├── memcache_drdos.py
│   ├── memcache_unauth.py
│   ├── netgear_passwd.json
│   ├── nginx_CVE_2017_7529.py
│   ├── nodejs_debugger_rce.py
│   ├── phpmyadmin_crackpass.py
│   ├── resin_fileread.json
│   ├── resin_fileread_1.json
│   ├── resin_fileread_3.json
│   ├── rsync_weak_auth.py
│   ├── s2_052.py
│   ├── shiro_550.py
│   ├── st2_eval.py
│   ├── svn_entries_disclosure.json
│   ├── testing.py
│   ├── tomcat_crackpass.py
│   ├── tomcat_cve_017_12615.py
│   ├── web_fileread.py
│   ├── web_shellshock.py
│   ├── weblogic_CVE_2015_4852.py
│   ├── weblogic_CVE_2017_10271.py
│   ├── weblogic_CVE_2018_2628.py
│   ├── weblogic_ssrf.json
│   ├── websphere_CVE_2015_7450.py
│   ├── wordpress_crackpass.py
│   ├── zabbix_jsrpc_SQL.json
│   ├── zabbix_latest_sql.py
│   └── zookeeper_unauth_access.py
└── vulscan.py
这里学长让我看看这几个文件:
vulscan/vulscan.pynascan/nascan.pyweb.py(但这个只是一个Flask入口.....)
那就主要是前两个文件了,其他文件都是Flask的模板文件之类的,如果分析完那两个文件之后,感觉可以看看
源码分析
导入库就先不看了,遇到了就追回去看看
第16-17行
sys.path.append(sys.path[0] + '/vuldb')
sys.path.append(sys.path[0] + "/../")
这两句在于把/vuldb和上层目录加入python解析器的搜索路径里
然后开始连接MongoDB数据库,之前已经配置好了,这些用来获那些结果、插件、设置等等
db_conn = pymongo.MongoClient(ProductionConfig.DB, ProductionConfig.PORT)
na_db = getattr(db_conn, ProductionConfig.DBNAME)
na_db.authenticate(ProductionConfig.DBUSERNAME, ProductionConfig.DBPASSWORD)
na_task = na_db.Task
na_result = na_db.Result
na_plugin = na_db.Plugin
na_config = na_db.Config
na_heart = na_db.Heartbeat
na_update = na_db.Update
然后生成一个多线程的锁
lock = thread.allocate()
这几个目前不知道是干什么的,除了那个超时和多线程以外
PASSWORD_DIC = []
THREAD_COUNT = 50
TIMEOUT = 10
PLUGIN_DB = {}
TASK_DATE_DIC = {}
WHITE_LIST = []
下面的kp = kunpeng()
是实例化的kunpeng类,这玩意好像是个漏洞库?
这里来分析一下
def __init__(self):
  self.kunpeng = None
  self.system = platform.system().lower()
  self.pwd = os.path.split(os.path.realpath(__file__))[0]
  self.suf_map = {
    'windows': '.dll',
    'darwin': '.dylib',
    'linux': '.so'
  }
  self._load_kunpeng()
构造函数没啥好说的
得了当前路径,系统类型,以及好像是动态链接库的后缀?
最后调用了_load_kunpeng()方法
def _get_lib_path(self):
  file_list = os.listdir(self.pwd)
  for v in file_list:
    if 'kunpeng' in v and os.path.splitext(v)[1] == self.suf_map[self.system]:
      return v
这个函数先是读取了当前路径下的文件,然后检测文件名是否存在kunpeng并且后缀是否符合那个字典的要求,然后返回这个文件名
可以看到它实际上是用来寻找那个链接库
def check_version(self):
  print 'check version'
  release = self._get_release_latest()
  # print(release)
  if release['tag_name'] != self.get_version():
    print 'new version', release['tag_name']
    self._down_release(release['tag_name'])
    return release
然后是检测版本信息,这里看看_get_release_latest()函数
def _get_release_latest(self):
  body = urllib2.urlopen(
    'https://api.github.com/repos/opensec-cn/kunpeng/releases/latest').read()
  release = json.loads(body)
  return release
可以看到是请求了,返回了请求的json
然后判断是否有新版本,这里把版本获取函数没找到,看一下下载最新版本的函数
def _down_release(self, version):
  print 'kunpeng update ', version
  save_path = self.pwd +
  '/kunpeng_{}_v{}.zip'.format(self.system, version)
  down_url = 'https://github.com/opensec-cn/kunpeng/releases/download/{}/kunpeng_{}_v{}.zip'.format(
    version, self.system.lower(), version)
  print 'url', down_url
  urlretrieve(down_url, save_path, self._callbackinfo)
这里很简单,把系统类型、版本号格式化进去之后进行下载,然后调用urlretrieve函数进行保存,其中_callbackinfo函数是个回调函数,用来显示下载进度
_callbackinfo
@down:已经下载的数据块
@block:数据块的大小
@size:远程文件的大小
def _callbackinfo(self, down, block, size):
per = 100.0*(down*block)/size
if per > 100:
per = 100
print '%.2f%%' % per
然后看看版本更新函数
def update_version(self, version):
  self.close()
  os.remove(self.pwd + '/' + self._get_lib_path())
  save_path = self.pwd +
  '/kunpeng_{}_v{}.zip'.format(self.system, version)
  z_file = zipfile.ZipFile(save_path, 'r')
  dat = z_file.read('kunpeng_c' + self.suf_map[self.system])
  print len(dat)
  new_lib = self.pwd + '/kunpeng_v' + version + self.suf_map[self.system]
  lib_f = open(new_lib,'wb')
  lib_f.write(dat)
  lib_f.close()
  z_file.close()
  print 'update success',version
  self._load_kunpeng()
这里先关闭kunpeng
def close(self):
  if self.system == 'windows':
    _ctypes.FreeLibrary(self.kunpeng._handle)
    else:
      handle = self.kunpeng._handle
      del self.kunpeng
      _ctypes.dlclose(handle)
这个FreeLibraey函数我没搜到,不过猜测作用是释放Lib的
在其他系统上是通过del self.kunpeng这个属性以及关闭句柄的
反正ctypes这个库感觉就是用来处理动态库的
然后通过读取下载的zip文件,把数据二进制方式写入一个新的文件里,加载了_load_kunpeng()方法进行了加载
这个方法就不写了,反正就是用了ctypes这个库进行了动态链接库加载以及参数设置
self.kunpeng.GetPlugins.restype = c_char_p
self.kunpeng.Check.argtypes = [c_char_p]
self.kunpeng.Check.restype = c_char_p
self.kunpeng.SetConfig.argtypes = [c_char_p]
self.kunpeng.GetVersion.restype = c_char_p
kunpeng.py先到这里,继续分析vulscan.py,遇到了就回到看定义
构造函数没啥好看的,就直接看start函数了
def start(self):
    self.get_plugin_info()
    if '.json' in self.plugin_info['filename']:  # 标示符检测模式
        self.load_json_plugin()  # 读取漏洞标示
        self.set_request()  # 标示符转换为请求
        self.poc_check()  # 检测
这里查询了插件的信息之后(通过Mongo来查询
> db.Plugin.find()
{ "_id" : ObjectId("5e797eb938e88b00324eb4bb"), "count" : 0, "add_time" : ISODate("2020-03-24T11:30:01.657Z"), "info" : "导致数据库敏感信息泄露,严重可导致服务器被入侵。", "name" : "Redis弱口令", "keyword" : "server:redis", "level" : "高危", "url" : "http://www.freebuf.com/vuls/85021.html", "author" : "wolf@YSRC", "filename" : "crack_redis", "source" : 1, "type" : "弱口令" }
{ "_id" : ObjectId("5e797eb938e88b00324eb4bc"), "count" : 0, "add_time" : ISODate("2020-03-24T11:30:01.657Z"), "info" : "攻击者通过此漏洞最终可以达到任意文件读取的效果。", "name" : ".NET Padding Oracle信息泄露", "keyword" : "tag:aspx", "level" : "高危", "url" : "", "author" : "wolf@YSRC", "filename" : "MS10-070", "source" : 1, "type" : "任意文件读取" }
{ "_id" : ObjectId("5e797eb938e88b00324eb4bd"), "count" : 0, "add_time" : ISODate("2020-03-24T11:30:01.657Z"), "info" : "可直接执行任意代码,进而直接导致服务器被入侵控制。", "name" : "Jboss反序列化代码执行", "keyword" : "tag:jboss", "level" : "紧急", "url" : "http://www.freebuf.com/articles/86950.html", "author" : "wolf@YSRC", "filename" : "jboss_rce_un", "source" : 1, "type" : "代码执行" }
他这里有三种检测方式
- json
- kunpeng漏洞库
- python脚本
if '.json' in self.plugin_info['filename']:  # 标示符检测模式
  self.load_json_plugin()  # 读取漏洞标示
  self.set_request()  # 标示符转换为请求
  self.poc_check()  # 检测
def load_json_plugin(self):
  json_plugin = open(sys.path[0] + '/vuldb/' +
                     self.plugin_info['filename']).read()
  self.plugin_info['plugin'] = json.loads(json_plugin)['plugin']
读取他的plugin信息
{
    "name" : "Axis2信息泄露",
    "info" : "HappyAxis.jsp 页面存在系统敏感信息。",
    "level" : "低危",
    "type" : "信息泄露",
    "author" : "wolf@YSRC",
    "url": "",
    "keyword" : "tag:axis2",
    "source" : 1,
    "plugin" : {
        "url" : "/axis2/axis2-web/HappyAxis.jsp",
        "tag" : "敏感信息泄露",
        "analyzing" : "keyword",
        "analyzingdata" : "Axis2 Happiness Page",
        "data" : "",
        "method" : "GET"
    }
}
然后开始把json里的url和请求方式转化为一个urllib2.Request请求
def set_request(self):
  url = 'http://' +
  self.task_netloc[0] + ":" +
  str(self.task_netloc[1]) + self.plugin_info['plugin']['url']
  if self.plugin_info['plugin']['method'] == 'GET':
    request = urllib2.Request(url)
    else:
      request = urllib2.Request(url, self.plugin_info['plugin']['data'])
      self.poc_request = request
然后进行POC检测
def poc_check(self):
  try:
    res = urllib2.urlopen(self.poc_request, timeout=30)
    res_html = res.read(204800)
    header = res.headers
    # res_code = res.code
    except urllib2.HTTPError, e:
      # res_code = e.code
      header = e.headers
      res_html = e.read(204800)
      except Exception, e:
        return
前半部分是用来发送HTTP请求的,这里吐槽一下,不能直接用request库吗???
然后对页面进行了解码和编码操作
try:
  html_code = self.get_code(header, res_html).strip()
  if html_code and len(html_code) < 12:
    res_html = res_html.decode(html_code).encode('utf-8')
    except:
      pass
这时候对漏洞发现关键字进行检测:
an_type = self.plugin_info['plugin']['analyzing']
vul_tag = self.plugin_info['plugin']['tag']
analyzingdata = self.plugin_info['plugin']['analyzingdata']
if an_type == 'keyword':
  # print poc['analyzingdata'].encode("utf-8")
  if analyzingdata.encode("utf-8") in res_html:
    self.result_info = vul_tag
    elif an_type == 'regex':
      if re.search(analyzingdata, res_html, re.I):
        self.result_info = vul_tag
        elif an_type == 'md5':
          md5 = hashlib.md5()
          md5.update(res_html)
          if md5.hexdigest() == analyzingdata:
            self.result_info = vul_tag
如果说是keyword的话,他会检测那个analyzingdata数据是否在页面里,是的话返回结果是那个标签
下面的regex是通过在页面正则查找某个内容,然后返回结果
md5是通过对比页面的内容的md5和analyzingdata的差别,然后返回标签结果
elif 'KP-' in self.plugin_info['filename']:
  self.log(str(self.task_netloc) + 'call kunpeng - ' + self.plugin_info['filename'])
  kp.set_config(TIMEOUT, PASSWORD_DIC)
  if self.task_netloc[1] != 80:
    self.result_info = kp.check('service', '{}:{}'.format(
      self.task_netloc[0], self.task_netloc[1]), self.plugin_info['filename'])
    if not self.result_info:
      scheme = 'http'
      if self.task_netloc[1] == 443:
        scheme = 'https'
        self.result_info = kp.check('web', '{}://{}:{}'.format(
          scheme, self.task_netloc[0], self.task_netloc[1]), self.plugin_info['filename'])
这里的log方法通过上锁和开锁的方式来打印那个调用信息
这时候判断是否是80端口,如果不是的话调用kunpeng的check方法
def check(self, t, netloc, kpid):
  task_dic = {
    'type': t,
    'netloc': netloc,
    'target': kpid
  }
  r = json.loads(self.kunpeng.Check(json.dumps(task_dic)))
  result = ''
  if not r:
    return ''
  for v in r:
    result += v['remarks'] + ','
    return result
这里的Check方法找不到,但我推测应该是导入那个模块进行检测,然后返回remarks结果
如果发现check没有返回时,就认定他是web服务,通过设置协议、IP、端口号重新导入kunpeng::check()进行检测
else:  # 脚本检测模式
  plugin_filename = self.plugin_info['filename']
  self.log(str(self.task_netloc) + 'call ' + self.task_plugin)
  if task_plugin not in PLUGIN_DB:
    plugin_res = __import__(plugin_filename)
    setattr(plugin_res, "PASSWORD_DIC", PASSWORD_DIC)  # 给插件声明密码字典
    PLUGIN_DB[plugin_filename] = plugin_res
    self.result_info = PLUGIN_DB[plugin_filename].check(
      str(self.task_netloc[0]), int(self.task_netloc[1]), TIMEOUT)
    self.save_request()  # 保存结果
这边如果任务插件不在那个PLUGIN_DB的话
就动态import那个插件py文件
这个setattr(plugin_res, "PASSWORD_DIC", PASSWORD_DIC) # 给插件声明密码字典
是用来给弱口令啥的增加字典的
然后就是把import的那个py导入到一个字典里,然后调用那个py文件的check方法,这里随便拿一个举个例子
# coding:utf-8
# author:wolf
import urllib2


def get_plugin_info():
    plugin_info = {
        "name": "Axis2控制台弱口令",
        "info": "攻击者通过此漏洞可以登陆管理控制台,通过部署功能可直接获取服务器权限。",
        "level": "高危",
        "type": "弱口令",
        "author": "wolf@YSRC",
        "url": "http://www.codesec.net/view/247352.html",
        "keyword": "tag:axis",
        "source": 1
    }
    return plugin_info


def check(host, port, timeout):
    url = "http://%s:%d" % (host, int(port))
    error_i = 0
    flag_list = ['Administration Page</title>', 'System Components', '"axis2-admin/upload"',
                 'include page="footer.inc">', 'axis2-admin/logout']
    user_list = ['axis', 'admin', 'root']
    PASSWORD_DIC.append('axis2')
    for user in user_list:
        for password in PASSWORD_DIC:
            try:
                login_url = url + '/axis2/axis2-admin/login'
                PostStr = 'userName=%s&password=%s&submit=+Login+' % (user, password)
                request = urllib2.Request(login_url, PostStr)
                res = urllib2.urlopen(request, timeout=timeout)
                res_html = res.read()
            except urllib2.HTTPError, e:
                return
            except urllib2.URLError, e:
                error_i += 1
                if error_i >= 3:
                    return
                continue
            for flag in flag_list:
                if flag in res_html:
                    info = u'存在弱口令,用户名:%s,密码:%s' % (user, password)
                    return info
它上面的get_plugin_info是用来获取插件信息的,但在漏洞检测进程里面是没用的
他的检测很有意思,会有错误统计,超过三次以上就直接返回了,这里如果检测到了就直接返回那个信息
最后save_request函数保存结果
def save_request(self):
  if self.result_info:
    time_ = datetime.datetime.now()
    self.log(str(self.task_netloc) + " " + self.result_info)
    v_count = na_result.find(
      {"ip": self.task_netloc[0], "port": self.task_netloc[1], "info": self.result_info}).count()
    if not v_count:
      na_plugin.update({"name": self.task_plugin},
                       {"$inc": {'count': 1}})
      vulinfo = {"vul_name": self.plugin_info['name'], "vul_level": self.plugin_info['level'],
                 "vul_type": self.plugin_info['type']}
      w_vul = {"task_id": self.task_id, "ip": self.task_netloc[0], "port": self.task_netloc[1],
               "vul_info": vulinfo, "info": self.result_info, "time": time_,
               "task_date": TASK_DATE_DIC[str(self.task_id)]}
      na_result.insert(w_vul)
      # self.wx_send(w_vul)  # 自行定义漏洞提醒
这里大概就是先看看漏洞扫描结果数据库里有没有这条记录
没有的话就把Plugin库里的这个插件的扫到的漏洞的count + 1
使用$inc操作符将一个字段的值增加或者减少
{ $inc: { <field1>: <amount1>, <field2>: <amount2>, ... } }
然后就是把漏洞信息以及IP地址、端口啥的都插进Result数据库里
接下来看main函数
if __name__ == '__main__':
    init()
    PASSWORD_DIC, THREAD_COUNT, TIMEOUT, WHITE_LIST = get_config()
    thread.start_new_thread(monitor, ())
    thread.start_new_thread(kp_check, ())
    thread.start_new_thread(kp_update, ())
    while True:
        try:
            task_id, task_plan, task_target, task_plugin = queue_get()
            if task_id == '':
                time.sleep(10)
                continue
            if PLUGIN_DB:
                del sys.modules[PLUGIN_DB.keys()[0]]  # 清理插件缓存
                PLUGIN_DB.clear()
            for task_netloc in task_target:
                while True:
                    if int(thread._count()) < THREAD_COUNT:
                        if task_netloc[0] in WHITE_LIST:
                            break
                        try:
                            thread.start_new_thread(
                                vulscan, (task_id, task_netloc, task_plugin))
                        except Exception as e:
                            print e
                        break
                    else:
                        time.sleep(2)
            if task_plan == 0:
                na_task.update({"_id": task_id}, {"$set": {"status": 2}})
        except Exception as e:
            print e
这里先看看init函数
def init():
    time_ = datetime.datetime.now()
    if na_plugin.find().count() >= 1:
        return
    install_kunpeng_plugin()
这里如果插件数大于一个的话,就直接return
script_plugin = []
json_plugin = []
print 'init plugins'
file_list = os.listdir(sys.path[0] + '/vuldb')
for filename in file_list:
  try:
    if filename.split('.')[1] == 'py':
      script_plugin.append(filename.split('.')[0])
      if filename.split('.')[1] == 'json':
        json_plugin.append(filename)
        except:
          pass
然后就是把vuldb下的文件前缀给提取出来,然后存到两个相应的列表里
for plugin_name in script_plugin:
  try:
    res_tmp = __import__(plugin_name)
    plugin_info = res_tmp.get_plugin_info()
    plugin_info['add_time'] = time_
    plugin_info['filename'] = plugin_name
    plugin_info['count'] = 0
    na_plugin.insert(plugin_info)
    except:
      pass
然后对于py的文件,动态加载,然后获得插件信息,插入时间、插件文件名还有个数count,最后把这个插入到Plugin中
同理对于json文件
for plugin_name in json_plugin:
  try:
    json_text = open(sys.path[0] + '/vuldb/' + plugin_name, 'r').read()
    plugin_info = json.loads(json_text)
    plugin_info['add_time'] = time_
    plugin_info['filename'] = plugin_name
    plugin_info['count'] = 0
    del plugin_info['plugin']
    na_plugin.insert(plugin_info)
    except:
      pass
原理一致,都是读取json文件然后把信息写入Plugin,不过插入之前把plugin这个给删掉了
然后就是安装kunpeng-plugin
def install_kunpeng_plugin():
    time_ = datetime.datetime.now()
    for plugin in kp.get_plugin_list():
        level_list = ['紧急','高危','中危','低危','提示']
        plugin_info = {
            '_id': plugin['references']['kpid'],
            'name': 'Kunpeng -' + plugin['name'],
            'info': plugin['remarks'] + ' ' + plugin['references']['cve'],
            'level': level_list[int(plugin['level'])],
            'type': plugin['type'],
            'author': plugin['author'],
            'url': plugin['references']['url'],
            'source': 1,
            'keyword': '',
            'add_time': time_,
            'filename': plugin['references']['kpid'],
            'count': 0
        }
        na_plugin.insert(plugin_info)
获得这些信息后插入到Plugin当中
然后获取配置信息,包括PASSWORD_DIC, THREAD_COUNT, TIMEOUT, WHITE_LIST
启动了三个线程
thread.start_new_thread(monitor, ())
thread.start_new_thread(kp_check, ())
thread.start_new_thread(kp_update, ())
这里看看三个函数的作用
def monitor():
    global PASSWORD_DIC, THREAD_COUNT, TIMEOUT, WHITE_LIST
    while True:
        queue_count = na_task.find({"status": 0, "plan": 0}).count()
        if queue_count:
            load = 1
        else:
            ac_count = thread._count()
            load = float(ac_count - 6) / THREAD_COUNT
        if load > 1:
            load = 1
        if load < 0:
            load = 0
        na_heart.update({"name": "load"}, {
                        "$set": {"value": load, "up_time": datetime.datetime.now()}})
        PASSWORD_DIC, THREAD_COUNT, TIMEOUT, WHITE_LIST = get_config()
        if load > 0:
            time.sleep(8)
        else:
            time.sleep(60)
这里是心跳检测的,大概是如果判断有执行的任务的话,就设置load为1,否则就为0
然后对Heart进行更新,然后重新获取PASSWORD_DIC, THREAD_COUNT, TIMEOUT, WHITE_LIST
如果有任务执行的话,就每隔8秒就检测一次心跳,否则的话就60秒检测一次心跳
def kp_check():
    while True:
        try:
            new_release = kp.check_version()
            print new_release
            if new_release:
                info = new_release['body']
                if '###' in new_release['body']:
                    info = new_release['body'].split('###')[1]
                row = {
                    'info': info,
                    'isInstall': 0,
                    'name': new_release['name'],
                    'author': new_release['author']['login'],
                    'pushtime': new_release['published_at'],
                    'location': "",
                    'unicode': new_release['tag_name'],
                    'coverage': 0,
                    'source': 'kunpeng'
                }
                na_update.insert(row)
                time.sleep(60 * 60 * 48)
        except Exception as e:
            print e
        time.sleep(60 * 30)
body的值如下:
"body": "### 插件更新rn增加 Atlassian Confluence Widget Connector macro RCE漏洞检测插件 CVE-2019-3396 @ywolf rn增加 Microsoft Remote Desktop RCE漏洞检测插件 CVE-2019-0708 @Medicean rnrn### 代码更新rn修复 go并发调用时出现goroutine leak问题 @l3m0n rn修复 加载json插件内存未释放问题 @l3m0n rnrn### 其他rn无"
然后对kunpeng的安装状态进行删除,重新写入kunpeng的插件信息
def kp_update():
    while True:
        try:
            row = na_update.find_one_and_delete(
                {'source': 'kunpeng', 'isInstall': 1})
            if row:
                kp.update_version(row['unicode'])
                na_plugin.delete_many({'_id':re.compile('^KP')})
                install_kunpeng_plugin()
        except Exception as e:
            print e
        time.sleep(10)
这一步需要配合view.py里面的对安装状态更改后,才能让isInstall变成1,这时候才能删除
然后是获取任务队列信息
def queue_get():
    global TASK_DATE_DIC
    task_req = na_task.find_and_modify(query={"status": 0, "plan": 0}, update={
                                       "$set": {"status": 1}}, sort={'time': 1})
    if task_req:
        TASK_DATE_DIC[str(task_req['_id'])] = datetime.datetime.now()
        return task_req['_id'], task_req['plan'], task_req['target'], task_req['plugin']
    else:
        task_req_row = na_task.find({"plan": {"$ne": 0}})
        if task_req_row:
            for task_req in task_req_row:
                if (datetime.datetime.now() - task_req['time']).days / int(task_req['plan']) >= int(task_req['status']):
                    if task_req['isupdate'] == 1:
                        task_req['target'] = update_target(
                            json.loads(task_req['query']))
                        na_task.update({"_id": task_req['_id']}, {
                                       "$set": {"target": task_req['target']}})
                    na_task.update({"_id": task_req['_id']}, {
                                   "$inc": {"status": 1}})
                    TASK_DATE_DIC[str(task_req['_id'])
                                  ] = datetime.datetime.now()
                    return task_req['_id'], task_req['plan'], task_req['target'], task_req['plugin']
        return '', '', '', ''
大概逻辑是先查询是否有任务,有的话把状态status改成1,然后设置任务的时间为当前时间,返回查询到的编号、计划、目标以及使用的插件等等
要是没找到状态不是在计划当中的任务(plan!=0)
然后就会把查询到的写入到数据库当中(待补充)
task_id, task_plan, task_target, task_plugin = queue_get()
            if task_id == '':
                time.sleep(10)
                continue
            if PLUGIN_DB:
                del sys.modules[PLUGIN_DB.keys()[0]]  # 清理插件缓存
                PLUGIN_DB.clear()
            for task_netloc in task_target:
                while True:
                    if int(thread._count()) < THREAD_COUNT:
                        if task_netloc[0] in WHITE_LIST:
                            break
                        try:
                            thread.start_new_thread(
                                vulscan, (task_id, task_netloc, task_plugin))
                        except Exception as e:
                            print e
                        break
                    else:
                        time.sleep(2)
            if task_plan == 0:
                na_task.update({"_id": task_id}, {"$set": {"status": 2}})
        except Exception as e:
            print e
如果说这时候没有任务的话,就会sleep(10)
然后下面两句删除了插件的缓存,因为Vulscan中一个插件是被多个目标调用,所以PLUGIN_DB.keys()是唯一的,然后清空PLUGIN_DB字典的值(为了加载最新的插件)
然后针对没一个目标for循环读取,当当前线程数小于设置的线程总数时候,才会添加线程,并且对于白名单的目标是不会添加线程的
然后对于每一个目标都实例化一个vulscan类,并启动新的线程进行扫描
下面的if判断用来设置扫描的优先级(这里得配合前端看看)
资产搜集模块
框架目录
.
├── lib
│   ├── __init__.py
│   ├── cidr.py
│   ├── common.py
│   ├── icmp.py
│   ├── log.py
│   ├── mongo.py
│   ├── scan.py
│   └── start.py
├── nascan.py
└── plugin
    └── masscan.py
主函数
CONFIG_INI = get_config()  # 读取配置
def get_config():
    config = {}
    config_info = mongo.na_db.Config.find_one({"type": "nascan"})
    for name in config_info['config']:
        if name in ['Discern_cms', 'Discern_con', 'Discern_lang', 'Discern_server']:
            config[name] = format_config(name, config_info['config'][name]['value'])
        else:
            config[name] = config_info['config'][name]['value']
    return config
大概意思是从数据库里找到type为nascan的集合
{
    "type": "nascan",
    "config": {
        "Scan_list": {
            "value": "",
            "info": "网络资产探测列表(必填)",
            "help": "指定爬虫引擎探测范围,格式:192.168.1.1-192.168.1.254(修改会立刻触发资产扫描收集)"
        },
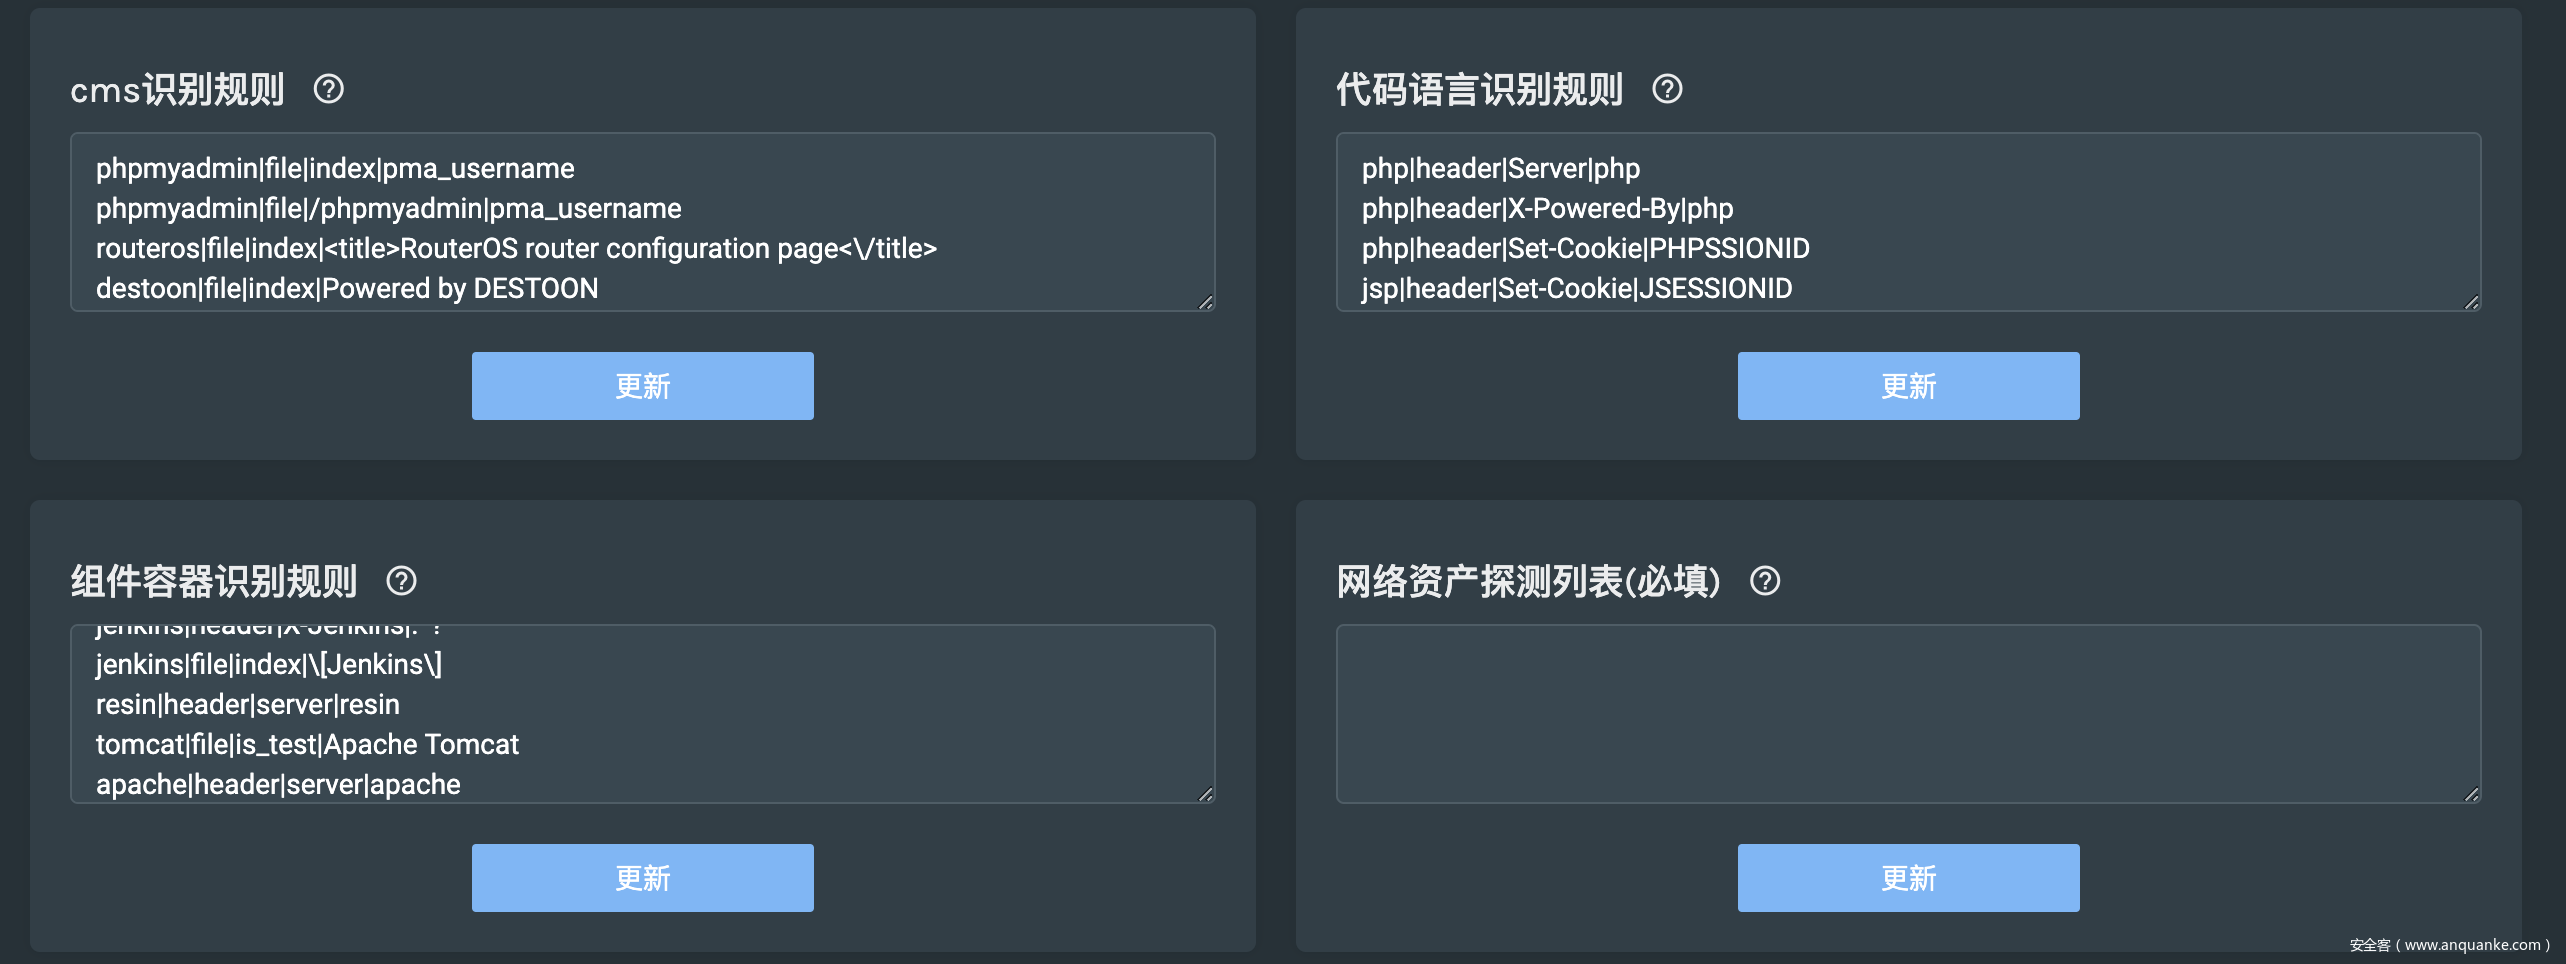
        "Discern_cms": {
            "value": "phpmyadmin|file|index|pma_usernamenphpmyadmin|file|/phpmyadmin|pma_usernamenrouteros|file|index|<title>RouterOS router configuration page<\/title>ndestoon|file|index|Powered by DESTOONndestoon|file|index|DESTOON B2B SYSTEMnU-mail|file|index|Power(ed)? by[^>]+U-MailnWinmail|file|index|Winmail Mail ServernCoremail|file|index|Coremail[^>]+<\/title>nWinmail|header|Set-Cookie|magicwinmailnWinmail|file|index|Powered by Winmail ServernTurboMail|file|index|Powered by TurboMail nXmail|file|index|\d{4}-\d{4}\s*webmail.idccenter.netnoutlook|header|X-OWA-Version|.*?noutlook|file|index|Outlook Web (Access|App)\s*(?=<\/title>)nAnymacro|header|Server|AnyWebAppnAnymacro|file|index|sec.anymacro.comnExtMail|file|index|powered by.*?ExtmailnLotus|file|index|IBM Lotus iNotes[^>]+(?=<\/title>)nLotus|file|index|iwaredir.nsfnSquirrelMail|file|index|SquirrelMail Project TeamnSquirrelMail|header|Set-Cookie|SQMSESSIDnSquirrelMail|file|index|SquirrelMailneqmail|file|index|Powered by EQMailnTMailer|file|index|TMailer Collaboration Suite Web Client nzimbra|header|Set-Cookie|ZM_TESTnzimbra|file|index|zimbra[^>]+(?=<\/title>)nzimbra|file|index|Zimbra,?\s*Inc. All rights reserved.nbxemail|file|index|abc@bxemail.comnHorde|file|index|<title>[^>]+?HordenHorde|file|index|\/themes\/graphics\/horde-power1.pngnAtmail|file|index|powered by AtmailnIlohaMail|header|Set-Cookie|IMAIL_TEST_COOKIEnIlohaMail|header|SESS_KEY|.*?nIlohaMail|file|index|powered by[^>]+IlohaMailnfangmail|file|index|fangmailnRoundcube|file|index|Roundcubenmailbase|header|Set-Cookie|\s*(mb_lang|mb_ui_type|mb_cus_type)nmailbase|file|index|MailBase[^<>]+(?=<\/title>)nKXmail|file|index|Powered By\s?<[^>]+>\s?KXmailntongda|file|index|href="/images/tongda\.ico"ntrs_wcm|file|index|<title[^>]+>TRS WCM[^<]+</title>ntrs_wcm|file|index|href="/wcm/console/auth/reg_newuser.jsp"nmymps|file|index|powered by[^&]+Mymps.*?nmymps|file|index|wcontent="mympsnmailgard|file|index|mailgard\swebmailndiscuz|file|/robots.txt|discuzndiscuz|file|/robots.txt|discuznphpwind|file|/robots.txt|phpwindnphpcms|file|/robots.txt|phpcmsnphp168|file|/robots.txt|php168nqibosoft|file|/robots.txt|qibocmsnemlog|file|/robots.txt|robots.txt for emlognwecenter|file|/robots.txt|robots.txt for wecenternbbsmax|file|/robots.txt|bbsmaxnshopnc|file|/robots.txt|robots.txt for shopncnhdwike|file|/robots.txt|robots.txt for hdwikinphpdisk|file|/robots.txt|PHPDiskndedecms|file|/data/admin/ver.txt|20110812ndedecms|file|/data/admin/ver.txt|20111111ndedecms|file|/data/admin/ver.txt|20120709ndedecms|file|/data/admin/ver.txt|20140814ndedecms|file|/data/admin/verifies.txt|20081204ndedecms|file|/data/admin/verifies.txt|20100324ndedecms|file|/data/admin/verifies.txt|20100514ndedecms|file|/data/admin/verifies.txt|20110216nwordpress|file|/robots.txt|wordpressnwordpress|file|/license.txt|wordpressnwordpress|file|/readme.txt|wordpressnwordpress|file|/help.txt|wordpressnwordpress|file|/readme.html|wordpressnwordpress|file|/wp-admin/css/colors-classic.css|wordpressnwordpress|file|/wp-admin/js/media-upload.dev.js|wordpressnwordpress|file|/wp-content/plugins/akismet/akismet.js|wordpressnwordpress|file|/wp-content/themes/classic/rtl.css|wordpressnwordpress|file|/wp-includes/css/buttons.css|wordpressnz-blog|file|/license.txt|z-bolgnz-blog|file|/SCRIPT/common.js|z-bolgnsouthidc|file|/Ads/left.js|southidcnsouthidc|file|/Css/Style.css|southidcnsouthidc|file|/Images/ad.js|southidcnsouthidc|file|/Script/Html.js|southidcnsiteserver|file|/robots.txt|\/SiteFiles\/nsiteserver|file|/SiteFiles/Inner/Register/script.js|stlUserRegisternenableq|file|/License/index.php|<td>EnableQnenableq|file|/robots.txt|robots.txt for EnableQntrs_wcm|file|/wcm/app/login.jsp|TRS WCMntrs_wcm|file|/wcm/app/login.jsp|href="/wcm/console/auth/reg_newuser.jsp"nmymps|file|/robots.txt|mympsnigenus|file|/help/|igenusnmailgard|file|/help/io_login.html|webmail",
            "info": "cms识别规则",
            "help": "用于识别WEB的CMS,格式:CMS名称|判断方式|判断对象|判断正则。识别信息保存于tag记录中,可使用tag:dedecms方式进行搜索。"
        },
        "Discern_con": {
            "value": "jboss|header|X-Powered-By|jbossnjboss|file|jboss.css|youcandoit.jpgnjboss|file|is_test|JBossWebnaxis|file|axis2|axis2-web/images/axis_l.jpgnweblogic|file|is_test|Hypertext Transfer Protocolnweblogic|file|console/css/login.css|Login_GC_LoginPage_Bg.gifnglassfish|file|resource/js/cj.js|glassfish.dev.java.netnglassfish|header|server|GlassFishnjenkins|header|X-Jenkins|.*?njenkins|file|index|\[Jenkins\]nresin|header|server|resinntomcat|file|is_test|Apache Tomcatnapache|header|server|apacheniis|header|server|iisnjetty|header|server|jettynnginx|header|server|nginxncisco|header|server|cisconcouchdb|header|server|couchdbntplink|header|WWW-Authenticate|TP-LINKnh3c|header|WWW-Authenticate|h3cnh3c|file|index|/web/device/loginnhuawei|header|WWW-Authenticate|huaweinnetgear|header|WWW-Authenticate|netgearnhikvision|header|server|DNVRS-Websnhikvision|header|server|App-websnhikvision|header|server|DVRDVS-Websnhikvision|header|server|Hikvision-Websntengine|header|server|Tengine",
            "info": "组件容器识别规则",
            "help": "用于识别WEB的容器、中间件等组件信息,格式:组件名称|判断方式|判断对象|判断正则。识别信息保存于tag记录中,可使用tag:tomcat方式进行搜索。"
        },
        "Discern_lang": {
            "value": "php|header|Server|phpnphp|header|X-Powered-By|phpnphp|header|Set-Cookie|PHPSSIONIDnjsp|header|Set-Cookie|JSESSIONIDnasp|header|Set-Cookie|ASPSESSIONnaspx|header|Set-Cookie|ASP.NET_SessionIdnaspx|header|X-AspNet-Version|versionnaspx|file|index|<input[^>]+name=\"__VIEWSTATEnaspx|file|index|<a[^>]*?href=('|")[^http].*?\.aspx(\?|\1)nasp|file|index|<a[^>]*?href=('|")[^http].*?\.asp(\?|\1)nphp|file|index|<a[^>]*?href=('|")[^http].*?\.php(\?|\1)njsp|file|index|<a[^>]*?href=('|")[^http].*?\.jsp(\?|\1)",
            "info": "代码语言识别规则",
            "help": "用于识别WEB的开发语言,识别信息保存于tag记录中,可使用tag:php方式进行搜索。"
        },
        "Discern_server": {
            "value": "ftp|21|banner|^220.*?ftp|^220-|^220 Service|^220 FileZillanssh|22|banner|^ssh-ntelnet|23|banner|^\xff[\xfa-\xfe]|^\x54\x65\x6c|Telnetnsmtp|25|banner|^220.*?smtpndns|53|default|npop3|110|banner|\+OK.*?pop3nnetbios|139|default|nimap|143|banner|^\* OK.*?imapnldap|389|default|nsmb|445|default|nsmtps|465|default|nrsync|873|banner|^@RSYNCD|^@ERRORnimaps|993|default|npop3|995|banner|\+OKnproxy|1080|\x05\x01\x00\x01|^\x05\x00npptp|1723|default|nmssql|1433|\x12\x01\x00\x34\x00\x00\x00\x00\x00\x00\x15\x00\x06\x01\x00\x1b\x00\x01\x02\x00\x1c\x00\x0c\x03\x00\x28\x00\x04\xff\x08\x00\x01\x55\x00\x00\x00\x4d\x53\x53\x51\x4c\x53\x65\x72\x76\x65\x72\x00\x48\x0f\x00\x00|^\x04\x01noracle|1521|\x00\x3a\x00\x00\x01\x00\x00\x00\x01\x39\x01\x2c\x00\x00\x08\x00\x7f\xff\xc6\x0e\x00\x00\x01\x00\x00\x00\x00\x3a\x00\x00\x08\x00\x41\x41\x00\x00\x00\x00\x00\x00\x00\x00\x00\x00\x00\x00\x00\x00\x00\x00\x00\x00\x00\x00\x00\x00\x00\x00|\x00Y\x00nmysql|3306|banner|^.\0\0\0.*?mysql|^.\0\0\0\n|.*?MariaDB servernrdp|3389|\x03\x00\x00\x13\x0E\xE0\x00\x00\x00\x00\x00\x01\x00\x08\x00\x03\x00\x00\x00|\x03\x00\x00\x13nsvn|3690|default|npostgresql|5432|\x00\x00\x00\x54\x00\x03\x00\x00\x75\x73\x65\x72\x00\x70\x6f\x73\x74\x67\x72\x65\x73\x00\x64\x61\x74\x61\x62\x61\x73\x65\x00\x70\x6f\x73\x74\x67\x72\x65\x73\x00\x61\x70\x70\x6c\x69\x63\x61\x74\x69\x6f\x6e\x5f\x6e\x61\x6d\x65\x00\x70\x73\x71\x6c\x00\x63\x6c\x69\x65\x6e\x74\x5f\x65\x6e\x63\x6f\x64\x69\x6e\x67\x00\x55\x54\x46\x38\x00\x00|^R\x00\x00\x00nvnc|5900|banner|^RFBnredis|6379|info\r\n|redisnelasticsearch|9200|GET /_cat HTTP/1.1\r\n\r\n|/_cat/masternmemcache|11211|\x80\x0b\x00\x00\x00\x00\x00\x00\x00\x00\x00\x00\x00\x00\x00\x00\x00\x00\x00\x00\x00\x00\x00\x00|^\x81\x0bnmongodb|27017|\x00\x00\x00\xa7A\x00\x00\x00\x00\x00\x00\xd4\x07\x00\x00\x00\x00\x00\x00admin.$cmd\x00\x00\x00\x00\x00\xff\xff\xff\xff\x13\x00\x00\x00\x10ismaster\x00\x01\x00\x00\x00\x00|ismasternzookeeper|2181|stat|Zookeeper version",
            "info": "服务类型识别规则",
            "help": "用于识别开放端口上所运行的服务信息,格式:服务名称|端口号|匹配模式|匹配正则,结果以正则匹配为优先,无正则内容时使用端口号进行默认匹配,再无结果时即主动发送探测包进行识别,识别结果保存于server记录中,可使用server:ftp方式进行搜索"
        },
        "Port_list": {
            "value": "1|21n22n23n25n53n80n110n139n143n389n443n445n465n873n993n995n1080n1311n1723n1433n1521n3000n3001n3002n3306n3389n3690n4000n5432n5900n6379n7001n8000n8001n8080n8081n8888n9200n9300n9080n9090n9999n11211n27017",
            "info": "端口探测列表(TCP探测)",
            "help": "默认探测端口列表,可开启ICMP,开启后只对存活的IP地址进行探测"
        },
        "Masscan": {
            "value": "0|20000|/root/xunfeng/masscan/linux_64/masscan",
            "info": "启用MASSCAN",
            "help": "可启用MASSCAN(自行安装)代替默认的端口扫描方式,路径地址需配置全路径,MASSCAN探测端口范围为1-65535且强制进行ICMP存活检测,请根据网络实际情况设置发包速率。"
        },
        "Timeout": {
            "value": "8",
            "info": "连接超时时间(TCP)",
            "help": "WEB请求的超时时间,socket连接超时为值的一半。"
        },
        "Cycle": {
            "value": "1|9",
            "info": "资产探测周期",
            "help": "设置资产探测的扫描周期,格式:天数|小时,例如 5|16,即每5天的16点开始进行扫描。"
        },
        "Thread": {
            "value": "200",
            "info": "最大线程数",
            "help": "爬虫引擎的最大线程数限制"
        },
        "White_list": {
            "value": "",
            "info": "资产发现白名单",
            "help": "不对白名单内的IP列表进行资产发现。格式:x.x.x.x,以行分割"
        }
    }
}
然后判断是否为['Discern_cms', 'Discern_con', 'Discern_lang', 'Discern_server']这里面的集合
这里分类如下:
-
Discern_cms:cms识别规则 -
Discern_con:组件容器识别规则 -
Discern_lang:代码语言识别规则 -
Discern_server:服务类型识别规则
是的话就进行config格式化处理:
def format_config(config_name, config_info):
    mark_list = []
    try:
        config_file = config_info.split('n')
        if config_name == 'Discern_server':
            for mark in config_file:
                name, port, mode, reg = mark.strip().split("|", 3)
                mark_list.append([name, port, mode, reg])
        else:
            for mark in config_file:
                name, location, key, value = mark.strip().split("|", 3)
                mark_list.append([name.lower(), location, key, value])
    except Exception, e:
        print e
    return mark_list
先每一行分开
如果是服务类型识别规则,就分割成name, port, mode, reg
不是服务类型识别规则的话,就分割成name, location, key, value
然后根据列表方式返回到一个新的列表,最后返回总列表
如果不在这几个识别类型里的话,就直接返回他的查询的value,就比如:
"Timeout": {
  "value": "8",
  "info": "连接超时时间(TCP)",
  "help": "WEB请求的超时时间,socket连接超时为值的一半。"
},
它实际上就是在设置这一块部分
STATISTICS = get_statistics()  # 读取统计信息
def get_statistics():
    date_ = datetime.datetime.now().strftime('%Y-%m-%d')
    now_stati = mongo.na_db.Statistics.find_one({"date": date_})
    if not now_stati:
        now_stati = {date_: {"add": 0, "update": 0, "delete": 0}}
        return now_stati
    else:
        return {date_: now_stati['info']}
根据年月日来读取,所以说他数据不能实时更新,只能每天更新一次统计信息
def monitor(CONFIG_INI, STATISTICS, NACHANGE):
    while True:
        try:
            time_ = datetime.datetime.now()
            date_ = time_.strftime('%Y-%m-%d')
            mongo.na_db.Heartbeat.update({"name": "heartbeat"}, {"$set": {"up_time": time_}})
            if date_ not in STATISTICS: STATISTICS[date_] = {"add": 0, "update": 0, "delete": 0}
            mongo.na_db.Statistics.update({"date": date_}, {"$set": {"info": STATISTICS[date_]}}, upsert=True)
            new_config = get_config()
            if base64.b64encode(CONFIG_INI["Scan_list"]) != base64.b64encode(new_config["Scan_list"]):NACHANGE[0] = 1
            CONFIG_INI.clear()
            CONFIG_INI.update(new_config)
        except Exception, e:
            print e
        time.sleep(30)
它是对之前的配置信息和统计信息做心跳检测的(每隔30秒)
大概逻辑是判断是否扫描列表更新了,更新了的话就更新字典,设置NACHANGE[0]=1
并且把原先的设置清除了,然后重新获取数据
thread.start_new_thread(cruise, (STATISTICS, MASSCAN_AC))  # 失效记录删除线程
def cruise(STATISTICS,MASSCAN_AC):
    while True:
        now_str = datetime.datetime.now()
        week = int(now_str.weekday())
        hour = int(now_str.hour)
        if week >= 1 and week <= 5 and hour >= 9 and hour <= 18:  # 非工作时间不删除
            try:
                data = mongo.NA_INFO.find().sort("time", 1)
                for history_info in data:
                    while True:
                        if MASSCAN_AC[0]:  # 如果masscan正在扫描即不进行清理
                            time.sleep(10)
                        else:
                            break
                    ip = history_info['ip']
                    port = history_info['port']
                    try:
                        sock = socket.socket(socket.AF_INET, socket.SOCK_STREAM)
                        sock.connect((ip, int(port)))
                        sock.close()
                    except Exception, e:
                        time_ = datetime.datetime.now()
                        date_ = time_.strftime('%Y-%m-%d')
                        mongo.NA_INFO.remove({"ip": ip, "port": port})
                        log.write('info', None, 0, '%s:%s delete' % (ip, port))
                        STATISTICS[date_]['delete'] += 1
                        del history_info["_id"]
                        history_info['del_time'] = time_
                        history_info['type'] = 'delete'
                        mongo.NA_HISTORY.insert(history_info)
            except:
                pass
        time.sleep(3600)
大概逻辑就是判断是否为工作时间或者MASSCAN是否在扫描,然后通过与这些ip和端口尝试进行socket连接来判断是否存活
通过异常捕捉来实现删除,然后写入删除记录
while True:
  now_time = time.localtime()
  now_hour = now_time.tm_hour
  now_day = now_time.tm_mday
  now_date = str(now_time.tm_year) +
  str(now_time.tm_mon) + str(now_day)
  cy_day, ac_hour = CONFIG_INI['Cycle'].split('|')
  log.write('info', None, 0, u'扫描规则: ' + str(CONFIG_INI['Cycle']))
  # 判断是否进入扫描时段
  if (now_hour == int(ac_hour) and now_day % int(cy_day) == 0 and now_date not in ac_data) or NACHANGE[0]:
    ac_data.append(now_date)
    NACHANGE[0] = 0
    log.write('info', None, 0, u'开始扫描')
    s = start(CONFIG_INI)
    s.masscan_ac = MASSCAN_AC
    s.statistics = STATISTICS
    s.run()
    time.sleep(60)
先是拼接当前时间,然后获取计划资产扫描的周期
然后写入log当中
然后判断是否为当前计划扫描周期的时间或者有新的扫描任务(通过心跳检测来设置)
(now_hour == int(ac_hour) and now_day % int(cy_day) == 0 and now_date not in ac_data) or NACHANGE[0]
然后就把当前的时间加入ac_data列表,把NACHANGE[0]重置为0,写入日志当中,开始扫描
start.py
s = start(CONFIG_INI)
s.masscan_ac = MASSCAN_AC
s.statistics = STATISTICS
s.run()
这个类有点多,我们分开来看
__init__
def __init__(self, config):  # 默认配置
  self.config_ini = config
  self.queue = Queue.Queue()
  self.thread = int(self.config_ini['Thread'])
  self.scan_list = self.config_ini['Scan_list'].split('n')
  self.mode = int(self.config_ini['Masscan'].split('|')[0])
  self.icmp = int(self.config_ini['Port_list'].split('|')[0])
  self.white_list = self.config_ini.get('White_list', '').split('n')
读取了扫描的配置信息,然后设置了一个队列,读取了扫描线程、IP列表、Masscan配置信息、端口信息以及白名单
"Scan_list": {
  "value": "",
  "info": "网络资产探测列表(必填)",
  "help": "指定爬虫引擎探测范围,格式:192.168.1.1-192.168.1.254(修改会立刻触发资产扫描收集)"
},
"Masscan": {
  "value": "0|20000|/root/xunfeng/masscan/linux_64/masscan",
  "info": "启用MASSCAN",
  "help": "可启用MASSCAN(自行安装)代替默认的端口扫描方式,路径地址需配置全路径,MASSCAN探测端口范围为1-65535且强制进行ICMP存活检测,请根据网络实际情况设置发包速率。"
},
"Port_list": {
  "value": "1|21n22n23n25n53n80n110n139n143n389n443n445n465n873n993n995n1080n1311n1723n1433n1521n3000n3001n3002n3306n3389n3690n4000n5432n5900n6379n7001n8000n8001n8080n8081n8888n9200n9300n9080n9090n9999n11211n27017",
  "info": "端口探测列表(TCP探测)",
  "help": "默认探测端口列表,可开启ICMP,开启后只对存活的IP地址进行探测"
},
"White_list": {
  "value": "",
  "info": "资产发现白名单",
  "help": "不对白名单内的IP列表进行资产发现。格式:x.x.x.x,以行分割"
}
def run(self):
    global AC_PORT_LIST
    all_ip_list = []
    for ip in self.scan_list:
        if "/" in ip:
            ip = cidr.CIDR(ip)
        if not ip:
            continue
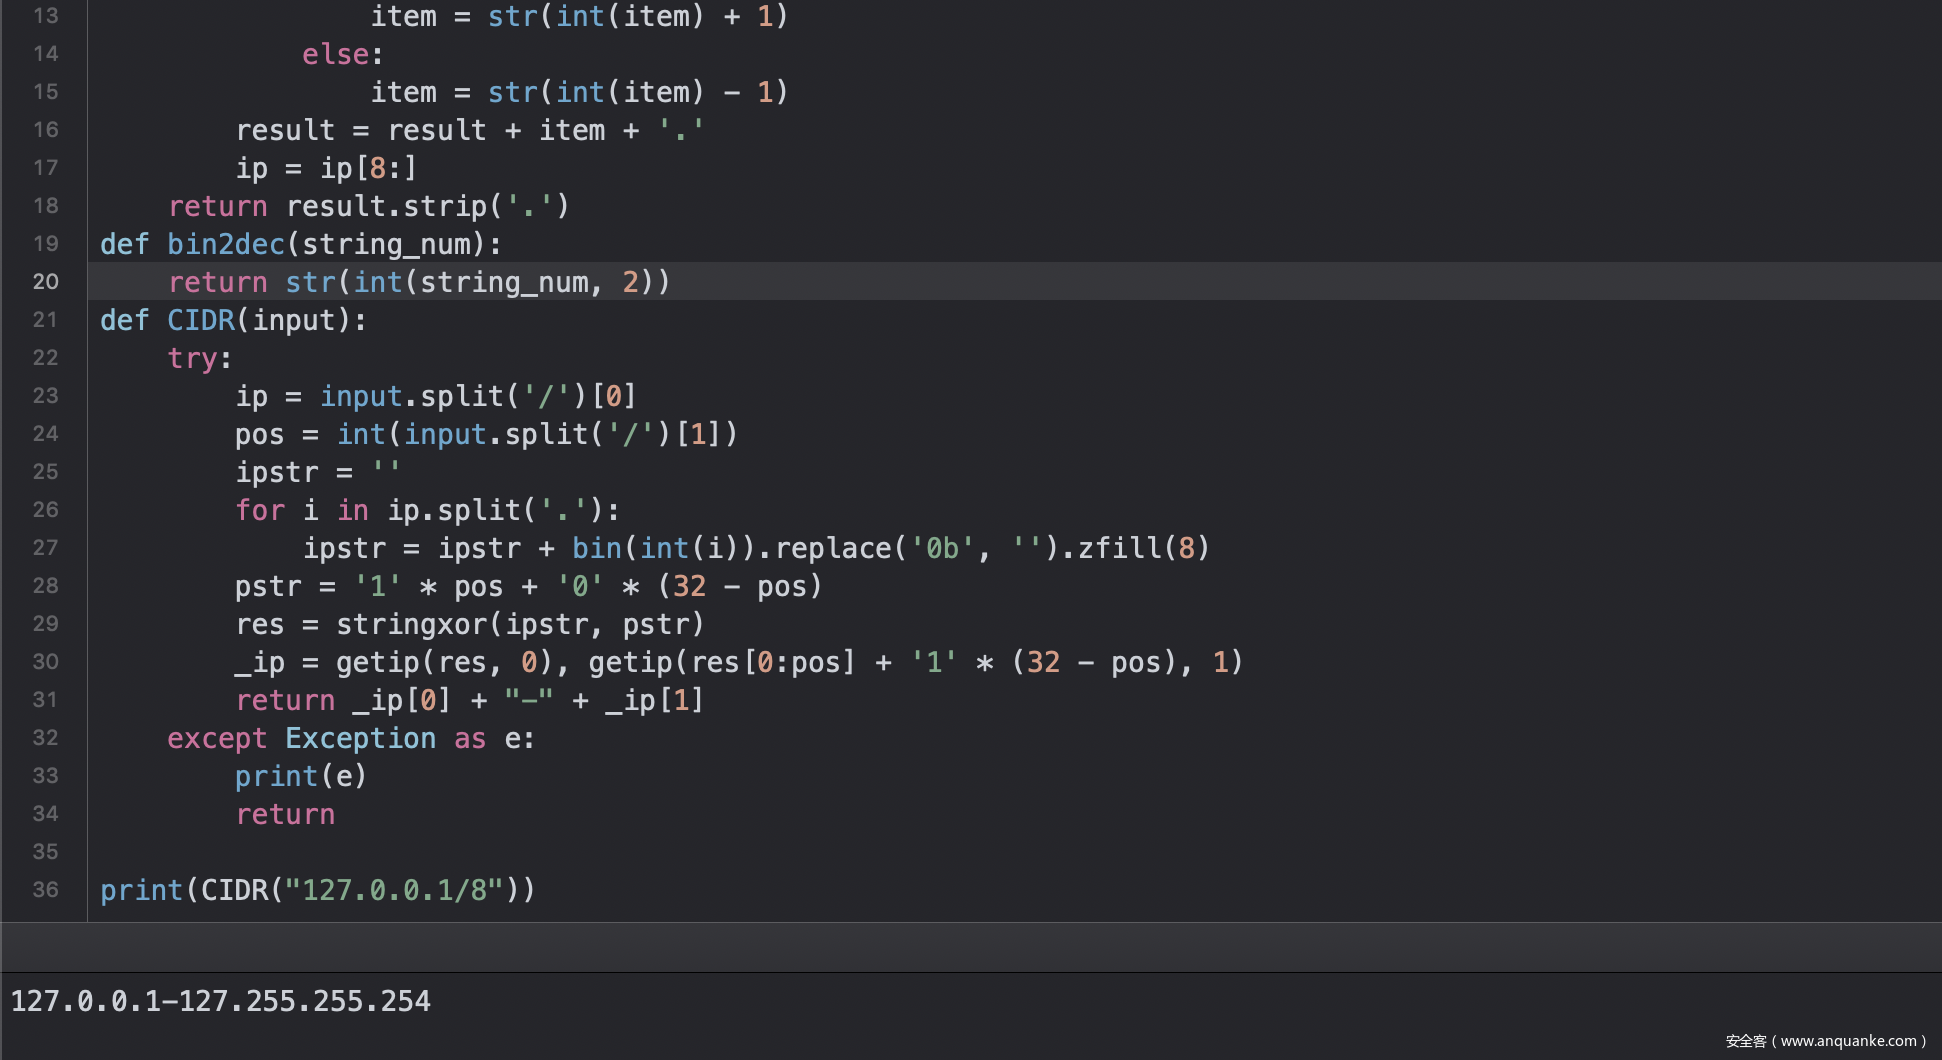
cidr.CIDR(ip)这个我想了一会才发现这是子网掩码IP转IP段的
def CIDR(input):
    try:
        ip = input.split('/')[0]
        pos = int(input.split('/')[1])
        ipstr = ''
        for i in ip.split('.'):
            ipstr = ipstr + bin(int(i)).replace('0b', '').zfill(8)
        pstr = '1' * pos + '0' * (32 - pos)
        res = stringxor(ipstr, pstr)
        _ip = getip(res, 0), getip(res[0:pos] + '1' * (32 - pos), 1)
        return _ip[0] + "-" + _ip[1]
    except:
        return
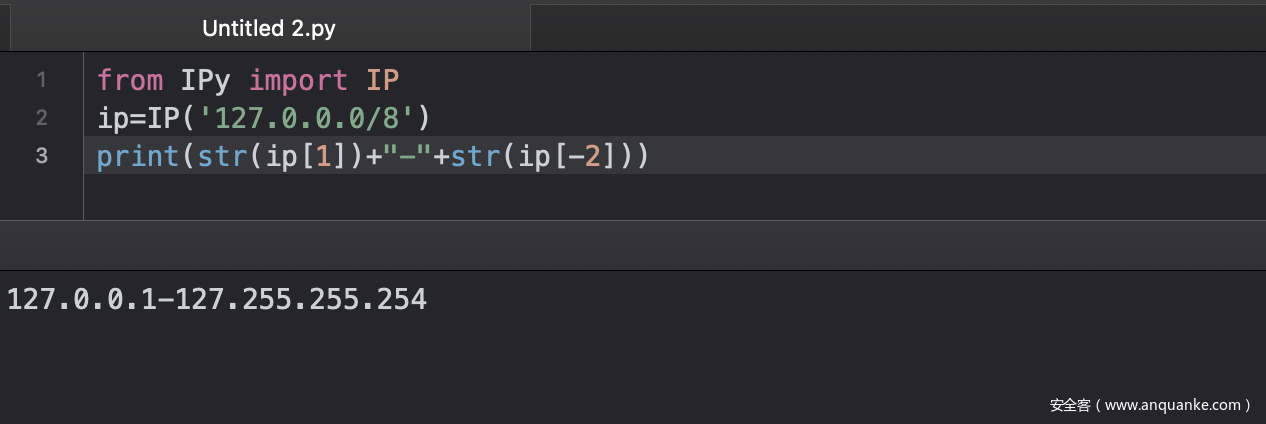
但这里我推荐使用IPy这个库
重复造轮子会导致效率低下
然后根据白名单删除
for white_ip in self.white_list:
  if white_ip in ip_list:
    ip_list.remove(white_ip)
然后看是否启用Masscan
我们这里先看启用Masscan的情况
            if self.mode == 1:
                masscan_path = self.config_ini['Masscan'].split('|')[2]
                masscan_rate = self.config_ini['Masscan'].split('|')[1]
                # 如果用户在前台关闭了ICMP存活探测则进行全IP段扫描
                if self.icmp:
                    ip_list = self.get_ac_ip(ip_list)
                self.masscan_ac[0] = 1
                # 如果安装了Masscan即使用Masscan进行全端口扫描
                AC_PORT_LIST = self.masscan(
                    ip_list, masscan_path, masscan_rate)
                if not AC_PORT_LIST:
                    continue
                self.masscan_ac[0] = 0
                for ip_str in AC_PORT_LIST.keys():
                    self.queue.put(ip_str)  # 加入队列
                self.scan_start()  # 开始扫描
            else:
                all_ip_list.extend(ip_list)
读取了masscan的路径以及发包速率
然后判断是否icmp存活检测
ip_list = self.get_ac_ip(ip_list)
    def get_ac_ip(self, ip_list):
        try:
            s = icmp.Nscan()
            ipPool = set(ip_list)
            return s.mPing(ipPool)
        except Exception, e:
            print 'The current user permissions unable to send icmp packets'
            return ip_list
这里看一下icmp的扫描流程
icmp.py
class SendPingThr(threading.Thread):
    def __init__(self, ipPool, icmpPacket, icmpSocket, timeout=3):
        threading.Thread.__init__(self)
        self.Sock = icmpSocket
        self.ipPool = ipPool
        self.packet = icmpPacket
        self.timeout = timeout
        self.Sock.settimeout(timeout + 1)

    def run(self):
        for ip in self.ipPool:
            try:
                self.Sock.sendto(self.packet, (ip, 0))
            except socket.timeout:
                break
            except:
                pass
        time.sleep(self.timeout)
class Nscan:
    def __init__(self, timeout=3):
        self.timeout = timeout
        self.__data = struct.pack('d', time.time())
        self.__id = os.getpid()
        if self.__id >= 65535: self.__id = 65534

    @property
    def __icmpSocket(self):
        Sock = socket.socket(socket.AF_INET, socket.SOCK_RAW, socket.getprotobyname("icmp"))
        return Sock

    def __inCksum(self, packet):
        if len(packet) & 1:
            packet = packet + ''
        words = array.array('h', packet)
        sum = 0
        for word in words:
            sum += (word & 0xffff)
        sum = (sum >> 16) + (sum & 0xffff)
        sum = sum + (sum >> 16)
        return (~sum) & 0xffff

    @property
    def __icmpPacket(self):
        header = struct.pack('bbHHh', 8, 0, 0, self.__id, 0)
        packet = header + self.__data
        chkSum = self.__inCksum(packet)
        header = struct.pack('bbHHh', 8, 0, chkSum, self.__id, 0)
        return header + self.__data

    def mPing(self, ipPool):
        Sock = self.__icmpSocket
        Sock.settimeout(self.timeout)
        packet = self.__icmpPacket
        recvFroms = set()
        sendThr = SendPingThr(ipPool, packet, Sock, self.timeout)
        sendThr.start()
        while True:
            try:
                ac_ip = Sock.recvfrom(1024)[1][0]
                if ac_ip not in recvFroms:
                    log.write("active", ac_ip, 0, None)
                    recvFroms.add(ac_ip)
            except Exception:
                pass
            finally:
                if not sendThr.isAlive():
                    break
        return recvFroms & ipPool
大概流程就是使用原始套接字进行数据包构造
然后实例化一个SendPingThr类进行多线程发包
然后通过set的一个集合来去重,如果收到响应包,说明存活,最后判断线程是否存活,不存货则退出死循环,最终返回我们的扫描结果集合
然后回到我们的start.py
self.masscan_ac[0] = 1
AC_PORT_LIST = self.masscan(
                    ip_list, masscan_path, masscan_rate)
                if not AC_PORT_LIST:
                    continue
                self.masscan_ac[0] = 0


    def masscan(self, ip, masscan_path, masscan_rate):
        try:
            if len(ip) == 0:
                return
            sys.path.append(sys.path[0] + "/plugin")
            m_scan = __import__("masscan")
            result = m_scan.run(ip, masscan_path, masscan_rate)
            return result
        except Exception, e:
            print e
            print 'No masscan plugin detected'
动态调用masscan,然后启动扫描,masscan放到最后看
然后把扫描结果加入到队列里
if not AC_PORT_LIST:
  continue
  self.masscan_ac[0] = 0
  for ip_str in AC_PORT_LIST.keys():
    self.queue.put(ip_str)  # 加入队列
  self.scan_start()  # 开始扫描
看一下scan_start函数
def scan_start(self):
  for i in range(self.thread):  # 开始扫描
    t = ThreadNum(self.queue)
    t.setDaemon(True)
    t.mode = self.mode
    t.config_ini = self.config_ini
    t.statistics = self.statistics
    t.start()
  self.queue.join()
###################################################
class ThreadNum(threading.Thread):
    def __init__(self, queue):
        threading.Thread.__init__(self)
        self.queue = queue

    def run(self):
        while True:
            try:
                task_host = self.queue.get(block=False)
            except:
                break
            try:
                if self.mode:
                    port_list = AC_PORT_LIST[task_host]
                else:
                    port_list = self.config_ini['Port_list'].split('|')[
                        1].split('n')
                _s = scan.scan(task_host, port_list)
                _s.config_ini = self.config_ini  # 提供配置信息
                _s.statistics = self.statistics  # 提供统计信息
                _s.run()
            except Exception, e:
                print e
            finally:
                self.queue.task_done()
大概流程就是实例化了一个ThreadNum类
里面从队列中调取IP地址,然后读取扫描的端口调用scan.scan类
这个类文件很多,我们简单说一下流程
- 使用原始套接字进行端口扫描,讲扫到的端口写入
Mongo,合并历史扫描数据 - 服务识别,使用
default和banner区分 - 如果识别的服务名为空,则尝试web访问
如果想调用masscan进行扫描的话
#coding:utf-8
#author:wolf
import os
def run(ip_list,path,rate):
    try:
        ip_file = open('target.log','w')
        ip_file.write("n".join(ip_list))
        ip_file.close()
        path = str(path).translate(None, ';|&`n')
        rate = str(rate).translate(None, ';|&`n')
        if not os.path.exists(path):return
        os.system("%s -p1-65535 -iL target.log -oL tmp.log --randomize-hosts --rate=%s"%(path,rate))
        result_file = open('tmp.log', 'r')
        result_json = result_file.readlines()
        result_file.close()
        del result_json[0]
        del result_json[-1]
        open_list = {}
        for res in result_json:
            try:
                ip = res.split()[3]
                port = res.split()[2]
                if ip in open_list:
                    open_list[ip].append(port)
                else:
                    open_list[ip] = [port]
            except:pass
        os.remove('target.log')
        os.remove('tmp.log')
        return open_list
    except:
        pass
很粗暴,通过读写文件存储中间结果,然后写入变量后删除临时文件
总结
大概流程就是这样吧,好多东西只有当自己亲手研究时候,才能发现其中的优点以及存在的问题
巡风我认为的问题
- 好多代码没有重用,就比如资产扫描和漏洞扫描里的get_code函数在两个模块写了两次
- 使用了urllib2,可以用request代替
- 心跳间距过长,可能导入配置后得最少30秒才能启动扫描
优点
- 使用两个模块的心跳检测来触发扫描,这样可以逻辑分离,并且可以通过前端修改配置来通过心跳检测来触发扫描
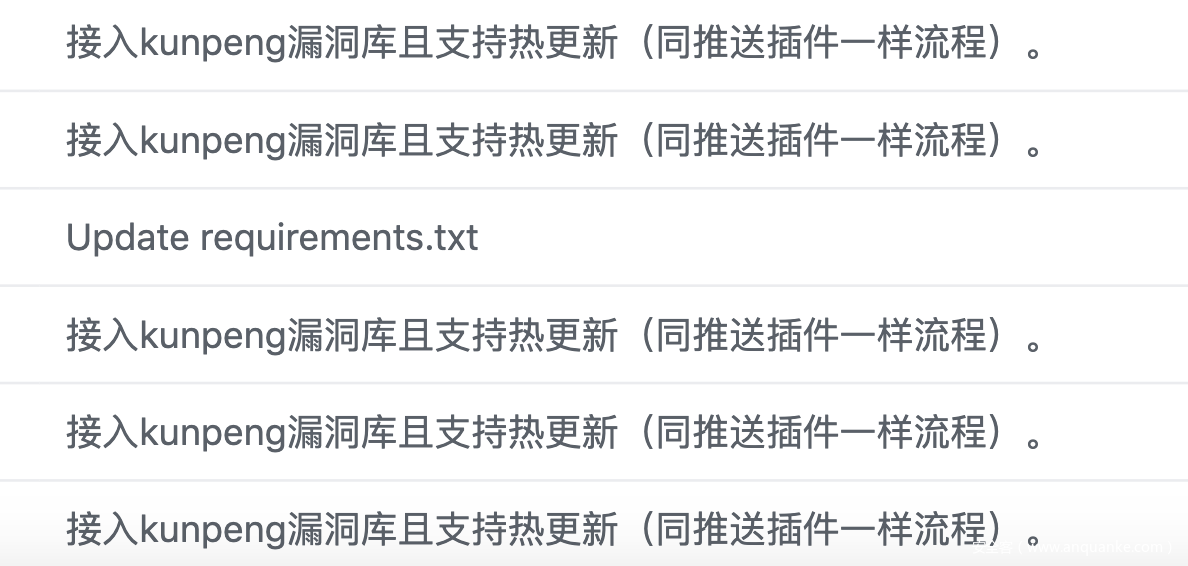
- 支持插件热更新,原理是通过心跳检测新版本然后下载,通过前端触发安装
- 模块分开编写,容易修改、重构
- 自定义payload方便,有固定的格式,并且可以通过心跳检测更新配置
- 支持调用masscan,把扫描目标写入target.log和tmp.log来临时保存,读取后删除文件


